@p51 posted:

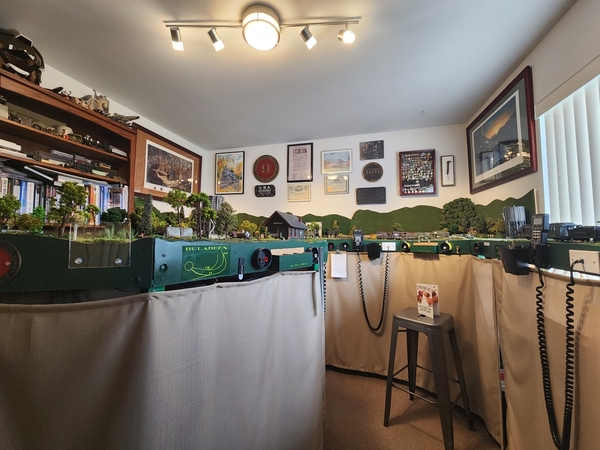
Sitting in my work chair and rotating around without getting out, this is what I see:

20230222_114127

GREAT LOOKING OFFICE!!!   Question:  Do you occasionally take a break from running trains to do a little work or Do you occasionally take a break from work to run a little trains?    No need to reply, I think I know the answer!!      I'm thankful that I'm retired as my answer might get me in trouble with work!

Cheers, Dave

Last edited by darlander

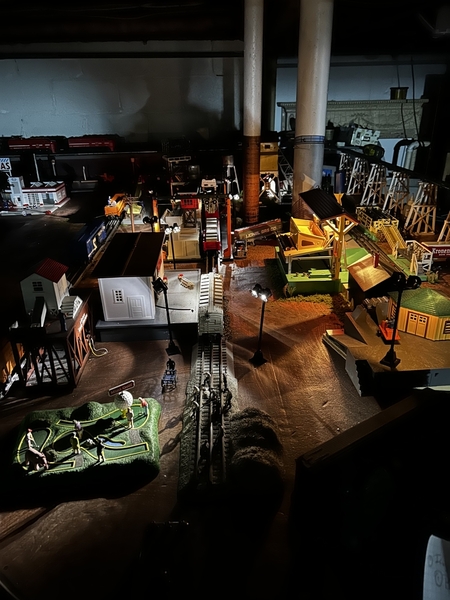
I have been working on putting in a yard and a industrial spur.  Took out old city scenery for a new yard and did a redo on the industrial yard. These photos are where I am at this moment, also I might add went from 3 rail to 2 rail. The yard will have ground throws instead of electrical switches. The industrial will still have electric switches but I may change that in the future to ground throws.  All my engines are RailPro with battery power. I am completely deadrail . Here are a few photos.  20230225_09083720230225_090913

Attachments

Images (3)
  • 20230225_090837: New Yard
  • 20230225_090913: Spur into New yard
  • 20230225_090941: Redo on industrial yard

Afternoon guys and gals, It has been a few days since my last log on and you all are just killing it with all your wonderful projects! I was going to comment on everyone's work like I normally to, but there has been so much done I would have to write a book! LOL

I am sorry as I have nothing new for you guy as I have been dealing with snow removal. I am tired of snow and ready for sun and warmth of the big gold ball in the sky!

I am sure some of you have already got some and those why haven't, don't worry it's on its way to visit you also! LOL I guess it is going to dump more tonight and into next week.

I might be able to sneak into the train room sometime, if so I will surly give you all an update!

I hope you all find time to have fun with your layouts and trains! Also please be safe out there!

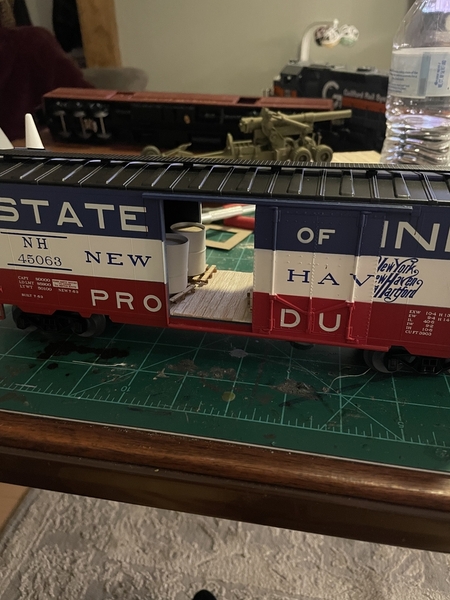
I hit the citrus model railroad show today in Hollywood, Florida and picked up a premier flatcar for 12 bucks and a couple of unique unbuilt 1/48 scale military models that will eventually become loads for the flatcar. However, one vendor had an unboxed, old ps2 3 volt MTH subway engine car that he wouldn’t sell for a reasonable price.  I tried haggling but to no avail. Oh well.

@DrSteveDC posted:

@mike g. easy with the snow removal and that knee!  It’s currently around 30 in NJ - no snow yet this season!


Icing station, fork lift, radar tower, barrel ramp and yard lights complete. Once I wire the ucs track for the barrel car and finish landscaping the industrial side is complete

Steve you sure have a wonderful layout with lots of things going on! I could be just like a little kid at your layout wanting to try everything! As for the snow and knee the hard part is going up and down the ladder as the wife won't let me on the roof anymore, I have to use a snow rake to get the snow off the roof!

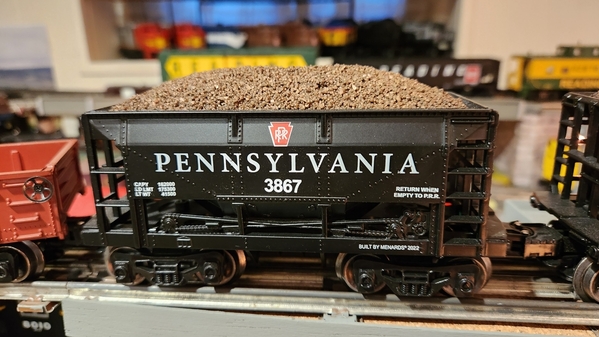
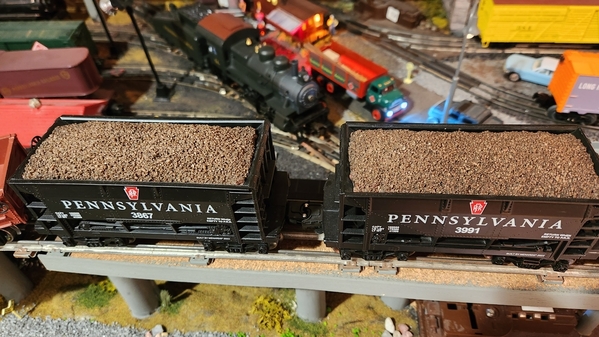
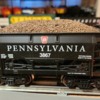
I finished the loads for the 2 Menards ore cars today. I did an acrylic wash of dark brown and black to knock down the shine of the gravel. I may still hit them with a spray of matte clear when the weather gets warmer.

For anyone with Menards ore cars, this simple project makes a huge difference in the appearance of the loads.

@Richizzle07....are you watching?????

Before.....

2023-02-20 16.48.47

After.....

I made each load look slightly different.

2023-02-25 12.01.222023-02-25 17.33.492023-02-25 17.33.552023-02-25 17.34.032023-02-25 17.34.15

cheap, simple, and fun!

Bob

Attachments

Images (6)
  • 2023-02-20 16.48.47
  • 2023-02-25 12.01.22
  • 2023-02-25 17.33.49
  • 2023-02-25 17.33.55
  • 2023-02-25 17.34.03
  • 2023-02-25 17.34.15

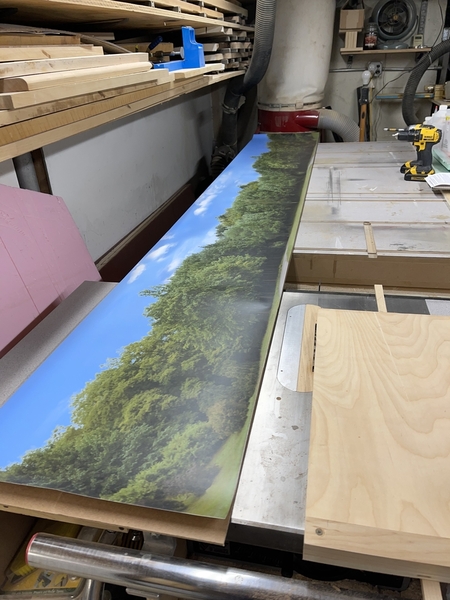
Because my benchwork is already built, and I’m late to the backdrop scene, I will attach the backdrop to the Masonite and then mount the whole set up to the wall. I’ll use paint friendly double stick tape to secure the Masonite to the wall. It’s got a pretty strong tack but doesn’t peel the paint off when removed (I already tested it). Knowing that I would mount the backdrop to the Masonite first, I bought one continuous 10’ piece from Railroadbackdrops.com

Andy

D3E13746-94D5-4A4A-872A-81F1BB05C21AE00A2C7B-5D14-4D57-B138-5EFDADF0C8D1

Attachments

Images (2)
  • D3E13746-94D5-4A4A-872A-81F1BB05C21A
  • E00A2C7B-5D14-4D57-B138-5EFDADF0C8D1
@chris a posted:

So, back to questions about  the Crossing Signal which was built up using the MTH Cantilever flashing crossing lights, along with an NJ International Brass Crossing gate - Don't want to write a book here....

It's an involved project.  I used a Tortoise switch machine along with a Tortoise accessory bracket that enabled me to mount the machine on it's side and create vertical up and down motion.   Don't have a part number for that bracket, I got a few of them with switch machines bought on eBay.  Anyway, I used the DZ 1070 Infra--Red Train Detector, and also had to add the DZ1008 Relay according to Dennis Zander, owner DZ products.   To make the Tortoise activate I used another DPDT relay to switch DC polarity,  + polarity drives it one direction, reverse the polarity and it switches the other direction.   

So kind of the labor man's description of what's going on in the not so pretty schematic below.  The DZ1070 and DZ1008 are powered by 12 VAC power, the output of the detector triggers the DZ1008 relay through the White Wire which is hooked to the input of the 1008 relay.  When the detector sees the train, the DZ1008 puts out a 12 VDC signal, as I am supplying 12 VDC to the Blue Wire (Relay Common on DZ1008),  which is used directly to power the LED lights on the MTH Signal, and also used to close the solenoid coil on the 2nd DPDT additional relay.  By energizing this second relay, that is what switches the polarity and lowers the gate.  This is accomplished by cross connecting the NO and NC contacts with 12 VDC and Ground, then the relay Common contacts receive normal or reverse polarity  (think of it as +12VDC, or -12VDC)

Once the train passes and a 5 second delay happens, the DZ1070 drops the signal which drops the 12 VDC signal going out, hence the lights stop blinking the gate returns to the up position.   

Yes I know the difference between DC Ground and AC common, on my layout they are tied together to make the 22 B&O signal heads all work correctly.  Hence the dual labeling on the schematic  GRND and COMMON.

DSC01198

Chris,

Thanks for the detailed information. I know that gate is a rare find. I'll keep my eyes open for one because I really like that configuration.

Dave

Dave,  if you're NOT planning on, or already, using one of the outside insulated common rails for block signal system, there is an easier way to wire up the mechanical brass crossing gate and the Crossing buck lights.   

Essentially if you can dedicate an insulated common rail section for the crossing signal operation, then the DZ1070 infra-red detector and the DZ1008 Relay can be taken out, and replaced with a simple  DPDT 12 VDC relay, maybe even  SPDT.  Just need the train wheels and axles to complete the common feed to the 12 VDC DPDT relay coil, and then use the relay common (wiper),  and NO contact to switch +12VDC to the rest of the circuit as drawn.   

I am working on a schematic to see if I can do this on my layout without impacting the signal system.  It's kind of a "block within an existing block" that will drive the crossing gate, but not alter the signal system operation.   I am sure it's possible, I just have to play with it and set up a test section of track to verify that it can be done.   I don't really care for having to use the DZ1070 and the DZ1008, they're pricey and they only work in one direction...   

@RSJB18 posted:

I finished the loads for the 2 Menards ore cars today. I did an acrylic wash of dark brown and black to knock down the shine of the gravel. I may still hit them with a spray of matte clear when the weather gets warmer.

For anyone with Menards ore cars, this simple project makes a huge difference in the appearance of the loads.

@Richizzle07....are you watching?????

Before.....

2023-02-20 16.48.47

After.....

I made each load look slightly different.

2023-02-25 12.01.222023-02-25 17.33.492023-02-25 17.33.552023-02-25 17.34.032023-02-25 17.34.15

cheap, simple, and fun!

Bob

Great job, Bob! This approach should also apply to the Lionel cars which appear to have identical ore loads and car bodies:

20230226_024042[1]

The only difference between the Menard's and Lionel versions appears to be the trucks. Your Menard's cars appear to have Timken roller-bearing trucks while the 12 Lionel cars I have have diecast Bettendorf friction bearing trucks with nylon inserts to accept the axle-end needle bearings. Who makes the gravel and where did you get it? 12 of these will be quite a project for me but it looks to be well worth the effort.

Attachments

Images (1)
  • 20230226_024042[1]
@DrSteveDC posted:

Barrel car wired. Culvert loader and unloader tuned up and working perfectly! Not bad for stuff that is over 70 years old - ****, I hope I am working as well when I’m 70, lol

Steve your unloader operation is one of the smoothest I’ve seen and I’m jealous. Can you expand on what you did for your tune up? I can’t get consistent lowering of the magnetic pickup to the culvert pipes.

@Rich Wiemann. I’ve had the culver loader and unloader in my collection for about 10 years.  I tuned it up when I got it so I don’t really recall.  I would suggest a tiny drop of oil at all pully axles on the lift mechanism especially the weight.  Make sure the weight isn’t snagging anywhere on the frame.  As with any vibrotor accessory, the string on the pully mechanism below the unit must be free from any oil.  It also helps to scuff up the track in the pully they the string wraps around.   Hope that helps!

@Bill Swatos posted:

Great job, Bob! This approach should also apply to the Lionel cars which appear to have identical ore loads and car bodies:


The only difference between the Menard's and Lionel versions appears to be the trucks. Your Menard's cars appear to have Timken roller-bearing trucks while the 12 Lionel cars I have have diecast Bettendorf friction bearing trucks with nylon inserts to accept the axle-end needle bearings. Who makes the gravel and where did you get it? 12 of these will be quite a project for me but it looks to be well worth the effort.

Bill- I used a floral gravel that I bought at Michael's Art and Crafts. They sell an assortment of colors and sizes that I've used all over the layout. A heavy coating of Tacky Glue worked well for the initial application, and wet-water and diluted white glue for the second.

I had to clean up the edges so that the loads would fit back in the cars. The paint wash covered any damage.

2020-11-01 19.18.022020-11-17 19.34.08

Bob

Attachments

Images (2)
  • 2020-11-01 19.18.02
  • 2020-11-17 19.34.08
@RSJB18 posted:

I finished the loads for the 2 Menards ore cars today. I did an acrylic wash of dark brown and black to knock down the shine of the gravel. I may still hit them with a spray of matte clear when the weather gets warmer.

For anyone with Menards ore cars, this simple project makes a huge difference in the appearance of the loads.


I made each load look slightly different.

2023-02-25 17.34.03

cheap, simple, and fun!

Bob

That’s a MAJOR improvement, Bob - nice job.

@trestleking- Look for a razor-edge blade for cutting homosote. Virtually eliminates dust.

BOSCH T313AW3 3-Piece 6 In. Knife Edge Special for Soft Materials T-Shank Jig Saw Blades - Jig Saw Blades - Amazon.com

Still no measurable snow on Long Island this year. Maybe a couple inches tomorrow night but that's about it.....Not that I'm complaining or anything.

@Apples55 - Thanks Paul. I have 2 new RMT cars on the way and a MTH LIRR car in line for the same job.

@M. Mitchell Marmel- I have no words.......

Bob

Attachments

Images (1)
  • blobid0
Last edited by RSJB18
@RSJB18 posted:

Bill- I used a floral gravel that I bought at Michael's Art and Crafts. They sell an assortment of colors and sizes that I've used all over the layout. A heavy coating of Tacky Glue worked well for the initial application, and wet-water and diluted white glue for the second.

I had to clean up the edges so that the loads would fit back in the cars. The paint wash covered any damage.

2020-11-01 19.18.022020-11-17 19.34.08

Bob

Thanks, Bob! Headed to Michael's and going for it!

@Apples55 posted:

Bob;

Is the MTH car one of Nassau Hobbies special runs??? I have two of them and would like to “upgrade” the load to look more like ballast.

Not sure Paul since I bought it second hand. The 2 RMT cars I ordered through TW are also LIRR. Walter says they should arrive soon. These will make a nice 5 car train along with the NLOE bobber caboose that should arrive soon too.....

"slip, slidin, away........."

2022-05-18 18.29.212022-05-18 18.29.30

@Bill Swatos- don't forget the Tacky glue.......

Bob

Attachments

Images (2)
  • 2022-05-18 18.29.21
  • 2022-05-18 18.29.30
@RSJB18 posted:

Not sure Paul since I bought it second hand. The 2 RMT cars I ordered through TW are also LIRR. Walter says they should arrive soon. These will make a nice 5 car train along with the NLOE bobber caboose that should arrive soon too.....

"slip, slidin, away........."


No… found a pic of mine - more hopper sized, but I’m still thinking about updating the load to look more like ballast.

79303F63-250C-47F8-A1BB-46644E2EF82C

P.S. I’m also looking forward to receiving my LIRR bobber!!!

Attachments

Images (1)
  • 79303F63-250C-47F8-A1BB-46644E2EF82C

Hello everyone! Great looking stuff!
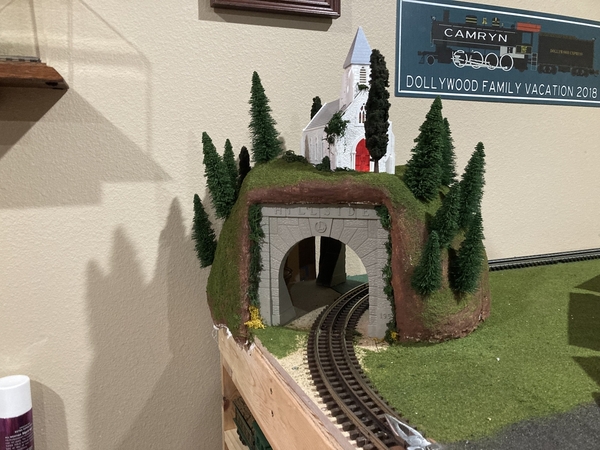
Today is my birthday and I decided to end the day with my family and trains. My parents got me some trees and I immediately used them on my church hill.
I began work on the hill by finishing the grass work. Next, I started planting trees. I found these trees on Amazon and I think I am going to get more.
Once I got a few trees placed I put the church back in its spot and filled in a few more spots. I wrapped things up by adding some “moss” on the church and around the tunnel portal. I am going to get some more woodland scenics trees and blend them with the trees I have placed.
Thanks for reading!
024FCE44-461C-444F-8E4F-084F3C42D9CF1036C723-4EAF-4E80-84A3-DFFD3EB71B6541016486-4461-4385-87D7-320E431DDF5A2E56B8C0-3A58-4E98-A628-9679444AE469

Attachments

Images (4)
  • 024FCE44-461C-444F-8E4F-084F3C42D9CF
  • 1036C723-4EAF-4E80-84A3-DFFD3EB71B65
  • 41016486-4461-4385-87D7-320E431DDF5A
  • 2E56B8C0-3A58-4E98-A628-9679444AE469
Last edited by Trainmaster04

Add Reply

Post

OGR Publishing, Inc., 1310 Eastside Centre Ct, Suite 6, Mountain Home, AR 72653
800-980-OGRR (6477)
www.ogaugerr.com

×
×
×
×
Link copied to your clipboard.
×
×