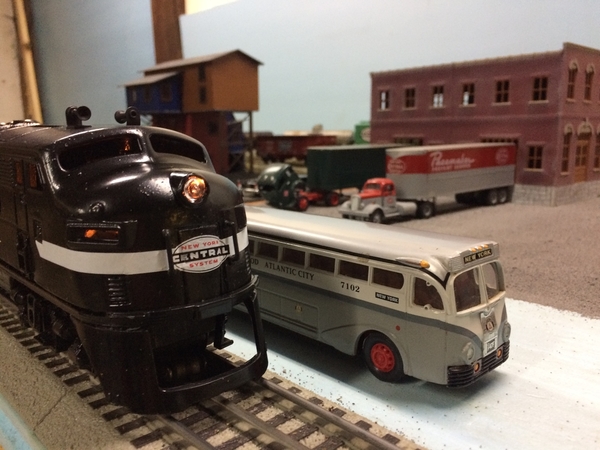
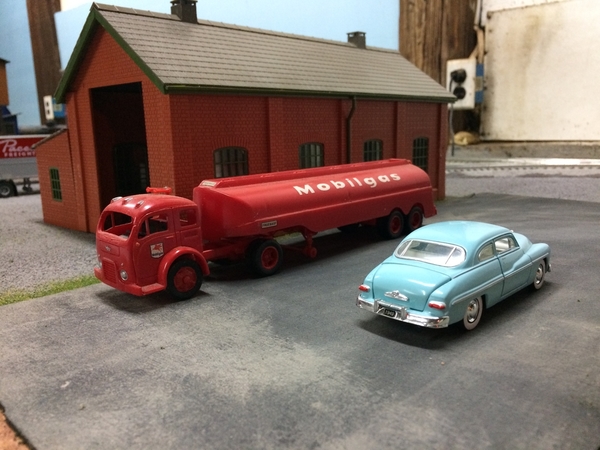
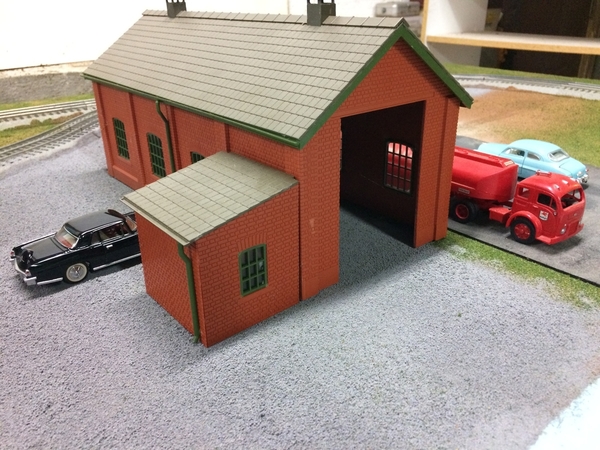
I successfully restored my model of a Tankar gas station, after taking one day off to sulk, and read this huge book on western ghost towns picked up at Indy O scale show. Two days of work after that and l managed to even duplicate the Inselbrick l had to strip off walls.  Didn't find duplicates of all signs, but substituted.  Read can before you spray!  Now l have a RightOnTrack Models grain elevatorkit in front of me, and am mulling over how to bash it, maybe with a higher tower?


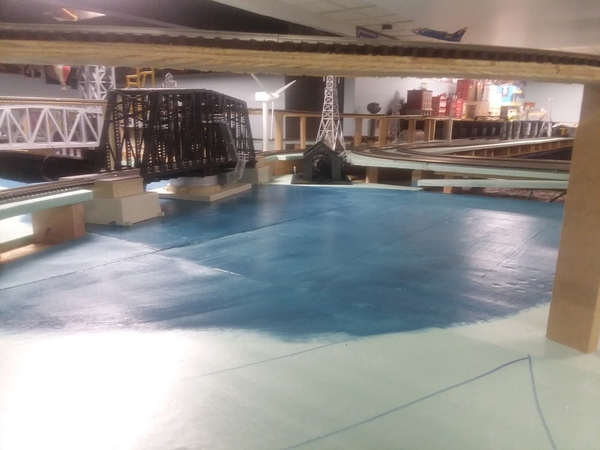
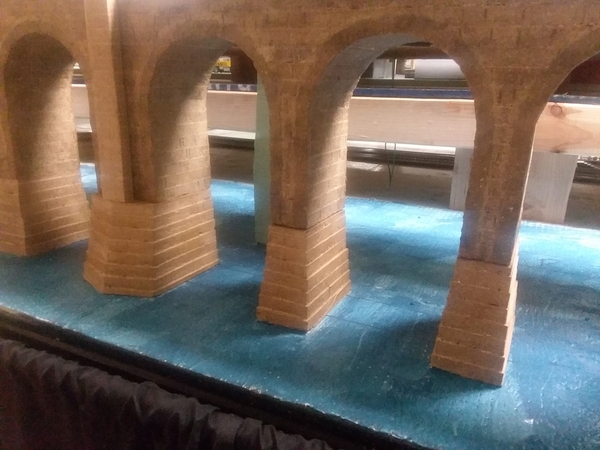
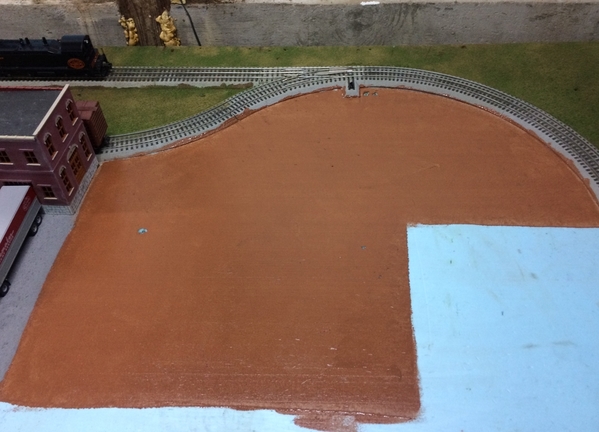
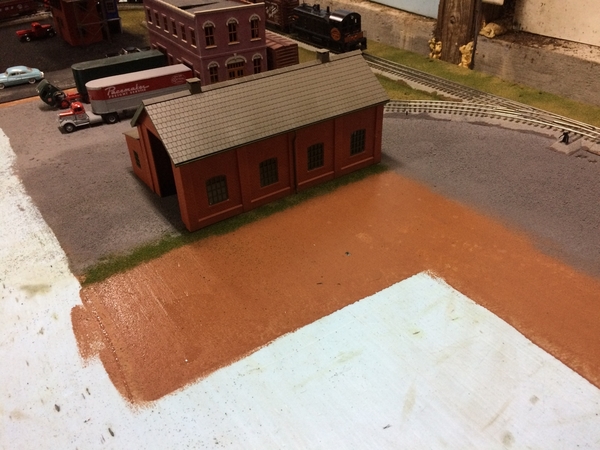
Since I'm hosting our train club in less than 2 weeks I really can't start any new big projects.  One item that has been bugging me is just seeing the green foam board where landscaping, water, and roads will eventually go.  So even though it will eventually be covered up it visually helps visitors see what I'm envisioning.  So I found some old paint and got the water areas painted tonight.  Over the next few days I'll do street and landscape areas.

20180927_19170120180927_19162820180927_191602

Attachments

Images (3)
  • 20180927_191701
  • 20180927_191628
  • 20180927_191602

LUVINDEMTRAINS, Be careful, Brian has every road name in the U.S., Probably the WORLD! LOL

NECRAILS, its never to start on scenery! I have seen people rip out stuff they have had for years and redo it!

Mark, if I were you I would just roll that nice blue cart into the new train room when ready! 

Bryan, looks good to me! No matter what the guys will love your layout! But if you wanted to have a little fun you could put a small boat in the water with Paul in it! LOL

Bryan,  I have found model railroaders are some of the most imaginative people.  They can see things before they are finished.  Tell your guests that there is water under the bridge, and they will see it.  Give them a fishing pole and watch what they pull from the water.

The layout is beautiful. Remember that deadlines are self-imposed. There is always the next open house.  It's not procrastination, it's creative reflection.

Sincerely, John Rowlen

mike g. posted:

LUVINDEMTRAINS, Be careful, Brian has every road name in the U.S., Probably the WORLD! LOL

NECRAILS, its never to start on scenery! I have seen people rip out stuff they have had for years and redo it!

Mark, if I were you I would just roll that nice blue cart into the new train room when ready! 

Bryan, looks good to me! No matter what the guys will love your layout! But if you wanted to have a little fun you could put a small boat in the water with Paul in it! LOL

Actually under water sleeping with the fishes lol

Bryan in Ohio posted:
mike g. posted:

LUVINDEMTRAINS, Be careful, Brian has every road name in the U.S., Probably the WORLD! LOL

NECRAILS, its never to start on scenery! I have seen people rip out stuff they have had for years and redo it!

Mark, if I were you I would just roll that nice blue cart into the new train room when ready! 

Bryan, looks good to me! No matter what the guys will love your layout! But if you wanted to have a little fun you could put a small boat in the water with Paul in it! LOL

Actually under water sleeping with the fishes lol

It must just be a blast when you 2 get together! What great friends! 

colorado hirailer posted:

I successfully restored my model of a Tankar gas station, after taking one day off to sulk, and read this huge book on western ghost towns picked up at Indy O scale show. Two days of work after that and l managed to even duplicate the Inselbrick l had to strip off walls.  Didn't find duplicates of all signs, but substituted.  Read can before you spray!  Now l have a RightOnTrack Models grain elevatorkit in front of me, and am mulling over how to bash it, maybe with a higher tower?


  I was speachless when I read that. No jokes or consoling words would have cut through the gloom. Glad to hear it panned out well after all. 

Test before you spray, don't just read. And let the test dry too. I've gotten gloss in cans marked flat and flat in cans marked gloss, and clear in a black can (or was it silver?) as well.   I.e., from Rusty, to Duplicolor, and Krylon, nobody's paint is immune to packaging mistakes....test it.

Mark,  My "mountain" is only 20" above the base level.  The  challenge was to  find enough footprint for the ROW to get that rise without a helix and to try to  hold a .87% grade.   Kinda funkie in spots  but there are no RR police in my place.

Overall photos are awhile off.  The RR is presently the Homasote & Cinderblock RR

Last edited by Tom Tee
necrails posted:

After finding multiple reasons to avoid trying this, after years of bare wood in some cases populated with track,, and after finding every other project known to model railroading known to humankind, I have begun adding scenic materials to the layout.  Not buildings but turf, brush, trees, etc.  Why I didn't do this sooner will remain a mystery.  The results while probably not as professional as some of the layouts we see in OGR are immediate and essentially make the layout something new for me.  Now I can't stop.

The nature of those that model railroad as a hobby is to derive pleasure from it.  Hit on one aspect that's particularly fun and it may look as if we're ignoring others on purpose.  That tiny fear of the unknown processes can make us appear stuck.  But as long as we're doing something related to the hobby, things as menial as cleaning up, we are making progress. Heck, being here online in this forum, you can learn so much it's time spent wisely.  Some day I hope to become proficient in signals and implementing them on the layout...then there's prototypical running adaptation, and on and on.  I gave up deadlines and goals for fun, therapy and reality escape.  It justifies for me the effort expended, even when the efforts are most challenging.  Congratulations on taking the important next step!  

Bruce

Mark Boyce posted:

Really great engine, Jack!

Thank you!

brwebster posted:

Nice, Jack.  Glad you finally got to run it.  Even the sound set seems acurate, if my tin ear fidelity when listening to Winston O Link recordings is any indication. I'd better forget about finding one at the train show tomorrow, which is very unlikely and couldn't afford it if there was.

Bruce 

I normally couldn’t afford something like this as well but got lucky and bought it for dealership cost. Good things come to those who wait! I’m sure you’ll get lucky in due time :-)


Last edited by Jack118711
mike g. posted:

LUVINDEMTRAINS, Be careful, Brian has every road name in the U.S., Probably the WORLD! LOL

NECRAILS, its never to start on scenery! I have seen people rip out stuff they have had for years and redo it!

Mark, if I were you I would just roll that nice blue cart into the new train room when ready! 

Bryan, looks good to me! No matter what the guys will love your layout! But if you wanted to have a little fun you could put a small boat in the water with Paul in it! LOL

Mike,

I thought about that as soon as I submitted the response. I said, uh oh! It's all good Brian but tame the beast.

Dave

Yesterday I decided to some cleaning / organizing under the layout.  A few months back I took some engines for service to Mr. Muffins.  I was looking for the engine boxes and of course found every one but the ones I was looking for (thanks Murphy's law).  I decided to relocate the engine boxes from under the layout to the attic of the house.  With a little help, I moved over 30 MTH, Atlas and Lionel engine boxes from the basement to the attic.  I then celebrated that by running trains for over an hour last night with 7 trains running and me walking from room to room with my iPad using the MTH WiFi. THAT was a lot of fun.

I got two more terminal blocks powered from the transformer. I thought when I did that I would get enough power and continuity to run an engine over the bridge onto the island portion of the layout. It doesn't look as if that is going to work. So I plan to come up and over the opening over the bridge with wires. Going to use PVC pipe to enclose them. And since I am going to have to do this I might as well run extra wire to the island for possibly accessories and DC. This is my weekend project...................Paul

jbmccormick posted:

Yesterday I decided to some cleaning / organizing under the layout.  A few months back I took some engines for service to Mr. Muffins.  I was looking for the engine boxes and of course found every one but the ones I was looking for (thanks Murphy's law).  I decided to relocate the engine boxes from under the layout to the attic of the house.  With a little help, I moved over 30 MTH, Atlas and Lionel engine boxes from the basement to the attic.  I then celebrated that by running trains for over an hour last night with 7 trains running and me walking from room to room with my iPad using the MTH WiFi. THAT was a lot of fun.

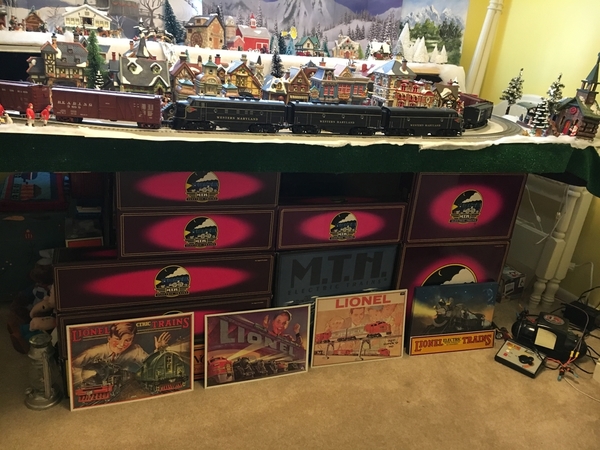
Here is what I did with my engine boxes so I could find them if I need to ship one out.  Of course you can see I don't have anywhere near 30.  They make a nice little view block of boxes for ceramic buildings as well.

2018-09-29 11.35.43

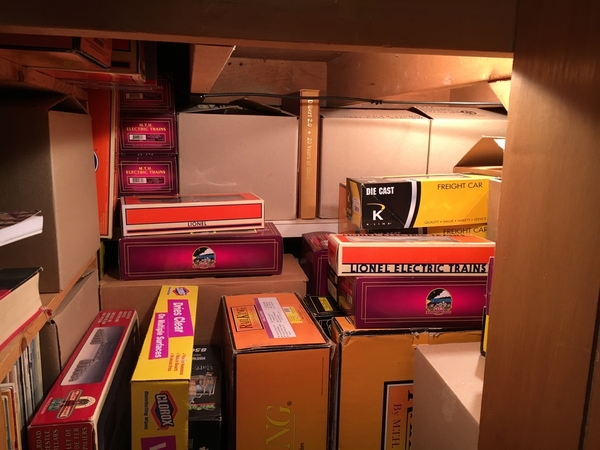
Here are all the rolling stock boxes in the closet  under the basement stairs.  They will go under the new layout once construction allows.  At 62, I'm tired of crawling in here.  

2018-09-28 09.39.292018-09-28 09.39.41


Attachments

Images (3)
  • 2018-09-29 11.35.43
  • 2018-09-28 09.39.29
  • 2018-09-28 09.39.41

Mike, the layout shown with the boxes is the Christmas layout, which I hope to redesign this year. The Christmas trains Polar Express, North Pole Central, and Hallmark Toymaker are stored behind the MTH boxes.  I can run 2 engines on the Ceiling Central Railroad, and the rest on the new to be built layout.  Yes we were discussing engine storage on my layout plan-build topic back in the spring.  I think we are good, except for the Premier F7 and F3 ABA units.  MTH has them tethered together which I find difficult to setup.  I do plan to upgrade the PS1 set to PS3 with separate boards in both powered A units, so then the tethers will go away.  That is the MTH recommended method.  The plan doesn't show engine storage tracks I hope to put in when building.  I do have trouble holding onto some of them, and plan to have engines not in use on the layout somewhere.  The tracks may end up in the hidden lower level in the upper left.  It looks like I wouldn't have good access, but actually I will with the planned roll-out section.  The other place could be in the lower right.  The yard in the middle is intended for switching cars on and off the layout.  I hope to start cleaning out the space in the family room after all my and my dad's leaves are cleaned up, then start real construction right after Christmas.  I have to be realistic, as I would like to start sooner.  

Mark 2018-06-07

Attachments

Images (1)
  • Mark 2018-06-07

Mark, at least you have them neatly under the tables. Mine are all over the place with no organization. I was going to go to Menards to get my PVC but I found a gift card for Lowes I had forgot I bought sometime back. So I got all my pipe, fittings and hardware to do the project. I was going to use 1/2 inch pipe but then decided to go with the 3/4 inch figuring it would be easier to get the wires thropugh the elbows. After I make Chili I'll start working on it. Pic .....Paul

DSCN2368

Attachments

Images (1)
  • DSCN2368

Thank you, Paul!  I’m a bit OCD.  I had to mellow to survive since my wife and older daughter just drop stuff anywhere.  Who said men are all messy and women are neat?  LOL

Yes, always use larger inside diameter conduit than you think you need.  I don’t know how long a run you have, but if it is any length at all leave a pull string in the conduit and tie it off at both ends.  If you need more wires later you will be glad you did.  In that note, we always pull spares whether it is copper or fiber optics.  You may want to do that too.  

Chili!!!!!  That would have me spending the afternoon in the bathroom instead of the train room!!!!  LOL

Keeping busy,  finally got the relay panel built for the 5 signal heads on the signal bridge and installed individual plugs for each head.    As the layout plan has changed due to the planned expansion, I re-did the main line under the bridge,  haven't bent any gargraves track in a while, forgot how well it makes easements, (transition curve).   Will probably go back and do a little more weathering on the signal bridge, but for now I need to run the DC power for the relays, and the signal wires for the insulated blocks.  DSC03076DSC03077DSC03078DSC03079DSC03081

Attachments

Images (5)
  • DSC03076
  • DSC03077
  • DSC03078
  • DSC03079
  • DSC03081

Mark,   Thanks.   Got more complicated than I thought, like most projects.   Since I purchased the do it yourself 3 light LED signal heads, I ended up needing two relays for each head, the first one to detect track presence, then the 2nd one with built in timer delay to control the Yellow to Red change...    In spite of all my "testing the LED's" as I was building this thing, I must have damaged one of the green LED's, not sure when, but what a pain in the ____ to get it off the mast, opened up and replaced.....  Anyway, glad it's done.   

Really want to start laying more track.   My last to do was re-configure the main line on the upper level, had to remove a return loop switch under the signal bridge and bend the mainline

On to Promontory ! 

paul 2 posted:

Mark, at least you have them neatly under the tables. Mine are all over the place with no organization. I was going to go to Menards to get my PVC but I found a gift card for Lowes I had forgot I bought sometime back. So I got all my pipe, fittings and hardware to do the project. I was going to use 1/2 inch pipe but then decided to go with the 3/4 inch figuring it would be easier to get the wires thropugh the elbows. After I make Chili I'll start working on it. Pic .....Paul

DSCN2368

Hey Paul- one of these will bend the pipe quite well, it's a PVC bending blanket ...Image result for Greenlee pvc blanket

I have one and I like Chili......should be out to Ohio by morning

Bob

chris a posted:

Mark,   Thanks.   Got more complicated than I thought, like most projects.   Since I purchased the do it yourself 3 light LED signal heads, I ended up needing two relays for each head, the first one to detect track presence, then the 2nd one with built in timer delay to control the Yellow to Red change...    In spite of all my "testing the LED's" as I was building this thing, I must have damaged one of the green LED's, not sure when, but what a pain in the ____ to get it off the mast, opened up and replaced.....  Anyway, glad it's done.   

Really want to start laying more track.   My last to do was re-configure the main line on the upper level, had to remove a return loop switch under the signal bridge and bend the mainline

On to Promontory ! 

Nice panel Chris. Who made the relay boards?

Bob

Bob,    I bought them both on ebay, here is a link to the ones with the 1 to 10 sec. timers... 

https://www.ebay.com/itm/US-SH...p2057872.m2749.l2649

If I were to do this again, I think I would use the old school type ice cube relays 12 VDC for the first bank of relays (without timer delay)....    The SPDT relay modules I bought 2 years ago are like the link below also available on ebay...   

https://www.ebay.com/itm/1-Cha...;hash=item3d5b46e298


Paul, looks like you have a good amount of work ahead! Just for thought, if you ite a cotton ball to a string and use your wife's vacuum you can suck it right threw the pipe!

Chris, things are looking nice, One question why not use a group of relays? I have a few that are 5 per board!

Lee, you are moving fast! But it sure looks good!

paul 2 posted:

Mike, you are always welcome here. My plan for the PVC is to do a section at a time. Feed the wires through the first section then feed the wires through the second section and glue them together and then so on till I have it alll the way through to under the island table............Paul

Paul, that will work, but be careful, if you get to much glue it can melt the wire covering!

John,   There may be other recommendations, but I mentioned buying this one off of Amazon made by "Point Zero"..... It's only gone up $6.00 since I bought mine a year ago.   

https://www.amazon.com/gp/prod...00?ie=UTF8&psc=1

Paul,  I would work for the Chili, looks pretty darn good.   I just came up from the basement, and realized it was getting late for "dinner" !!

Mike,  The 5 pack on one board should work fine,  I had purchased individuals some time back, long before I realized I was going to embark on this 5 signal bridge.   

Cancel my remark above, about using the ice cube relays for the first bank of relays, the one's I used are fine.  For some reason on the test bench the intensity of the Green LED's was changing and getting brighter when I activated any one of the blocks... Now that it's on the layout, that problem is completely gone.

I think my $5.00  HO  -  DC transformer that I picked up at a train show for doing bench work projects has voltage control issues.    I have a real nice Post War Lionel (HO)   DC Transformer on the layout that is powering all my signals, relays and LED building lights through some local inexpensive regulated power supply circuit boards to vary the building lights.   It works great, and there is no change in the light intensity on my new signal bridge.   Need to throw that $5.00 thing away and get another one that I know works.  

Chris,  Thank you for the recommendation of the Point Zero Air Brush.  I ordered it with some cleaner and cleaning brushes.  My air brush from college was ruined when I failed to clean it promptly after use.

My paints for re-numbering some Atlas O Union Pacific Hoppers are also on the way.  I have decals for the re-numbering of 20 of the 22 Trainman 70-Ton Open Hoppers.

My shipments from Atheron Scenics of flexible and rigid PRR Walls and Fillers arrived this week.  My winter projects are shaping up for a busy time.

Today I repaired some of my damaged concrete drive, hoping to postpone the inevitable new driveway.  It has worked in the past, but I was younger then.  Several of the bags from Home Depot had solidified concrete corners, already rock hard.  Tomorrow I will return the unusable cement and ask for a refund.  Contractors return cement all the time.  I got three bags that got wet before they were returned to stock.

Sincerely, John Rowlen

John Rowlen,  Ironic you should mention that experience.  I was thinking after responding,  to suggest that you plan to clean it thoroughly after each use.   The acrylic paints are great for keeping noxious fumes from building up, but they do leave residue inside the airbrush.  I bought one of those nice glass cleaning jars with a bracket that acts as a holder, but when I am done using it, I always pull the needle, and the nozzle end and soak everything in Simple Green for 30 minutes, then rinse it and let it dry while apart.   Got myself in trouble one time when  I just flushed the airbrush cleaner through through the cup, and thought it would be ok till the next day then when I picked it up it definitely wasn't spraying as well as before....  Took it apart cleaned and it was back to normal...  After that I just decided it was worth taking the 5 minutes to take out the major parts, soak, them and then I don't have any issues to deal with. 

chris a posted:

Bob,    I bought them both on ebay, here is a link to the ones with the 1 to 10 sec. timers... 

https://www.ebay.com/itm/US-SH...p2057872.m2749.l2649

If I were to do this again, I think I would use the old school type ice cube relays 12 VDC for the first bank of relays (without timer delay)....    The SPDT relay modules I bought 2 years ago are like the link below also available on ebay...   

https://www.ebay.com/itm/1-Cha...;hash=item3d5b46e298


Thanks Chris.

I used a AC relay for my grade crossing signals. I have some dwarf signals that I built and I'm looking for a better way to control them.


2018-05-06 08.34.49

Attachments

Images (2)
  • 2018-05-06 08.34.49
  • 2017-04-21 20.06.46
Last edited by RSJB18
Mark Boyce posted:
jbmccormick posted:

Yesterday I decided to some cleaning / organizing under the layout.  A few months back I took some engines for service to Mr. Muffins.  I was looking for the engine boxes and of course found every one but the ones I was looking for (thanks Murphy's law).  I decided to relocate the engine boxes from under the layout to the attic of the house.  With a little help, I moved over 30 MTH, Atlas and Lionel engine boxes from the basement to the attic.  I then celebrated that by running trains for over an hour last night with 7 trains running and me walking from room to room with my iPad using the MTH WiFi. THAT was a lot of fun.

Here is what I did with my engine boxes so I could find them if I need to ship one out.  Of course you can see I don't have anywhere near 30.  They make a nice little view block of boxes for ceramic buildings as well.

2018-09-29 11.35.43

Here are all the rolling stock boxes in the closet  under the basement stairs.  They will go under the new layout once construction allows.  At 62, I'm tired of crawling in here.  

2018-09-28 09.39.292018-09-28 09.39.41


Mark,

That is one reason they were moved to the attic.  Getting under the layout isn't the easiest.  I still have another 10-15 to find but thats for another day.

Mark Boyce posted:

JBMcCormick, I know what you mean about under the layout.  I am planning on using a roll out dolly.  I’m thinking of putting casters on plywood platforms that I can roll out.

I used furniture dollies from the big box store.  Less expensive than buying castors of the same quality.

IMG_1292IMG_1293

Attachments

Images (2)
  • IMG_1292
  • IMG_1293
mike g. posted:

Paul, looks like you have a good amount of work ahead! Just for thought, if you ite a cotton ball to a string and use your wife's vacuum you can suck it right threw the pipe!

Chris, things are looking nice, One question why not use a group of relays? I have a few that are 5 per board!

Lee, you are moving fast! But it sure looks good!

Mike thanks! 

It seems like years trying to get this layout going. Thanks to you guys for the inspiration I’ve got a lot more done than I thought I could. 

lee drennen posted:
mike g. posted:

Paul, looks like you have a good amount of work ahead! Just for thought, if you ite a cotton ball to a string and use your wife's vacuum you can suck it right threw the pipe!

Chris, things are looking nice, One question why not use a group of relays? I have a few that are 5 per board!

Lee, you are moving fast! But it sure looks good!

Mike thanks! 

It seems like years trying to get this layout going. Thanks to you guys for the inspiration I’ve got a lot more done than I thought I could. 

Lee, your more then welcome, I also get a great amount of inspiration from this forum! I like to give credit where it is rated! 

Mark Boyce posted:

Matt, Yes that is just it.  Also, besides the cost savings, those make half the work already done for you!  I suppose the person who wants display shelves under the layout could put them on the front and still put a handle on the top front.

There are many options for any layout.  I may paint the fronts black like a tunnel with a white headlight on one & a red taillight on the other. For me I just roll them out when I want to work under the layout. I made a creeper from one of the dollies & it rolls very smoothly. Mine are 3’ x 6’ & required 2 dollies each. I still wish I made the layout 4’ High instead of 3’.  

My project is going to extend into the beginning of the week. I was goping to use speaker wire for onme of my wires but when I ran to Home Depot to get double faced taped I stopped in the Electrical department and they had 14 gauge stranded wire in blue so I picked some up. When I got back home I started to line up everything to start working. But it took a number of tries to fish the wire up behind the backdrop. I may of made it easy on myself by doing just a couple of wires at a time but I was greedy and did all 5 at once which is why it took so long but I got them pulled through and enough to go ll the way to the island table. But in the morning I'll have to run to Lowes to get a flat blade bit so I can drill holes through the cross braces for the wires. With a little bit of luck I think I can finish this off tomorrow. Pics....................Paul

DSCN2371DSCN2373DSCN2372

Attachments

Images (3)
  • DSCN2371
  • DSCN2373
  • DSCN2372

One of the guys who helped me with the electrical stuff on my layout borrowed all my scenery adhesive from micro mark a while back. That means I can't really do any scenery improvements at all, until I get some more.

I'm not complaining, accusing him of anything, or thinking he's a freeloader. When he helped me on the initial assembly of the bench work on my layout, he donated quite a bit of modeling supplies to that effort. 

There is a all day op session event for local charity, run by the local Club. Two groups of attendees are going to come to my house in 2 weeks, and run trains. For the last couple of days, I've been cleaning track. I was hoping to have had a op session before now, to test out some new Switch lists I had worked up, in anticipation of that. But, summer being what it was in this part of the country, nobody wanted to run trains. Maybe I can get a guy or two out to the house this week after work, to run one train through to see whether it works.
So, I don't have much to report on, no real photos to speak of.

Started to install seated figures in a RailKing, Amtrak Passenger Coach Car.

Amtrak Figures

Going to let the glue dry over night. (Cyanoacrylate with gap filler). Tomorrow is the start of deer hunting season in Michigan. Archery Season only, no fire arms. This will slow down this process, will be out of the man cave for part of the day.

Gary

Attachments

Images (1)
  • Amtrak Figures
mike g. posted:

Hey Matt, any way you could show a picture of your creeper you built?

Yes. 

817D22FB-DF06-467F-8784-AE9AF63C451DThe one at the bottom is the  movers dolly with an ancient creeper  with old wheels removed mounted on it.  The other two storage racks had pillows on them as a joke for a friend, if he needed a place to stay.   

Attachments

Images (1)
  • 817D22FB-DF06-467F-8784-AE9AF63C451D
p51 posted:

One of the guys who helped me with the electrical stuff on my layout borrowed all my scenery adhesive from micro mark a while back. That means I can't really do any scenery improvements at all, until I get some more.

I'm not complaining, accusing him of anything, or thinking he's a freeloader. When he helped me on the initial assembly of the bench work on my layout, he donated quite a bit of modeling supplies to that effort. 

There is a all day op session event for local charity, run by the local Club. Two groups of attendees are going to come to my house in 2 weeks, and run trains. For the last couple of days, I've been cleaning track. I was hoping to have had a op session before now, to test out some new Switch lists I had worked up, in anticipation of that. But, summer being what it was in this part of the country, nobody wanted to run trains. Maybe I can get a guy or two out to the house this week after work, to run one train through to see whether it works.
So, I don't have much to report on, no real photos to speak of.

Lee, If I lived closer I would be over all the time! But then again I guess its lucky for you I am not that close to you! LOL

paul 2 posted:

My project is going to extend into the beginning of the week. I was goping to use speaker wire for onme of my wires but when I ran to Home Depot to get double faced taped I stopped in the Electrical department and they had 14 gauge stranded wire in blue so I picked some up. When I got back home I started to line up everything to start working. But it took a number of tries to fish the wire up behind the backdrop. I may of made it easy on myself by doing just a couple of wires at a time but I was greedy and did all 5 at once which is why it took so long but I got them pulled through and enough to go ll the way to the island table. But in the morning I'll have to run to Lowes to get a flat blade bit so I can drill holes through the cross braces for the wires. With a little bit of luck I think I can finish this off tomorrow. Pics....................Paul


It's probably not helping that you are having the shakes going through York badge withdrawal.  Don't worry buddy as long as you are nice tomorrow night at Al's I will return your badge to you.  

Elliot, sometimes it is good to take a breather. Gives you a chance to look over what you did so far to make sure you don't want to make any small changes before you get it all done.  Bryan, thank you for taking care of my badge for me. So kind of you. I will be taking nice pills for tomorrow evening to be nice to you. Also Shirley is making me a nice script to read nice things from to say to you in case the pills don't kick in on time. Got to head to Lowe's to get some bits so I can finish the wiring project...,....Paul

Back from Lowes this morning. I decided to splurge and go one step better then just flat blade bits. I bought this three pack of three different sizes which were the sizes I needed anyways. And while there I pick up a pack of cutting blades for doing gar graves and sandpaper which I was nursing my last sheet that had holers in it. So this afternoon so far I have gotten the wire and PVC pipe all the way to the furnace. Now I just have to make up a pipe coming down and a pipe to go through the back of the table. From there the wires will go to block terminals on the front making it ready to at least start wiring power and ground to all the different areas of the island. Pics............Paul

DSCN2374DSCN2376DSCN2377DSCN2378DSCN2379

Attachments

Images (5)
  • DSCN2374
  • DSCN2376
  • DSCN2377
  • DSCN2378
  • DSCN2379
trainroomgary posted:

Started to install seated figures in a RailKing, Amtrak Passenger Coach Car.

Amtrak Figures

Going to let the glue dry over night. (Cyanoacrylate with gap filler). Tomorrow is the start of deer hunting season in Michigan. Archery Season only, no fire arms. This will slow down this process, will be out of the man cave for part of the day.

Gary

Gary, looking good!  You may want to consider one or two standing people if they'll fit. Also, remember, the pointy end of the arrow points away from you....

Ed, Thinks for thinking of me! I am sure there will be others to chime in. But it its your layout so make it as you like it! LOL

Look at you go Paul, your just like me, I use any project to buy new tools! It's like Christmas when I start a new project! The wife doesn't like it when I am buying, but she sure loves the end results!

The wire job is looking very nice! Next thing you know you will be running trains across the bridge in no time!

Add Reply

Post

OGR Publishing, Inc., 1310 Eastside Centre Ct, Suite 6, Mountain Home, AR 72653
800-980-OGRR (6477)
www.ogaugerr.com

×
×
×
×
Link copied to your clipboard.
×
×