Bill Webb posted:

Elliott it looks like only one choice to me with the quality of your layout. Gotta fix it or you will never be satisfied.

Bill, that may be where I end up with this. I still have to check the Atlas 89' flat, a 21" passenger car,  and the 86' boxcars but I think they're all good. It's just those dang ladders on the auto racks that I have found, that are hitting. The Challenger will have a problem too, but it won't be taking that route and will use the small helix and small hidden yard, which it clears.

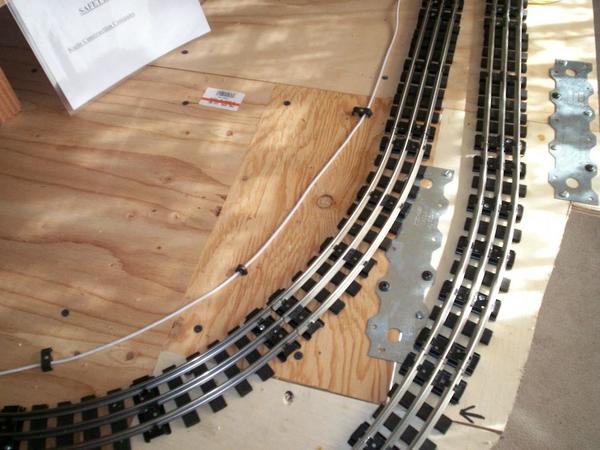
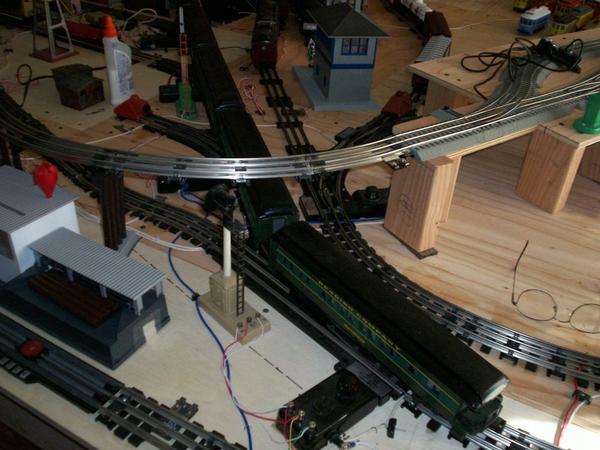
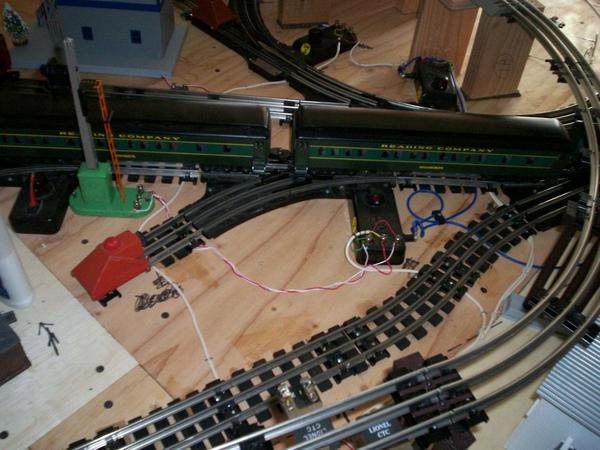
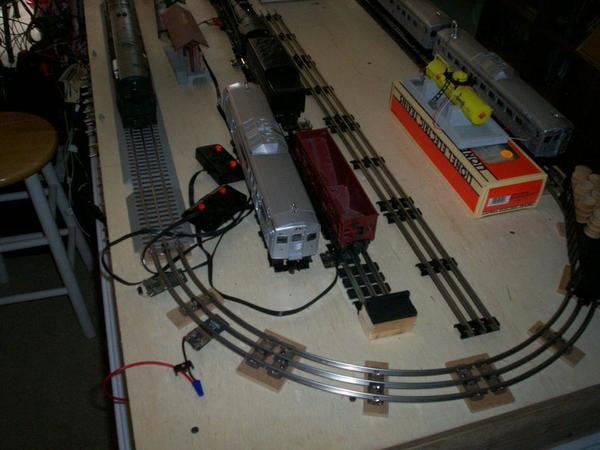
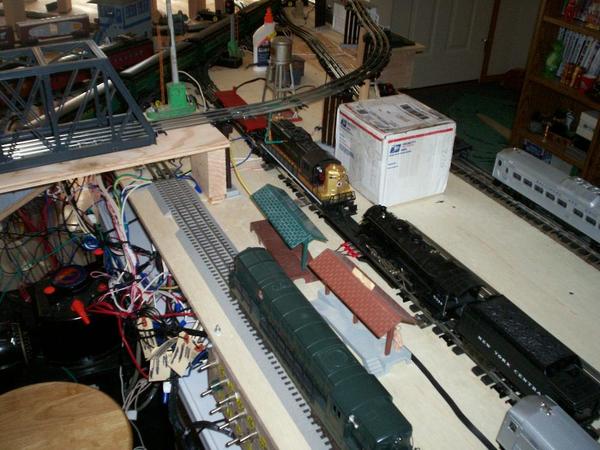
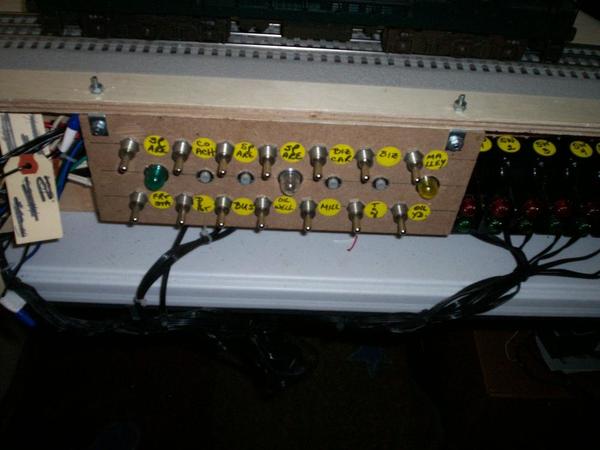
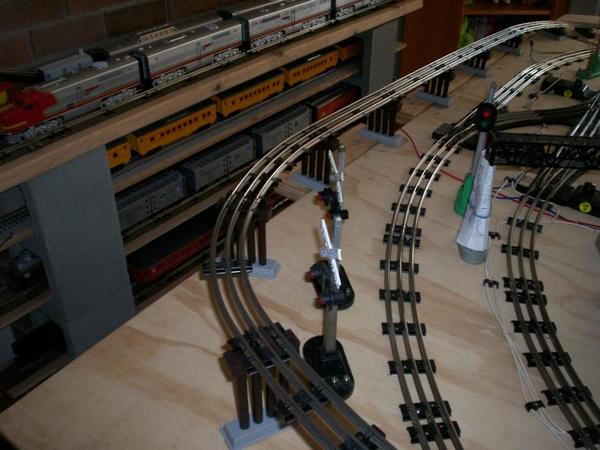
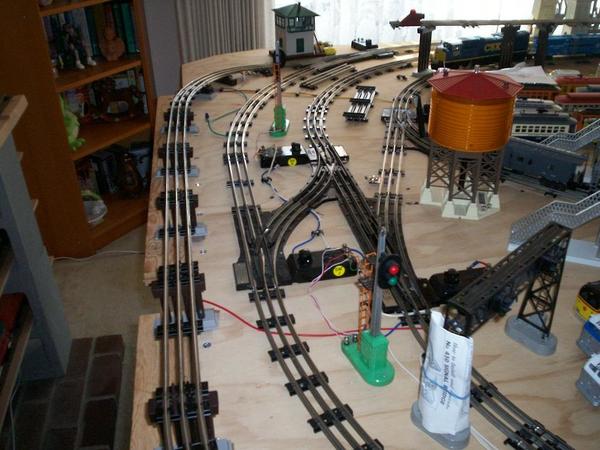
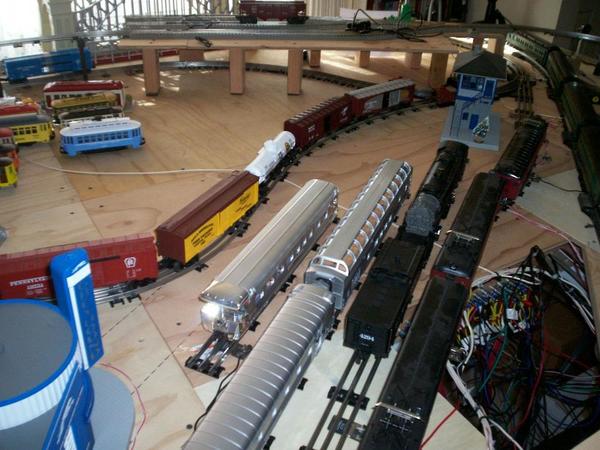
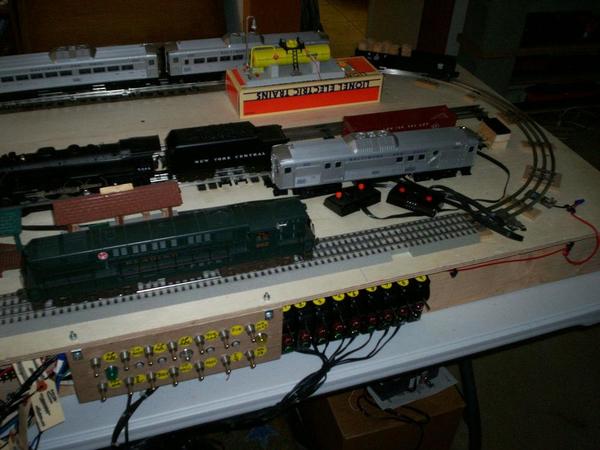
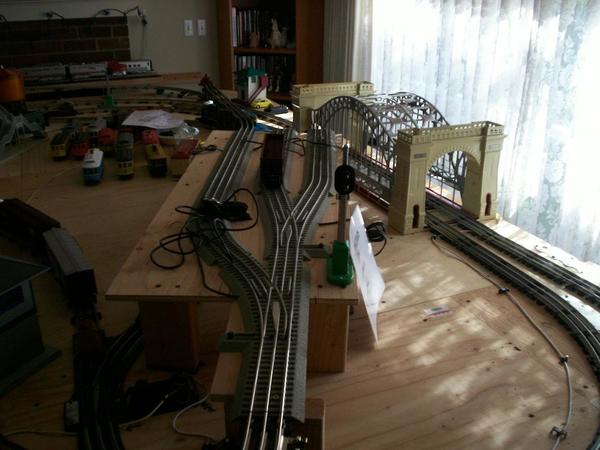
There is one more critical test that I haven't been able to perform as of yet, and it may be a while before I can, and that is will those cars go through the big hidden yard? There is one spot in particular, and that is the big hairpin turn seen here, in this very old photo.

2014-08-29 001 2003-12-12 007

The curve diameters are 092, 084, 076, 068 and 060.  There was no choice in this design and it cannot be changed. It is what it is. The curves at the far end should be fine, because the tightest is 072 and they go up to 0104.

Attachments

Images (1)
  • 2014-08-29 001 2003-12-12 007
Last edited by Big_Boy_4005
mike g. posted:

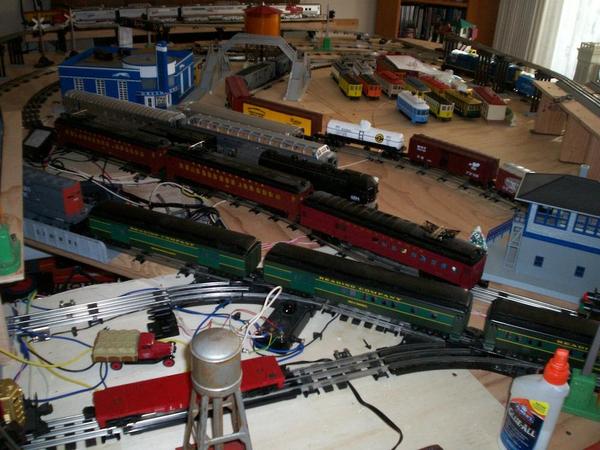
WOW Elliot, now that I see all the rolling stock you have. Now I knw why you have suck a big layout. I think it all looks great! Quick question. do you have any Atlas Pratt Bridges on your layout?

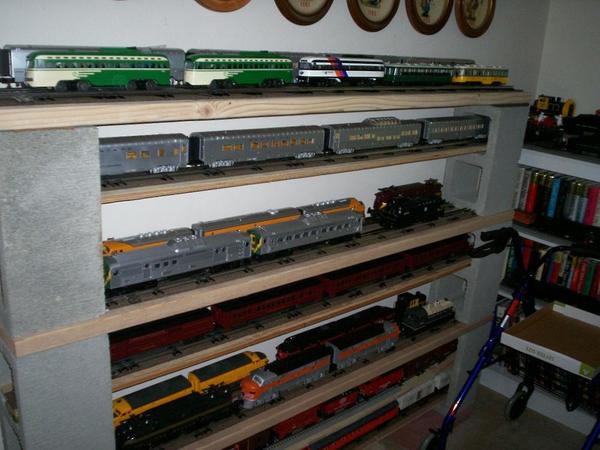
Oh Mike, what you are seeing there is just the tip of the iceberg. There are way more cars still in boxes.

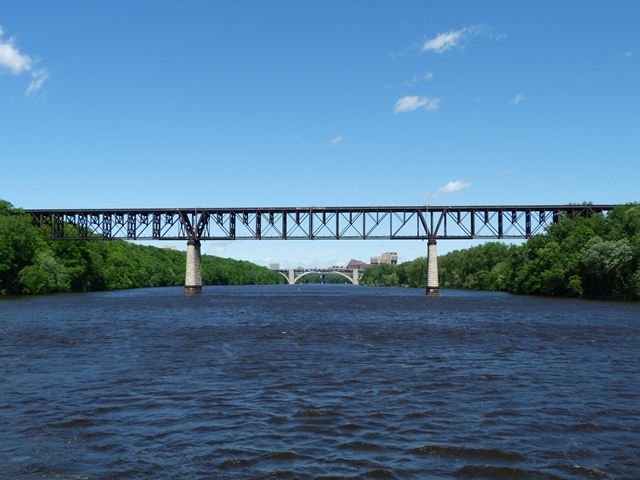
There will only be 3 train bridges on the entire layout. Two will be lift bridges, and the third will be a multi-span box truss, which I have to do on a curve even though the real one is straight.

This is the CP (ex Milw) lift bridge over the Mississippi at Hastings MN.

261_0915

The BNSF (ex CB&Q) lift bridge over the mouth of the St Croix River at Prescott WI.

TRAINS_1275

This is the Milwaukee Road Short Line Bridge over the Mississippi in Minneapolis.

Short Line Bridge

I might be able to use a Lionel lift bridge at Prescott, but I need to know if the MTH double stacks will go through before I invest. The other two will be scratch built.

Attachments

Images (2)
  • 261_0915
  • TRAINS_1275

Nice looking bridges there Elliot, I can't wait to see your full layout, I hope you put together a video! Everytime I see pictures I am just scratching my head wondering how you do all that. Do you know anyone who has a Pratt Bridge, I know the length, width, and height. But I have been looking for measurements of the deck side rails and the top rails, then the angle sizes. I can't afford one right now, but I think I can build one out of a bunch of wood I have.

;
paul 2 posted:

Today I finished up table three. Got it painted, leveled and bolted to table two and the wall. I had to make up a couple of blocks to go under two legs. Old basement I did not realize how bad the floor dropped toward the drain. Once the paint dries on them I'll place them under the legs. I made them long enough so the next tables legs will rest on them too. Right now I am hoping the floor goes back to level floor when I build table four. For me this is my stopping point. Heading for York on Thursday so for the rest of the week I'll run trains and make my wish list, actually my gotta have it list for York. Couple of pics of table three...........Paul


Paul:

Your bench work looks GREAT! Taking the time to carefully level the tables now will save you a lot of headaches in the future.

Randy, once again thanks for the compliment. I learned early that level is better especially where the tables meet. With longer ridged engine frames bad track work shows up more so. Still have a few tables to do. On a humorous note I am building the tables like the movie Field of Dreams. By that I am hoping a track plan will come to me like a light bulb going off.  It's not that I don't know what I want other then a switching layout. I just have not laid anything out.....................Paul

imageI recently purchased the small Lionel Grand Central terminal and I love it! The light inside is nice, but I felt that the outside of the station needed some more light on it. So I purchased some mini led spot lights from Wehonest on Ebay. The lights all work off of two AA batteries. Everything looks good except for one light that is dim. I have ordered some more lights and contacted Wehonest about the one dim light. I think the effect with the lights looks great. What do you think?


IMG_0643

Attachments

Images (2)
  • IMG_0643
  • image
Last edited by N5CJonny
Carey TeaRose posted:

Finally found the material I had been thinking of for the corners of my Std. Gauge Art Deco-style layout table. I bought four 12"x12" pieces of black with heavy white veining marble, that will be wet-saw cut down and then laid and glued in at the 9"x11" table's now-open corners.

These on a 42" high, 5'6" wide, x 8'10" long layout table- with fluted (routered), castered table legs, that are to be painted and finished with a black lacquer look.

Pics shows two of the marble pieces mocked-up in situ. The 4'x9'" wood end pieces seen herewill be replaced with 4'x11" wood end pieces.

IMG_1346IMG_1345

Looks to me like a gale blown sea from above!

I finished setting the ballast in the yard area.  My next project is to build and install dwarf signals for indicating switch direction. Found some target heads supplied with red & green LEDs and resister on ebay.  Package of 10 included free shipping for $12.99. You can bid on them and get them even cheaper.  I felt the buy now price was a bargain already.  Great service and prompt delivery all the way from China.   Arrived within 10 days of order.   They are a perfect size for what I want to use them for.   Check it out:  JTD23 10 sets Target Faces - eBay

I will post more when I get them installed.
Dave

DSC07556DSC07557DSC07558DSC07559DSC07563

Attachments

Images (5)
  • DSC07556
  • DSC07557
  • DSC07558
  • DSC07559
  • DSC07563
Last edited by darlander

Moving right along with my layout.  I'm using any spare time I have now, because the upstairs renovation is coming in June. Still doesn't look like much.  I placed most of the accessories on the layout for fit and ease of use.  Now they need to be wired.  I also have to complete the wiring of the remainder of O22 switches.  I bought some building photos and mounted them to quarter inch birch plywood.  The catenary section in the front is removed for ease of working on the platform.  You can fit alot of stuff on a 4'x12' platform.    IMG_3091IMG_3092IMG_3093IMG_3090

Attachments

Images (4)
  • IMG_3091
  • IMG_3092
  • IMG_3093
  • IMG_3090

Put my old O gauge Ives away and ran my Lionel 254 with  610 & 612 passenger cars. Spent most of my time outside. Started cleaning the leaves and twigs off my G scale track. Won't take much to get it going.  I have a bunched of extra O gauge 3 rail track and just might experiment with it outside. Like a narrow gauge next to the G gauge. Thinking a little paint on the rails to keep some of the rust off. I have extra Standard gauge too !!

I took about thirty (30) color photographs this evening of my Lionel O-gauge layout I have slowly been building for the past 18-months.  I'll have a lot more wiring to do after the track is finalized.  Mitch will like the photo of all the trolleys !!  Anyway, photos have to be checked out and ID'd and a script written to tell you guys what the heck is taking place !  I hope to post them later tomorrow!

Cheers.

KRK

Last edited by keyrouteken

Brought home a few goodies from York yesterday, a MTH trolley being one of them.  Of course I put it into immediate service and it worked like a jewel!  Runs very smooth and evenly on very low voltage.  This new MTH will now become my first line trolley, thus bumping ( no pun intended )  my Industrial Rail by Atlas O trolley into reserve status.  

I had the neighborhood kids over tonight to see the layout in action.  They all loved the new trolley and were thrilled watching 4 trains run on 3 levels.  They loved seeing photos, on the train room wall, of me at the throttle of a real life GG1 and seeing my scale Williams GG1 #4876!  There is one photo of me sitting in the engineers seat, of the real G, getting the engineers view out the small window of the G  .... as I pointed to that window on the model G.  They were in awe!!  

I let them run the trains and pick out an engine to replace the Y6b whose front pilot truck wheel was having a tracking problem when going over a switch.  The kids unanimously chose a B&O GP 9 to replace the Y6b.  One of their favorite trains in my collection is the EMD Aerotrain.  They love the way it looks!  For that matter so do I!

They had questions about cabooses ... as to how many cabooses did a freight train have?... and was the caboose always at the end of a freight train? .... What is a milk train?  

They really liked my US Army flat cars with artillery loads, truck and jeeps. Another favorite was my tank car train pulled by a FM Trainmaster in Virginian livery.  They also liked seeing the layout with the room lights turned off. That got a big WOW!!  Heres a few video of train on the FSJR in Patsburg!

Nothing like sharing my love of trains, both real and model, with kids!!!  Its a cool thing!!! 


Attachments

Videos (3)
Y6b Mallet pulling
B&O Mail train slow orders
BL2 on the main
trumptrain posted:

Brought home a few goodies from York yesterday, a MTH trolley being one of them.  Of course I put it into immediate service and it worked like a jewel!  Runs very smooth and evenly on very low voltage.  This new MTH will now become my first line trolley, thus bumping ( no pun intended )  my Industrial Rail by Atlas O trolley into reserve status.  

I had the neighborhood kids over tonight to see the layout in action.  They all loved the new trolley and were thrilled watching 4 trains run on 3 levels.  They loved seeing photos, on the train room wall, of me at the throttle of a real life GG1 and seeing my scale Williams GG1 #4876!  There is one photo of me sitting in the engineers seat, of the real G, getting the engineers view out the small window of the G  .... as I pointed to that window on the model G.  They were in awe!!  

I let them run the trains and pick out an engine to replace the Y6b whose front pilot truck wheel was having a tracking problem when going over a switch.  The kids unanimously chose a B&O GP 9 to replace the Y6b.  One of their favorite trains in my collection is the EMD Aerotrain.  They love the way it looks!  For that matter so do I!

They had questions about cabooses ... as to how many cabooses did a freight train have?... and was the caboose always at the end of a freight train? .... What is a milk train?  

They really liked my US Army flat cars with artillery loads, truck and jeeps. Another favorite was my tank car train pulled by a FM Trainmaster in Virginian livery.  They also liked seeing the layout with the room lights turned off. That got a big WOW!!  Heres a few video of train on the FSJR in Patsburg!

Nothing like sharing my love of trains, both real and model, with kids!!!  Its a cool thing!!! 


Great videos! Thanks for sharing.

keyrouteken posted:

I took about thirty (30) color photographs this evening of my Lionel O-gauge layout I have slowly been building for the past 18-months.  I'll have a lot more wiring to do after the track is finalized.  Mitch will like the photo of all the trolleys !!  Anyway, photos have to be checked out and ID'd and a script written to tell you guys what the heck is taking place !  I hope to post them later tomorrow!

Cheers.

KRK

KEN's Lionel O-gauge Layout

(An Amazement in the Works)


Hi Everybody-- As promised, here are the thirty color photos I took last night (Saturday, April 16th) ... The project does not appear to be beautiful and is highly cluttered, for now ! That will eventually change. Most of the tubular track will have wooden black ties glued between the metal ties. It makes the track look so much better.

There are TWO mainline loops on the lower level. Main 1 and Main 2.... There is an End-to-End loop for local trolleys to operate, known as the "Nicole Loop". Named after the 19-year old young lady who climbed up on top of the layout and installed some of the track for me. She was great ! Cute too ! Going to college to become an RN. Her slightly older brother is going to become an MD. Wow-if the family gets sick--they're all set !!

Anyway, Main 2 is designed to accommodate various operations without interfering with Trolleys. Main 1 (the Outer loop) is designed to accommodate various trains, with an interchange feature employed so Trolleys can share the mainline while a first-class train is held in a holding block.

A Trolley entering the Trolley loop from Main 1 will circle around, re-enter Main 1 in the opposite direction, cross the Hexxllgate Bridge, take a right at the tower, and ride the elevated line around the layout, terminating in the stub-end Trolley terminal, unless the Trolley negotiates track 3 in the Terminal, which continues to a bumper-controlled line.

This line will eventually continue, via a # 313 bascule bridge, to more trackage on the upper fireplace shelf.

Anyway, more info in a short bit !

There are thirty color photos to give you a peek as to what is going on--and I include a description for each photo :

Photo # 0841 Front of layout. Hexxllgate Bridge--elevated stub end trolley terminal.

# 0842 Another view--Hexxllgate Bridge & trolley terminal. Note the construction sign:

"Construction Zone"--Safety First !-- Kuzie Construction Company" (Kuzie is Ken & Suzie combined--clever, huh ?)

# 0843 View of double-track mainline. Wood ties improve the appearance.

# 0844 Tracks everywhere ! Sawmill to the left. Elevated trolley line crosses the two mains.

# 0845 Panoramic view ! Hexxllgate Bridge--elevated trolley terminal--major junction-- the towerman controls the action.

# 0846 Trolley junction--the bumper reverses trolley.

# 0847 Panoramic view ! "PRR" train of commuters using MP54 cars, pauses at the tower.

# 0848 View of elevated trolley line looking across the steel truss bridge.

# 0849 Tail end of trolley reverse loop.

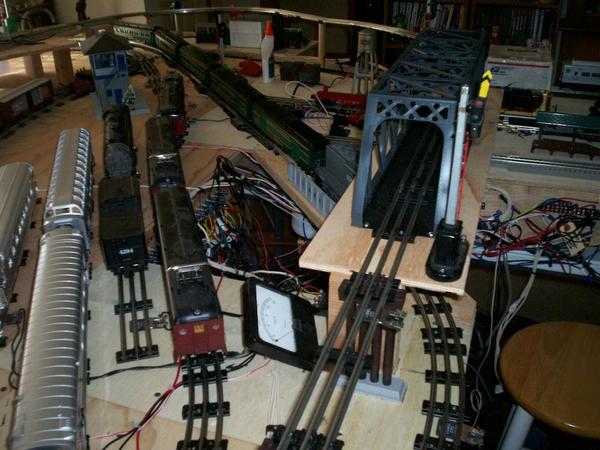
# 0850 Wiring clutter ! All wiring done without a diagram. I'm good, huh? (grin)

Middle track will be Operating Car area. RCS and Insulated track sections will allow three operating areas.

# 0851 View of steel truss bridge and "wiring clutter" ...

# 0852 Remote switch controllers.

# 0853 Control panel-- toggle switches--push buttons * ...

*Push buttons will initiate automatic operations of Trolleys.

# 0854 When power is "ON", these two lamps light ! Green light at far left lights when "switch power" is turned on.

# 0855 ZW, KW and LW transformers provide Primary power.

# 0856 My Greyhound Bus Terminal. The 'Marquee' sign is really cool in its operation.

# 0857 Pedestrian crossover is a new addition. Passengers from Bus terminal will walk over to a Trolley stop.

# 0858 Elevated trolley line making the climb.

# 0859 South end of layout. L-R: Elevated trolley line; Main 1; Main 2; Interchange to "Nicole Loop".

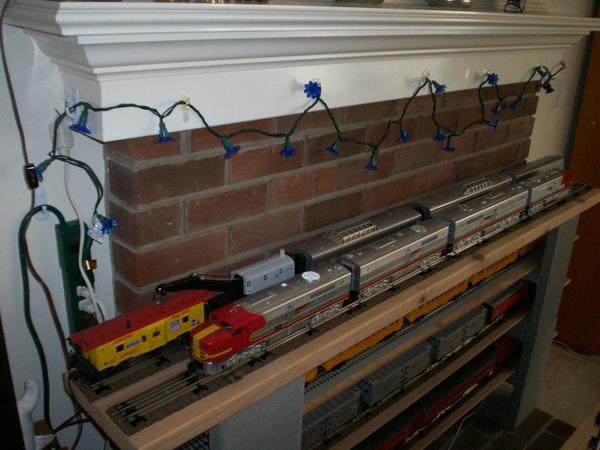
# 0860 Fireplace display! ATSF A-B-B-A ALCO units: four motors. (Future terminal)

# 0861 Coming round the bend!

# 0862 One track of elevated trolley terminal was extended to an elevated bumper.

Line to be eventually extended to the fireplace (top shelf) via a # 313 Bascule Bridge.

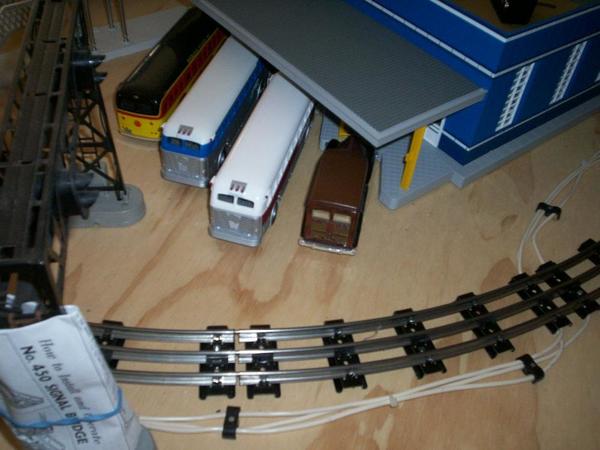
# 0863 Rear of Greyhound bus terminal. Three buses chosen to remind me of my childhood in Oakland, CA. L-R: Peerless Stages; Greyhound Lines; Trailways...

Fourth vehicle is a "woody" station wagon.

# 0864 Greyhound terminal takes up a lot of real estate.

# 0865 Another view of "Ken's Wonder" !

# 0866 SP 4294 sits on a display track. Business car "Mellenium" sits on display track.

# 0867 Trolley Loop with too much rolling stock in the way.

# 0868 Homemade book case for excess goodies.

# 0869 Steam power at the ready ! Two Hudsons; two Turbines. Two or three others.

# 0870 More power available. 1- ZW; 1- Z; 1-Powermaster; 1- CW 80. Freight and

Passenger stations.

Note: When the installation of wood Ties is completed, and Trees and Plasticville houses are installed, the track areas will be ballasted, and bare plywood and wiring will be covered by Top Soil or suitable Ground Cover. My wife Suzie has an extensive collection of vintage Plasticville. She also has seventeen (17) Trolleys.....

This completes the photographic tour of my current layout construction. As far as knowing a "little" about electricity: I took Electronic classes in high school and college.

I was an E-5 in the Navy. Maintaining communications, radar and countermeasures equipment in the Western Pacific in the 60's... I worked for the telephone company (Ma Bell) in the Switching and Special Services departments for just shy of "50" years, before finally retiring on October 24, 2014. Hopefully, guys, I'll be able to wire an O-gauge

layout !!

Cheers !

Ken Shattock (KRK)100_0841100_0842100_0843100_0844100_0845100_0846100_0847100_0848100_0849100_0850100_0851100_0852100_0853100_0854100_0855100_0856100_0857100_0858100_0859100_0860100_0861100_0862100_0863100_0864100_0865100_0866100_0867100_0868100_0869100_0870
Attachments

Images (30)
  • 100_0841
  • 100_0842
  • 100_0843
  • 100_0844
  • 100_0845
  • 100_0846
  • 100_0847
  • 100_0848
  • 100_0849
  • 100_0850
  • 100_0851
  • 100_0852
  • 100_0853
  • 100_0854
  • 100_0855
  • 100_0856
  • 100_0857
  • 100_0858
  • 100_0859
  • 100_0860
  • 100_0861
  • 100_0862
  • 100_0863
  • 100_0864
  • 100_0865
  • 100_0866
  • 100_0867
  • 100_0868
  • 100_0869
  • 100_0870

Not much but did put my Lionel 261 on the track and ran it. Spent the day taking RR photos of NS black & white locos with a CSX thrown in. The neatest was a LORAM rail grinder unit working on the Youngstown line through New Brighton. No shower of sparks but lots of smoke and dirt. Trains !!  NS and even CSX ran a whole lot of trains today. From 10AM until 3PM, lots of trains. All kinds-oil, coal, grain and mixed freights. Some crews were friendly.  Too bad there wasn't much variety in the engines.

Coincidentally, I also cast a few rock faces and outcroppings.  This is new territory to me, never having used casting molds and Sculptamold before.   Here's the castings attached to the sub layer.  I'm using house wrap ( Tyvek ) as a base then paint it with a thinned mix of drywall mud to form a solid sub layer when dry.

I picked up a rock face mold, much like the type DOBERMAN is using, to line tunnel entrances.  With Sculptamold, it sets up within 20-30 minutes and is still flexible enough to conform to the curved tunnel walls.  The completed tunnel section here is still damp.

Bruce

I set aside the afternoon to get the grass done for the center section of the layout. So the scenery is finally underway. I'll have this thing looking like a layout should, well inside the 2 years since it was still a pile of lumber and flex track.

I put down paint the color of the soil where I'm modeling, put down various ground foam and ballast for gravel, them sprayed the heck out of it with Micro Mark water/glue mix to solidify it all. Just blew some air across the surface and nothing moved.

I've waited so long for this day to come, where my layout actually look like a layout should, it really made me stop and stare. I've been looking forward to this moment for over a decade.

BuladeenSceneryABuladeenSceneryB

Attachments

Images (2)
  • BuladeenSceneryA
  • BuladeenSceneryB

For my deco style Std Gauge layout table, the top is in four pieces fitted together. the center is 4'x8', with 9' pieces surrounding it. The four additional pieces got glued up to the main pieces, the short sides yesterday.

More bracing right next to the table legs will be happening next.

After that, then the four marble corner pieces will be sent with Tom to work to get cut. They are now 12"x12", and will end being 9"x11".

I'll be starting to look at different wood stains for the poplar top.

mike g. posted:

Love the idea Lee! Looks great!

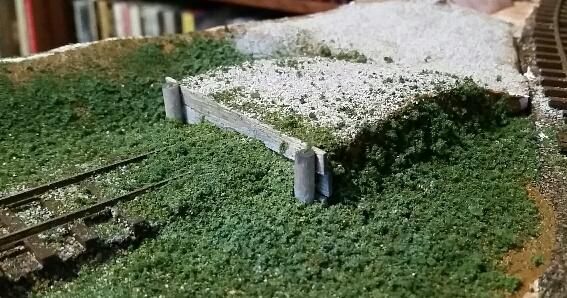
Thanks, it took very little effort. I cut the pink foam with a heat cutter, them smeared caulk over the top to get the smooth look right. The boards were amazingly easy and took less than 5 minutes total (I made an extra one at the same time, just in case another is needed elsewhere later). I had less than 25 cents into the wood and stain, the ground cover and ballast was probably the most costly part. I have maybe 15-20 minutes in it total. I think I'll be putting similar structures at the end of most of my spurs now that I see how it looks...

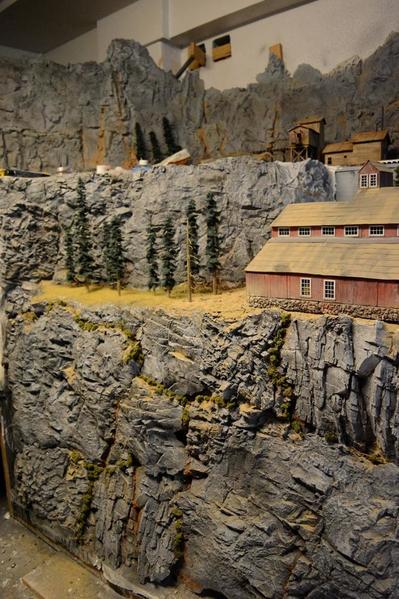
Still working on my endless canyon. Have about 20 feet done including the ghost town but still have about 8 or so feet more to go. It reaches 7 ft. tall and most of it goes to the floor. The upper main line and a short line, both electric. Three mines are serviced by the short line. Not sure how many hundreds of pounds of plaster I've used. There will be blue seamless wall behind the canyon with clouds. DonDSC_2475_2


Attachments

Images (1)
  • DSC_2475_2
Last edited by scale rail

Thanks Lee, it's really the cheapest thing on the layout. Plaster Paris, a wood frame, black wrap and acrylic paint. The longest time is letting the molds set up in the sun for a couple of days. It's embarrassingly easy. I wish more people would try things they haven't done before. Anyone can do this, By the way, that's not a white waterfall at the end of the trestle, it's just not covered with a rock mold yet. DonDSC_2477

Attachments

Images (1)
  • DSC_2477
Last edited by scale rail

lets see.  MTH Challenger with a faulty smoke unit.  First I superglued the fan blades to the motor shaft so it's not free spinning anymore.  Second I replaced the wicking.  Third I drilled out the hole in the metal piece that divides the smoke output to the two stacks, doubling the diameter size.  Smokes a hell of a lot better.

Next was to install an LED backup light in the challenger tender(bulb burnt out) and install a tether for my new PS3 aux tender.  Removed the coil coupler on the Aux tender and installed a Kadee coupler.  Now my Aux tender is my transition car to my kadee equipped rolling stock.  I'll do a video tomorrow.

Last edited by superwarp1
trumptrain posted:
Carey TeaRose posted:

Legs attached on the art deco style Std. Gauge layout table I am creating with my fiance' Tom.

IMG_1415


Carey - Tom is a lucky guy!!!

Aw shucks, thanks... I'm one lucky gal, too- he's a keeper. Nice to have a master woodworker in the house to build stuff for me We're a good team- I come up with ideas, he makes them happen.

scale rail posted:

Thanks Lee, it's really the cheapest thing on the layout. Plaster Paris, a wood frame, black wrap and acrylic paint. The longest time is letting the molds set up in the sun for a couple of days. It's embarrassingly easy.

Funny how the easy stuff sometimes is the thing people make a big deal about, meanwhile they never notice the things that almost drove you nuts or to the poorhouse, huh?

I'm in the middle of scenery work myself, but I decided to use light materials that can flex in case I ever need to move the layout, so using plaster is out for me.

Doesn't mean I can't appreciate your work, though...

Went to my L.H.S. today and pick up a hard copy of the MTH Catalog. 2016 Volume 2. Bert was on duty from my old L.H.S. Also met Frank in the HO & N scale department. He had the D T & I / 1776, in HO Scale.  We also talked about the Durand Michigan, Railroad Days, May 12th - 15th. http://www.durandrailroaddays.com/

Frank recommended several railroad history books I should read about the D T & I. Below is a loco I will be putting on my MTH Built to Order. Due late May.

Detroit Toledo & Ironton  - Click here to learn more.

MTH 2016 v2 D T & I GP 38 2Cheers from Train Room Gary Pan 2 View

Attachments

Images (2)
  • MTH 2016 v2 D T & I GP 38 2
  • Cheers from Train Room Gary Pan 2 View
I made some photos of the pickle plant complex (Menard's sallting station and the packing plant, as well as the "pepper" tower, and the rolling stock lettered for the plant, or that support it.....vinegar car, etc.) but have not figured out what this "pickle branch"/company shortline will use for power. I need a scale Porter steamer, and just the K-Line is out there...

Yesterday.   I went out into the lower yard and addressed a fallen granite rock that rolled out into the yard with a 12 lb. sledge hammer.  When I finished, and had a lot of gravel sized pieces, and gathered it all in a few wheelbarrow loads to dump over the bank, I went for a motorcycle ride.

Sometimes it is better to just walk away.  This distraction was the best thing for my layout at the time. 

Today, I have a better plan and clearer direction. 

SAC Sparkchaser posted:

Yesterday.   I went out into the lower yard and addressed a fallen granite rock that rolled out into the yard with a 12 lb. sledge hammer.  When I finished, and had a lot of gravel sized pieces,

Just by way of a friendly Hello, let me offer a bit of trivia. Your rock was from Canada. I don't know where you live, but if it is anywhere south of the Great Lakes, it was a "Glacial Erratic," brought to you by the last Ice Age ( as were the Great Lakes themselves) and deposited in your area by glacial action. Pinkish with the usual black/shiny/gray mica flecks or white-ish with the same content, such rocks originated in Canada and were rolled/dragged/washed to you, hence the rounded shape.

I couldn't resist that, but you probably knew all that anyolways. You picked one of the hardest  rocks on Earth to wack at.

Hi.

FrankM.

Last edited by Moonson

In the current issue (June/July) of OGR, there is a photo of a "Bert" patrolling a layout...assume not the same "Bert" cited above...   Per another comment above, a sibling's oldest kid went to a certain college expecting he would make the football team.  He did not.  He did graduate.   I am into cars and trains, not spectator sports, but, to me, basketball moves, football crawls, baseball stands.  (no clue what they do in tennis, nor how they score it, or....even the terminology, although a cousin played it).

Moonson posted:
SAC Sparkchaser posted:

Yesterday.   I went out into the lower yard and addressed a fallen granite rock that rolled out into the yard with a 12 lb. sledge hammer.  When I finished, and had a lot of gravel sized pieces,

Just by way of a friendly Hello, let me offer a bit of trivia. Your rock was from Canada. I don't know where you live, but if it is anywhere south of the Great Lakes, it was a "Glacial Erratic," brought to you by the last Ice Age ( as were the Great Lakes themselves) and deposited in your area by glacial action. Pinkish with the usual black/shiny/gray mica flecks or white-ish with the same content, such rocks originated in Canada and were rolled/dragged/washed to you, hence the rounded shape.

I couldn't resist that, but you probably knew all that anyolways. You picked one of the hardest  rocks on Earth to wack at.

I live in the Pacific Northwest and our house in on the floor of an ancient glacial valley. Wouldn't have been good real estate 20,000 years ago, I'm imagine.

It stinks when I need to dig a hole for any reason because for every ounce of soil, the shovel will pick up ten pounds of granite and other hard rock types.

All the granite in my area comes from ancient volcano's.  Garrett island in the middle of the Susquehanna River between Havre de Grace and Perryville Maryland was purchased in 1880 by the B&O Railroad s they could construct a bridge across the river and it was named for John W. Garrett President of the B&O Railroad.  The rocky high ground on the island's west side is the remains of the volcanic core. Basalt and quartz formed by the volcanic activity are still present.  There are several abandoned quarries on both sides of the river and one is still being mined by the Vulcan Materials Company and they estimate they can quarry down about 1000' below the rivers surface and still have plenty of stone 100 years from now.

jmiller320 posted:

All the granite in my area comes from ancient volcano's.  Garrett island in the middle of the Susquehanna River between Havre de Grace and Perryville Maryland was purchased in 1880 by the B&O Railroad s they could construct a bridge across the river and it was named for John W. Garrett President of the B&O Railroad.  The rocky high ground on the island's west side is the remains of the volcanic core. Basalt and quartz formed by the volcanic activity are still present.  There are several abandoned quarries on both sides of the river and one is still being mined by the Vulcan Materials Company and they estimate they can quarry down about 1000' below the rivers surface and still have plenty of stone 100 years from now.

So cool, I was stationed Aberdeen when the Ordnance center was still there, I used to hang around HDG all the time to hit the antique stores, watch the Metroliners zip by the NE Corridor, and sometimes pay the toll to cross the river to Perryville for it's nice depot and the outlet stores there.

Man, I miss that place...

In September, I was going between NYC and DC to get on the Capitol Limited for our cross-country Amtrak trip, and made sure to shoot this over that amazing bridge:

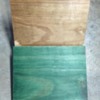
oh!!! I was supposed to wipe off the chestnut stain with a cloth after... duh me. OKAY! Here is a new piece of wood for the English Chestnut stain, one coat brushed on and then wiped off. Second coat of the Emerald, poured into a container and then brushed on, and wiped off. Better

Harumph. I like the two stains together but the English Chestnut next to the Blk/Wht marble does nothin' for me...

IMG_1452

IMG_1448

Attachments

Images (2)
  • IMG_1448
  • IMG_1452
Last edited by Carey TeaRose

P51, The Ordnance School move to Fort Lee and took the Museum, Anzio Annie and all the tanks in the field with them.  You wouldn't recognize the place today.  The new brick barracks have been converted into office buildings.  Almost all of the old wooden WWII building have been torn down and new six story office building have replaced most of them.


Sometimes progress is invisible, and today was one of those days. The results of my efforts won't show up for quite a while. I spent 4 hours online ordering electronic components from 3 different suppliers. I'll be building 18 of these circuit boards,

as well as 6 of a different type. The one shown has 12 identical circuits, and each controls a bi-color LED for signals. Doing the math, that's 216 of these LED drivers.

When it comes to electronics, I have limitations. I can't design circuits. I can kind of understand them. If this was cooking, I can follow a recipe, I'm just not a chef. Today was my day in the pantry, gathering the ingredients. When they show up, I'll start cooking. Great project to set up in front of the TV and watch baseball.

Carey TeaRose posted:

oh!!! I was supposed to wipe off the chestnut stain with a cloth after... duh me. OKAY! Here is a new piece of wood for the English Chestnut stain, one coat brushed on and then wiped off. Second coat of the Emerald, poured into a container and then brushed on, and wiped off. Better

Harumph. I like the two stains together but the English Chestnut next to the Blk/Wht marble does nothin' for me...

Speaking as a chap who grew up matching trim to fabric in the family store on Fabric Row in Philly (Marmelstein's on S. 4th Street, tho my father trimmed his name down in the 50s), I'd lose the emerald in favor of a two-tone brown to go with the marble.  But that's just me. 

Mitch

M. Mitchell Marmel posted:
Carey TeaRose posted:

oh!!! I was supposed to wipe off the chestnut stain with a cloth after... duh me. OKAY! Here is a new piece of wood for the English Chestnut stain, one coat brushed on and then wiped off. Second coat of the Emerald, poured into a container and then brushed on, and wiped off. Better

Harumph. I like the two stains together but the English Chestnut next to the Blk/Wht marble does nothin' for me...

Speaking as a chap who grew up matching trim to fabric in the family store on Fabric Row in Philly (Marmelstein's on S. 4th Street, tho my father trimmed his name down in the 50s), I'd lose the emerald in favor of a two-tone brown to go with the marble.  But that's just me. 

Mitch

Trying a mix of Ebony with the Eng. Chesnut. And then will try an Onyx stain solo. The Emerald is a nod to painted green layout table surfaces, with just a hint of deco. The mix is at the bottom right in this picture.

IMG_1455

Attachments

Images (1)
  • IMG_1455

Add Reply

Post

OGR Publishing, Inc., 1310 Eastside Centre Ct, Suite 6, Mountain Home, AR 72653
800-980-OGRR (6477)
www.ogaugerr.com

×
×
×
×
Link copied to your clipboard.
×
×