
After finishing the new pilot for the 2-8-0 consolidation, I decided I needed to add a few more details.   The head light and tender backup light needed the addition of prototypical number boards.   So the past few days I have been devoted to some more copper and brass construction.    I was motivated by the fact that I bought a new variable wattage soldering iron for this project and I was looking for more things to do with it.

Since the parts were so small, I made some wooden forms to help support and hole the pieces in alignment for soldering.   I also added a prototypical hand hold to the stock number plate below the front headlight.  

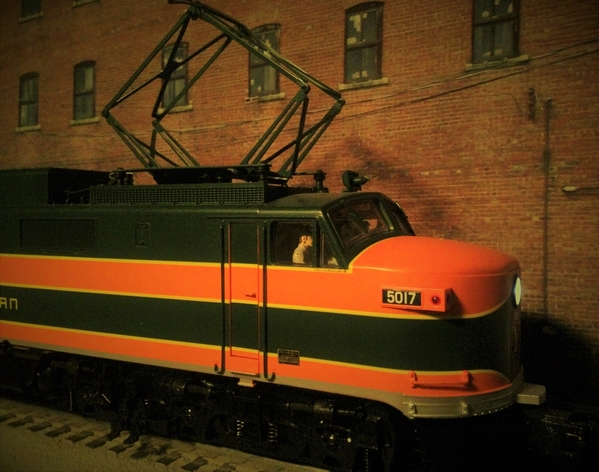
In 1930, the DM&IRR required shades be added to all locomotives cabs, so that was another requirement I had to complete.

I sprayed a coat of ACE gloss black enamel to the areas that received new decals.   I still need to spray the entire engine with a coat of matte finish to complete the project.    Tomorrow, Tomorrow!

So the next step, couple up an ore drag and see it in action!

Cheers to everyone for all the great posts!   Keep on Training!!

1933 Plymouth 2

Fabricating headlight number board:

DSC07590DSC07591DSC07592DSC07620DSC07629

IMG_6508

Tender backup light number board:

DSC07609DSC07610DSC07613DSC07614

Test fit!

DSC07617DSC07630IMG_1348

Cab shades

DSC07597DSC07631
Cheers again, Dave

Attachments

Images (18)
  • 1933 Plymouth 2
  • DSC07590
  • DSC07591
  • DSC07592
  • DSC07609
  • DSC07610
  • DSC07613
  • DSC07614
  • DSC07617
  • DSC07632
  • IMG_1348
  • DSC07597
  • DSC07629
  • DSC07630
  • DSC07631
  • IMG_6508
  • DSC07632
  • DSC07620
Videos (1)
IMG_0643
Last edited by darlander

Dave,   Stunning !!!   those details really make an incredible difference....   We need to get you some air tanks for the top of the boiler...   Thanks for sharing the details of how you made the small wood forms for the soldering operation, and I forgot to mention how good the decals look.....   Amazing transformation into a meaningful prototypical model for your layout.   

chris a posted:

Dave,   Stunning !!!   those details really make an incredible difference....   We need to get you some air tanks for the top of the boiler...   Thanks for sharing the details of how you made the small wood forms for the soldering operation, and I forgot to mention how good the decals look.....   Amazing transformation into a meaningful prototypical model for your layout.   

Thanks Chris and Mark!  Yes, I have been thinking about the air tanks.  I would have to move the bell forward to make room.   It would be a unique addition.   Maybe someday when I run out of things to do, I'll make it happen.

Cheers, Dave

Last edited by darlander
sidehack posted:
darlander posted:

Ray, I am very intrigued by your ability to print scale parts.  I know that you have a special 3D printer, but does it work off of a photo segment or do you need to enter data and dimensions, etc or both?   Would like more information on the process.   What a valuable tool!   Thanks!

Cheers, Dave

Dave, I wish it were that easy, I need to build a full 3d model in CAD (yes dimensions,surfaces, solids etc.), make an STL file from that, then put it through a "slicer program" which isn't difficult, it produces a program that the 3D printer cad read and then if all the printer settings are right it's time to make a part. Then in anywhere from 30 minutes to many hours we have what you see there. That wall with window took just over an hour and luckily was correct the first time. Yes to me this is the future but unless you have the STL file that someone else makes then you need to learn how to create models in a CAD system. When I need or want something I can probably make it.

If I can help you in any way just ask.

Thanks Ray for the reply.   I assumed it was a more complicated process.   I have purchased a few detail parts that were 3D printed.   I have a good friend that works at the Mayo Clinic imaging research division here in Rochester.  They have the luxury of scanning actual parts that they can then mirror, twist, you name it, and then a printer makes a perfect copy.    I think he said that they can even print in titanium!    The world is getting too techie for me.   I used a slide rule throughout my schooling and and this includes graduate school.    I'm sure there are people reading this that might need to look up the word "slide rule".

Cheers, Dave

Last edited by darlander
chris a posted:

Bob I like the changes you are making to the grade...  Can you tell me more about the block wall under the upper level track to the right of the portal,,, that's really nice looking stone work ?


Chris- the walls are printed on plain paper and mounted to thin card stock. To give some dimension to the wall I built out the corners. The print out came from textures.com . The site has tons of great images for download.

Here's some more pix of the build. The wall facing the track is removable to hide the wiring for this corner of the layout.

Thanks

2016-03-27 21.22.402016-03-27 22.04.032016-03-29 21.43.32


Attachments

Images (3)
  • 2016-03-27 21.22.40
  • 2016-03-27 22.04.03
  • 2016-03-29 21.43.32
darlander posted:
sidehack posted:
darlander posted:

Ray, I am very intrigued by your ability to print scale parts.  

Cheers, Dave

Dave, I wish it were that easy, 

Thanks Ray for the reply.   I assumed it was a more complicated process.   The world is getting too techie for me.   I used a slide rule throughout my schooling and and this includes graduate school.    I'm sure there are people reading this that might need to look up the word "slide rule".

Cheers, Dave

Well Dave, I don't need to look up what a slide rule is. But I did graduate to the more techie version of a slide rule known as the circular slide rule! Best invention since sliced bread for a physics major - you could even stick it in your shirt pocket without knocking your front teeth out!!

George

CoastsideKevin posted:

Painted a bunch of Bachmann figures I found in a box. Not perfect, but good enough for my purposes. Nice to finally have some people on my railroad. Build it and they will come!

IMG_3071

They look great, Kevin - can't have too many people on a layout IMHO, over 400 on Warrenville.

I cut the bases off mine.  Sometimes I make the people different by cutting off arms, heads, etc and gluing them back in different positions. Also, by trimming hats or filing them off completely.

GeoPeg posted:
darlander posted:
sidehack posted:
darlander posted:

Ray, I am very intrigued by your ability to print scale parts.  

Cheers, Dave

Dave, I wish it were that easy, 

Thanks Ray for the reply.   I assumed it was a more complicated process.   The world is getting too techie for me.   I used a slide rule throughout my schooling and and this includes graduate school.    I'm sure there are people reading this that might need to look up the word "slide rule".

Cheers, Dave

Well Dave, I don't need to look up what a slide rule is. But I did graduate to the more techie version of a slide rule known as the circular slide rule! Best invention since sliced bread for a physics major - you could even stick it in your shirt pocket without knocking your front teeth out!!

George

I knew I had one around here, now I just have to remember how to use it!

IMG_8577

Attachments

Images (1)
  • IMG_8577
chris a posted:

Thanks Mark and Geopeg:   It pays to keep going to local train shows and church every Sunday.    I told my wonderful daughter what I was looking at (hint, hint),  and got a gracious gift from her. So it just makes the passenger cars even more special !   

That’s right!  The Sunday train shows are a bit too far for me to attend after church.  There really isn’t enough time to make it worthwhile, so I go to Saturday shows.  Your daughter did very well!

I am starting the second of nine Lionel Santa Fe 21" Passenger cars today. The Great Dome is done, and the Dome Coach is in progress with the painting of the seats.  This car has a full coach on the lower level as well as the Vista Dome seating.  The Vista Dome coach comes in the 1927040 2-pack.

Here are a few pictures as I do the three coats of painting before adding the Preiser 65602 Seated People I painted.

Have a  good day working on your railroad.

Sincerely, John Rowlen

Attachments

Images (8)
  • IMG_1140
  • IMG_1141
  • IMG_1142
  • IMG_1143
  • IMG_1144
  • IMG_1145
  • IMG_1148
  • IMG_1150

I fixed my switch issues.  A defective controller was the final answer.  All switches now work.  I'm taking an afternoon nap.  Three days of electrical combat is enough. 

John R.,  I have added "put people in passenger cars" to my railroad punch list.

Chris A.,  Beautiful cars at your station.

While scrounging in my garage, I noticed I have the fundamentals for a drive in theater, complete with VHS/DVD player.  Seems like an excuse for another "to do" for the list.  I'll start by showing a double feature, "The Blob" and "Attack of the killer Tomatoes."  $3.00 per car.

Last edited by Odenville Bill
Odenville Bill posted:

I fixed my switch issues.  A defective controller was the final answer.  All switches now work.  I'm taking an afternoon nap.  Three days of electrical combat is enough. 

John R.,  I have added "put people in passenger cars" to my railroad punch list.

Chris A.,  Beautiful cars at your station.

While scrounging in my garage, I noticed I have the fundamentals for a drive in theater, complete with VHS/DVD player.  Seems like an excuse for another "to do" for the list.  I'll start by showing a double feature, "The Blob" and "Attack of the killer Tomatoes."  $3.00 per car.

I'm making the popcorn.......

sidehack posted:
GeoPeg posted:
darlander posted:
sidehack posted:
darlander posted:

Ray, I am very intrigued by your ability to print scale parts.  

Cheers, Dave

Dave, I wish it were that easy, 

Thanks Ray for the reply.   I assumed it was a more complicated process.   The world is getting too techie for me.   I used a slide rule throughout my schooling and and this includes graduate school.    I'm sure there are people reading this that might need to look up the word "slide rule".

Cheers, Dave

Well Dave, I don't need to look up what a slide rule is. But I did graduate to the more techie version of a slide rule known as the circular slide rule! Best invention since sliced bread for a physics major - you could even stick it in your shirt pocket without knocking your front teeth out!!

George

I knew I had one around here, now I just have to remember how to use it!

IMG_8577

Meet my old trustworthy Post!   Bought it in the fall of 1956!   Never had to change batteries or recharge it!   The Slide "Rules"!

IMG_0645

Cheers, Dave


Attachments

Images (1)
  • IMG_0645

What'd I do? I repaired a pair of K-Line passenger trucks. I recently acquired an 18" K-Line extruded aluminum retired business car in PRR livery:

        IMG_4538

Of the three K-Line cars of the PER two of them including this one have a case of the wobbles. That is, they don't sit stable on the trucks but rather wobble side-to-side disconcertingly when in motion. I quickly changed out a pair of good trucks and put the business car on the line but I wanted to see if I could do a repair. If I have two cars doing it there are probably a thousand out there with the same issue. So I dissected the trucks completely including driving out the center pins.

          Details here:

Repairing K Line passenger car truck wobble


Attachments

Images (1)
  • IMG_4538
Last edited by geysergazer

Lew, that’s a great tip, I’m glad you solved the issue and that’s a beautiful car. It’s always nice when we can solve a problem without having to send it to e repair shop. What I did on my layout today was replace a toggle switch to an electronic switch via my last BPC which has 1 more space left. I like being able to turn on/off blocks with the Cab 2. It’s so convenient and now there’s 19 separate blocks on my layout. Hope everyone is doing fine today. Happy Railroading DCE22430-1700-4417-977E-1003ABC8CD1E5550A9BA-2E4F-4B66-88D3-D875447443CF

Attachments

Images (2)
  • DCE22430-1700-4417-977E-1003ABC8CD1E
  • 5550A9BA-2E4F-4B66-88D3-D875447443CF
decoynh posted:

Thanks Lew. I have a KLine baggage car that has the “wobbles”. I’ll follow your detailed instructions. 

Matt, when you tap the center-pin out back up the underside so you don't twist the truck frame. I used the age-old trick of a socket of the correct size. It takes a couple tries to get a feel for how hard to tap on that dimple to flatten it. Also, flattening the dimple works the metal around the center-pin hole such that the center-pin is too tight a fit. Ream the hole carefully so the pin just pushes in. There are serrations at the base of the pin that will tighten the fit once the pin is driven home.

Last edited by geysergazer
geysergazer posted:
decoynh posted:

Thanks Lew. I have a KLine baggage car that has the “wobbles”. I’ll follow your detailed instructions. 

Matt, when you tap the center-pin out back up the underside so you don't twist the truck frame. I used the age-old trick of a socket of the correct size. It takes a couple tries to get a feel for how hard to tap on that dimple to flatten it. Also, flattening the dimple works the metal around the center-pin hole such that the center-pin is too tight a fit. Ream the hole carefully so the pin just pushes in. There are serrations at the base of the pin that will tighten the fit once the pin is driven home.

Lew, That all makes sense.  Flattening the dimple would make the hole too tight.  

Finally !!!   Got my 2 Tortoise machines throwing both switches at the crossover to the Mine Run completed.   I wanted both machines to switch together with one toggle switch, and I also wanted to add a 2nd  Bi-Polar Red/Green LED alongside the switch on the Main Line.   I have wired them together before at crossovers, but only with one Bi-Polar R/G LED in the control panel....  Anyway due the location of the switch and the location of the small sub-panel facing the back wall,  it was worth the extra effort to wire in a 2nd LED so I could see the switch position without taking a hike.


DSC06786 [3)DSC06787 [2)DSC06788 [2).   

Attachments

Images (3)
  • DSC06786 (3)
  • DSC06787 (2)
  • DSC06788 (2)

Hi Mark,  thanks for asking.   There were a couple of reasons I laminated 2 sheets of 1/2 inch plywood together.  

This is the curve that is 180 degrees,  probably  8'-6" diameter at the center line between the 2 main lines and it's on a 1.5% grade.  So I really wanted the most stable, flat sub road bed I could construct.   Whenever I join two sections of roadbed together in a butt joint I end up putting all kinds of reinforcement under the joint.    I have used lap joints with more success....

My goal here was to create a long continuous downhill/uphill grade, I didn't want any issues with uneven joints,  undulations, and I also wanted it to maintain it's level across the width.    This is where the 2 layer idea came from,  I figured out I could cut repeated sections  42 to 48 inches in length and overlap the joints top and bottom, so the entire 9 foot diameter is essentially one piece, glued, clamped and screwed together.  It worked pretty darn well with very little flexing and was easier to elevate and get the grade right on the money without flexing....  I have always wanted to run pretty long trains  25 to 30 car freight trains, and I figured this curve going up a grade had better as near perfect as I could make it if that was going to work without derailments.   

When I was installing it,  I made supports for both ends and the mid-point as it was easy to figure out the math for 1.5% grade, then I was able to make sure I was on track for that gradient to get me down to the lower level  around the last 90 degree turn across the lift gate.   With only 3 support points, it was fairly straight forward to keep tweaking it as the grade continues above and below this 180 degree roadbed. 

 I ended up adding some oak joists under the roadbed once everything checked out, from top to bottom.  

The other reason.....   I can't really pick up carry large 4 x 8 sheets of 3/4 inch plywood with the rebuilt shoulder... but I can just about manage 1/2 inch 

DSC03699DSC03708DSC03707


Attachments

Images (3)
  • DSC03699
  • DSC03708
  • DSC03707

Add Reply

Post

OGR Publishing, Inc., 1310 Eastside Centre Ct, Suite 6, Mountain Home, AR 72653
800-980-OGRR (6477)
www.ogaugerr.com

×
×
×
×
Link copied to your clipboard.
×
×