Dave Ripp, where did you get the playground equipment?
Dave, Outstanding work on the creek bed, the bents and the scenery work. Tell me more about the Arch Bridge ? Is that something you scratchbuilt. I'd love to see another photo and know more about it.
Thanks to all for the kind words on the video of the upgraded K line Hudson. I am soooo glad I hooked up with Pat (Harmonyards) and had him do the work.
Chris a

@Tranquil Hollow RR posted:Dave Ripp, where did you get the playground equipment?
Scenic Express: Model Scenery & Structure | Model Train Stuff
PART 2: Making a layout for the grandkids for Christmas.
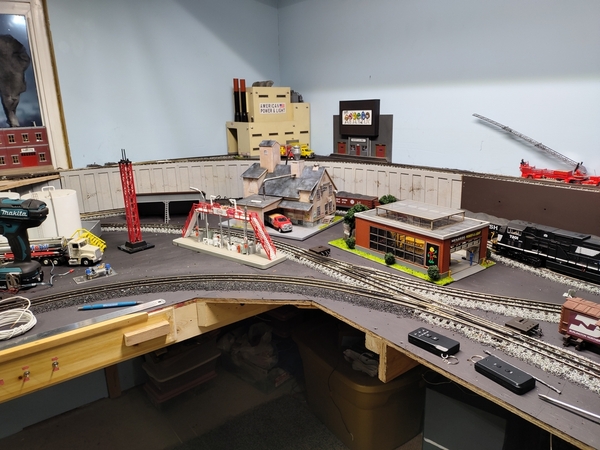
Not much I'm redoing the basement bathroom. I added a little more fence and I'm still in the figure out what looks best here. It's part of my little switching area I have a roughly 16 inch by 3 foot area with a dozen buildings to choose from.
Attachments
Am learning how to make dozens and dozens of puffball trees. First install will have to be pulled, looks too orderly to be realistic. Also went weed picking. There is a particular plant, I have no idea what it is, that grows in some wet areas. Cut a bunch leaving Raritan center after the Greenberg show. With a bit of spray glue, some coarse turf and a spray of scenic cement they make great trees. Have to get more before the next frost knocks they all down.
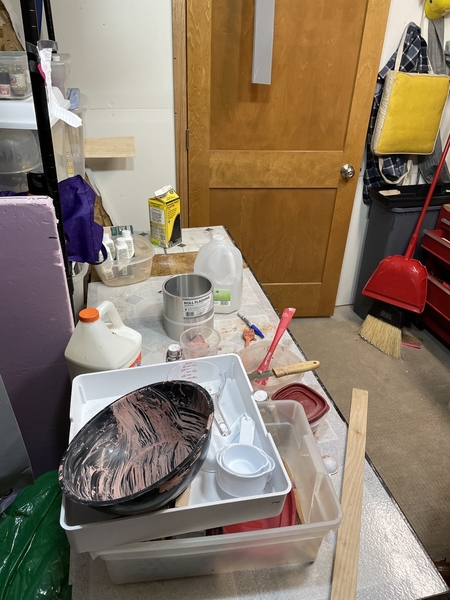
Today I started to reclaim the train work area, not a pretty sight or site.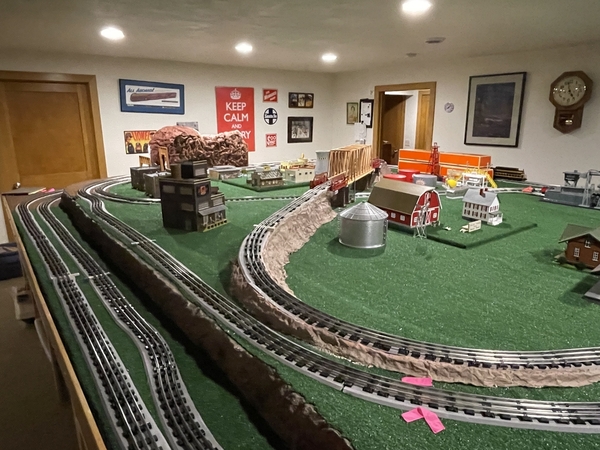
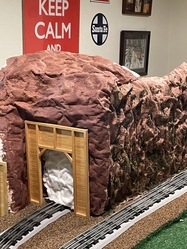
I also worked on the tunnel using shaper sheet and shaper plaster died with Rit liquid dye (chocolate brown).
Then constructed a table from an old counter top for more work space. No more running up to garage and back.
The plan is to get ready for winter by sorting out train and work area so better progress is achieved. We’ll see
Attachments
@train steve posted:That's really a great way that you made the incline to the bridge Steve. Looks nice.😉
Grandkids layout building (part 3).
Great stuff all around guys! I forgot how fast this thread can move at times. Like a raging river of creativity 😁
Andy
Today I started to reclaim the train work area, not a pretty sight or site.
I also worked on the tunnel using shaper sheet and shaper plaster died with Rit liquid dye (chocolate brown).
Then constructed a table from an old counter top for more work space. No more running up to garage and back.
The plan is to get ready for winter by sorting out train and work area so better progress is achieved. We’ll see
Steve, I like the topography of your layout, with tracks at different heights and levels on the terrain...nice job!
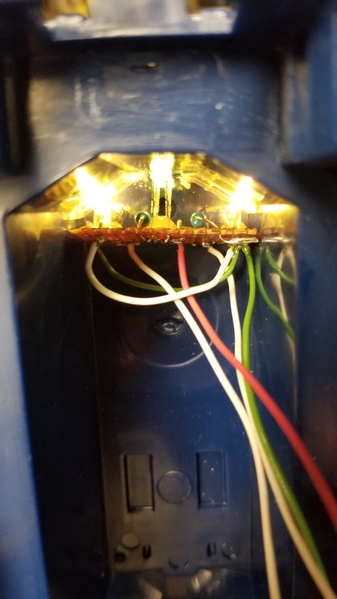
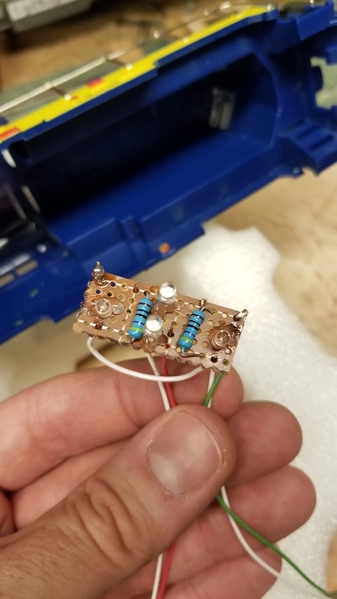
Built a new board for the headlights and markers on my BEEP. I tried to salvage at least the headlight set up but the board broke in my hand. The board is done and tested. The markers work but not the HL's. I need to check continuity from the plug to the board tonight.
Great work everyone.
Bob
Morning guys, I hope your all doing well!
Steve, your train table looks nice to me. I like the idea of the work bench, but I only have to walk through the door to the garage for my work bench. But what does suck is I have to walk from the house to the detached garage to get to the train room! LOL
Bob, Sorry the marker lights are not working, I know you will figure it out!
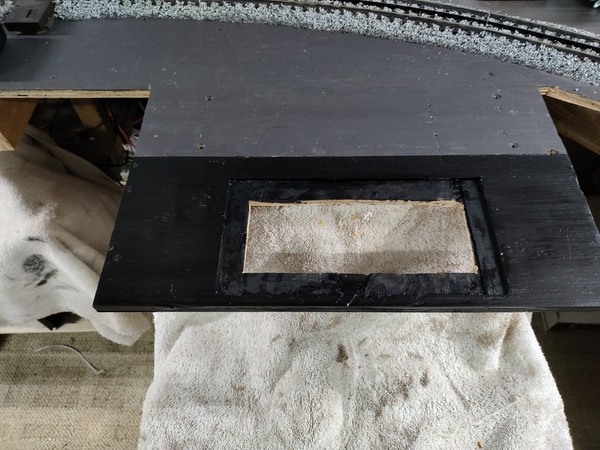
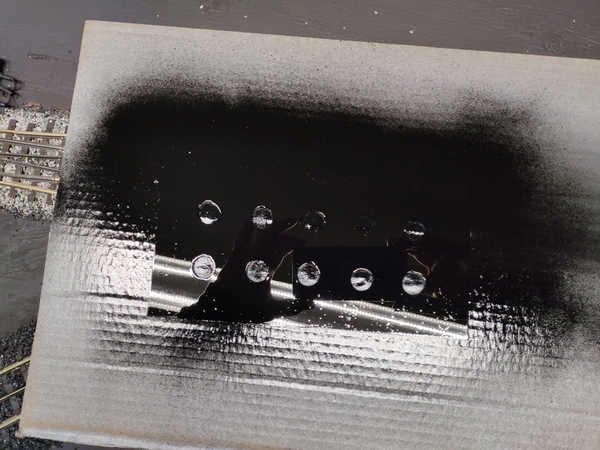
Well yesterday I got a little time in the train room and garage, I took a page out of Gunrunner John's book and built a switch panel for my track siding push buttons. Just a little advice if you plan on using a router in your train room cover more area then you think you need to keep things clean! LOL Here are a couple photos. I hope to work a little more on it today!
Attachments
@RSJB18 posted:Built a new board for the headlights and markers on my BEEP. I tried to salvage at least the headlight set up but the board broke in my hand. The board is done and tested. The markers work but not the HL's. I need to check continuity from the plug to the board tonight.
Great work everyone.
Bob
Bob , I thought you had the BEEP lighting finished 🤔
What happened ?
Attachments
@mike g. posted:Morning guys, I hope your all doing well!
Steve, your train table looks nice to me. I like the idea of the work bench, but I only have to walk through the door to the garage for my work bench. But what does suck is I have to walk from the house to the detached garage to get to the train room! LOL
Bob, Sorry the marker lights are not working, I know you will figure it out!
Well yesterday I got a little time in the train room and garage, I took a page out of Gunrunner John's book and built a switch panel for my track siding push buttons. Just a little advice if you plan on using a router in your train room cover more area then you think you need to keep things clean! LOL Here are a couple photos. I hope to work a little more on it today!
That looks like it's going to be nice Mike. I only have 4 turnouts so I'll probably just mount the MTH flippy flops.
@Dallas Joseph posted:Bob , I thought you had the BEEP lighting finished 🤔
What happened ?
I though so too. The marker lights in the short hood died. I had to rebuild the board. Not the worst job since I built it to be able to take it apart again. Just didn't expect it so soon. ![]()
Grandkids Christmas layout build (part 4)
videos.
Well it's not supposed to be over 60 degrees near Boston in December, but I took advantage of the warm weather for a some painting projects. Set up my temporary spray booth in the garage, then dull coated 6 freight cars so I can weather them with acrylic washes and pan pastels later this winter. After that, I decided to tackle the large Union Station Kitbash that I haven't worked on since last winter. Managed to get the base coats painted, and I also painted the "Arches" supporting the station platform. The arches are out out of 1 inch thick pink hard foam board insulation
First base coat was the "Sand" color from the Camouflage paint set, after about 5 to 10 minutes to I went back over it with the cheap flat white spray paint from Walmart, holding the can 2 feet away so the droplets almost 1/2 dry before reaching the model. It actually creates a very fine texture on the surface.
Now that I am reasonably happy with the color, I'll start washing all the window frames and decide on a trim color for windows/doors etc. I added one photo from the early spring, before painting.
Attachments
Nice work Mike, can’t wait to see them in place.
Chris, wow! Outstanding job. Looks great.
Andy
Afternoon guys,
Andy, thank you Sir!
Chris, I am with Andy and that looks Amazing! One question is the top soffit going to be a different color? Not to be a party pooper, but I am asking as I see a little yellow on the very top.
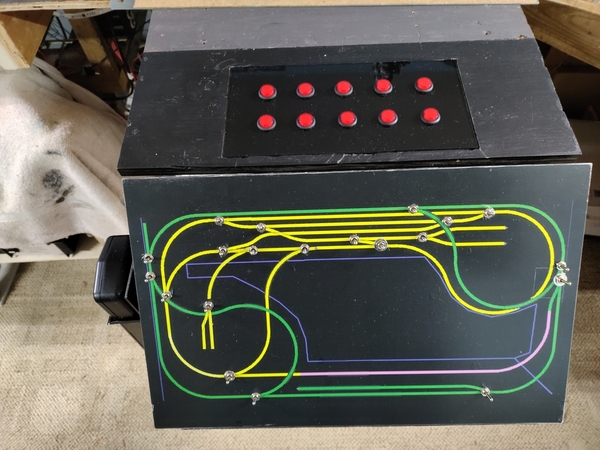
Well guys I know the photo I posted earlier of my switch panel was nothing to look at, but here it is with the switches installed, now all I have to do is wire them in! LOL
While I was out there, I place a couple buildings and worked on labeling the power supply needed for each, as some are 4.5v and some take 12v. I dont want to get them confused! LOL
Unlike Dave Ripp, I am not smart enough, so I will go back later and add grass or whatever is needed. I know I have to place some power polls from the power station to the city for its underground power! LOL
Attachments
@mike g. posted:Afternoon guys,
Andy, thank you Sir!
Chris, I am with Andy and that looks Amazing! One question is the top soffit going to be a different color? Not to be a party pooper, but I am asking as I see a little yellow on the very top.
Well guys I know the photo I posted earlier of my switch panel was nothing to look at, but here it is with the switches installed, now all I have to do is wire them in! LOL
While I was out there, I place a couple buildings and worked on labeling the power supply needed for each, as some are 4.5v and some take 12v. I dont want to get them confused! LOL
Unlike Dave Ripp, I am not smart enough, so I will go back later and add grass or whatever is needed. I know I have to place some power polls from the power station to the city for its underground power! LOL
Mike that looks great!
Mike, Nice job on the control panel, looks great. I also like the new arrangement of the buildings.
Also, you're right, "eagle eye", I missed a spot on the upper valance/soffit area. Fortunately, the upper valance over the main arch is still removable, so I should be able to touch that area up without getting overspray on the main structure.
Thanks to all for the positive comments and "likes" on the station. I'll keep posting as I make some more progress.
Chris, you the man! I knew you had a plan to take care of it! I hope you don't mind as I will be watching as I love the work you do!
Some great work going on!
Mike-That's quite an industrial vignette, in the third photo, you have going there. When you add more details it will really make a statement. Also, nice job on the control panel. Keep the progress coming.
Chris-You came back with a vengeance! Your kit-bashing skills are top notch. This is going to be sight to see once finished.
Dave
Wow! Such cool stuff going on! Like it all. Today’s mini project is a continuation of my MEC #11. 44 Tonner loco.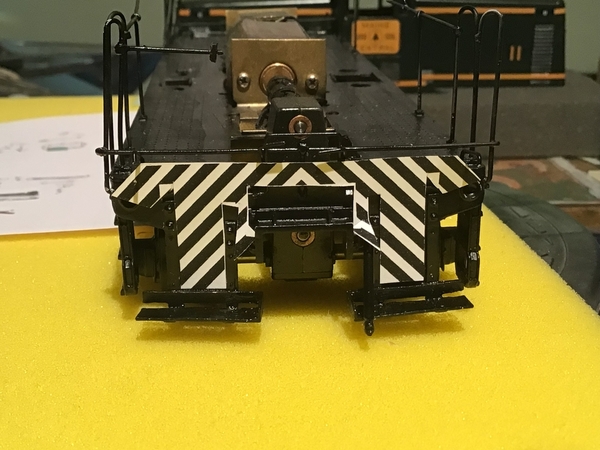
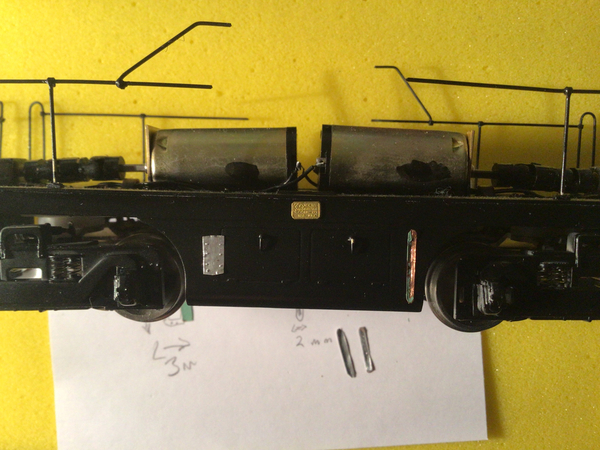
Top photo: fit a B&W cutout template on hyper detailed pilot. The orange decals will be made by Bill Brillinger and soon applied.
bottom photo: small detail parts being tried. To the left is the emergency fuel cutoff sheath. It will be smaller aluminum foil worked! It will be painted oxide red.
to the center top is a G E builders plate. Love this plate!
and to the right is a vertical representation of a fuel level glass.
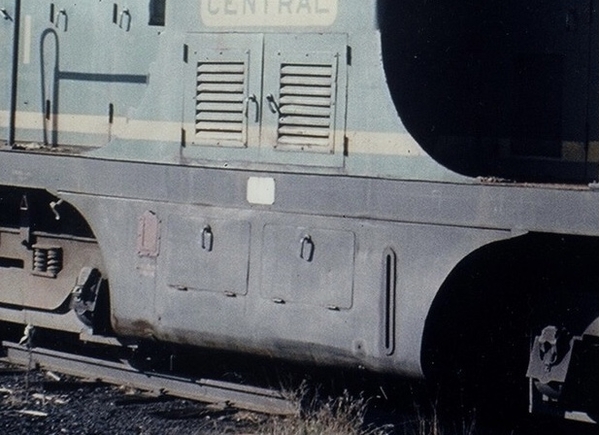
prototype photo below
Attachments
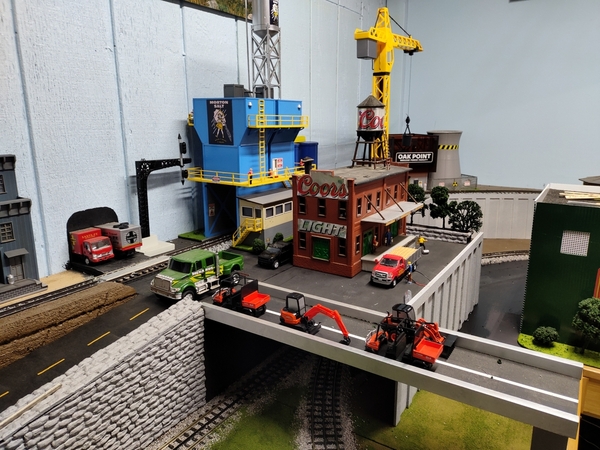
Mike. In you're last post was a pic of an overhead construction crane which is painted yellow. May I ask who made it and is it to scale. It really is a nice feature.
@farmerjohn posted:Mike. In you're last post was a pic of an overhead construction crane which is painted yellow. May I ask who made it and is it to scale. It really is a nice feature.
I know this doesn't answer your question, but Menards has a nice one at 1:50 scale.
Hi guys, thanks for the nice words, everyone!
Dave, I hope to get more detail in that area soon but will keep you posted!
Farmer John, I have no idea who makes it or if it's scale, I just thought it looked cool on the layout near all the service area. I bought it from a local kid for $10 because he broke the gear that made it turn. I got it home took it apart and come to find out I had the perfect replacement gear I took out of an old printer that quit working. Everything on it works great, spins, hook goes up and down, and in and out. The grandkids like it almost as much as I do! LOL
Started work filling in area I've been working on. Going through my buildings I totally changed what I was going to do. I'm building a Mortuary supply company called RIP's services. Just slopped togeather right now to show my plan. Here is the start of the small complex. Lots to do here I still have more work on the back building a wood storage area ect. I'll be able to have a box car picking up caskets, a wood chip car and a wood delivery car all on this siding.
Attachments
@Dave Ripp. posted:Started work filling in area I've been working on. Going through my buildings I totally changed what I was going to do. I'm building a Mortuary supply company called RIP's services. Just slopped togeather right now to show my plan. Here is the start of the small complex. Lots to do here I still have more work on the back building a wood storage area ect. I'll be able to have a box car picking up caskets, a wood chip car and a wood delivery car all on this siding.
What a great name for a casket builder. ![]()
Bob
Grandkids Christmas layout project (final prep for transporting 240 miles).
Let's see, I added the expansion to my layout about a month ago, and finally I've had the chance to do some landscaping. It'll be a siding off the mainline with some railroad service stuff, not completely sure just yet. Put in a dirt access road and some foliage on one of the expansions. Of to the model train store for a small building put in the middle of the outside corner. Looks a little desolate, but that's California for ya (DRY)! More to come.

Attachments
Posted pictures in a different string on my most favorite/highly detailed piece of rolling stock. Check it out, and add your photos!
@RSJB18 posted:I though so too. The marker lights in the short hood died. I had to rebuild the board. Not the worst job since I built it to be able to take it apart again. Just didn't expect it so soon.
good luck Bob..
Are the marker lights the wee small LEDs ? 🤔
@chris a posted:Dave, Outstanding work on the creek bed, the bents and the scenery work. Tell me more about the Arch Bridge ? Is that something you scratchbuilt. I'd love to see another photo and know more about it.
Thanks to all for the kind words on the video of the upgraded K line Hudson. I am soooo glad I hooked up with Pat (Harmonyards) and had him do the work.
Chris a
Chris,
My apologies for the late reply. The arch bridge is scratch built, by a friend, from stone wall materials from scenery express. One section prevalent in the model, is their rough cut vertical stone walls. The PRR pipe rail fencing was purchased from protocraft. Here's a photo I had of the model before it was installed.
Dave
Attachments
@Dallas Joseph posted:good luck Bob..
Are the marker lights the wee small LEDs ? 🤔
No- regular 3mm led's from an old string of christmas lights that died last year. A little tedious to pull the sockets apart but I didn't have any warm whites until recently. They are flat top and I wanted rounds for the headlights.
Attachments
Dave, Thanks so much for the reply and the photo. That arch bridge is really awesome. I'll have to see if I can find those stone wall sections when I go to the big Amherst RR show in Springfield in late January...
Went to my first train show this AM since 2019 !. Found some great deals on scenery items, at the White Elephant table: industrial tanks, static grass packages, leaf materials, coal, cinders, tallus, clump foliage, and some really cool O scale benches that are diecast metal (never seen anything like these before)....
Just working on weathering the wheel trucks from the 7 freight cars I removed them, when I took them out to the garage for Dull Coating last week. Need to clear the bench of all the parts and get the trucks and Kadee couplers mounted on these 7 cars.
Nothing to really photograph and share today.
Chris,
No problem. Sounds like you got some nice stuff from the train show. The O scale benches sound nice. Just curious, who makes the cars you are working on?
Dave
Dave, Here's some photos of the cars in process. (3) Weaver BAR 40 foot boxcars. I had already done 4 of them from Atlas O, then found a forum member last year who had a set of 3 nice Ultra Line Weavers so I bought all 3 of those. Then (2) Atlas O 70 ton covered NYC Hopper , and (1) Weaver Lackawanna Flat Car. Kind of forgot my weathering sequence on trucks, I need to go back and document it like I have been doing with other weathering projects. Memory apparently isn't good enough anymore to remember all the weathering steps, paint colors and products used and in which order. Keeping a file with all that information on my PC has worked really well for getting "repeatable" results.
Decided to take all the Union Station windows out, remove the glass, wash them and paint them. I am pretty pleased with the medium Green color I chose. Here's some photos


