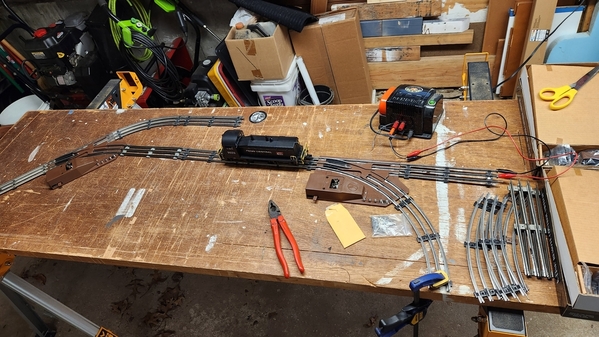
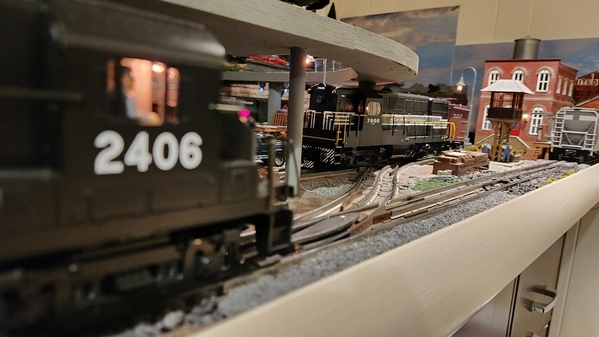
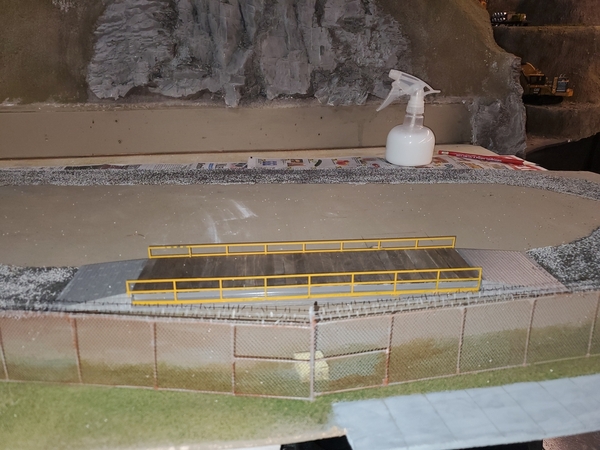
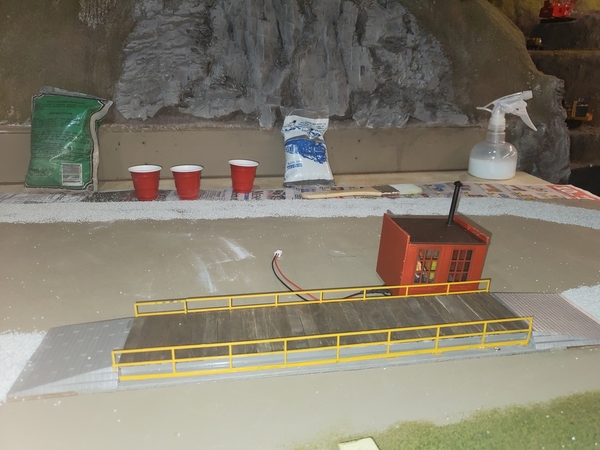
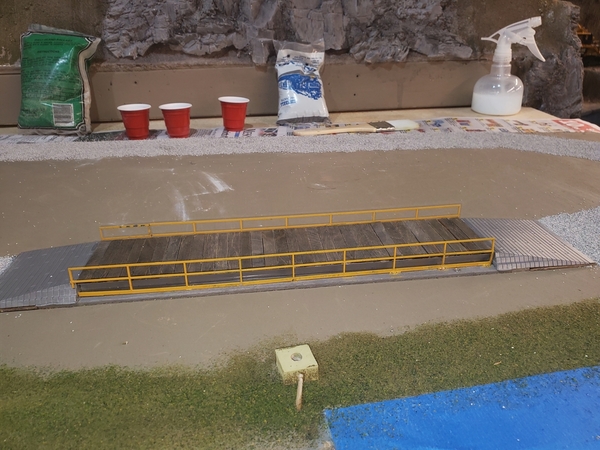
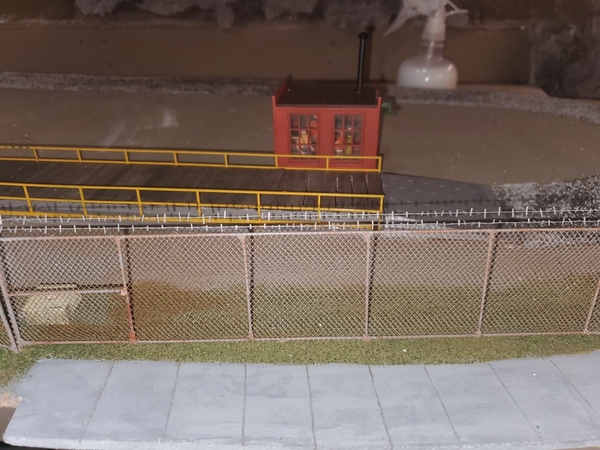
@Leroof , yes, I did give the fueling station a paint job. I thought it was just too shiny out of the box. The solenoid action is strong enough to move the station so I had to anchor it to keep it stationary. I think it's a neat piece, I like the light inside the shack coming on when you actuate it.

Thanks - Scott

@Woodson posted:

Lionel parts sells a cab interior with 2 figures for $12 that gave me a nice jump on the project.

@ Strap Hanger Nicely done!! Will you provide us with the Lionel part number??

Thanks! It was a fun project. Here is the link - https://www.lionelsupport.com/...INTERIOR-W-2-CREWMEN

However, you might want to search for “interior cab”  to see all the other cab interiors that they have available, which may be a better fit for your engine.  Here is a link to that search result - https://www.lionelsupport.com/...words=Interior%20cab

Good luck and if you convert an interior, don’t forget to post some pics as well.

Thanks for the information!! Another project...................

The CARE package from @Miggy arrived yesterday, and one of the first orders of business for Professor Lionel von Fronkensteen in the RTC shops was to get two Hudson (etc) motors in action:

GEDC2956

GEDC2957

One of these motors will be finding its way into the S-666 project...

Mitch

Mitch, general assumption you will change the fabric wiring!! LoL That's some old stuff, but they sure run good! Have fun with that project!

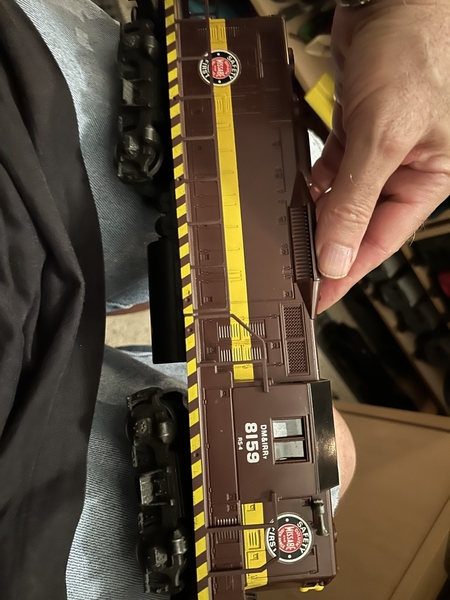
Did a bunch of cleaning and long put off maintenance on some of my engines, like finally regreasing some worm gears. However, one of the things on my bucket list is  adding pickup rollers and installing some wiring and a smoke unit to this MPC dummy Lionel RS4 engine that I picked up back in the early 1980s. Any recommendations on pickup rollers for it?  I went to the Lionel parts site and short of changing the trucks, which I don’t want to do, I couldn’t determine which pickup rollers would be best for this dummy unit.

IMG_2218

@StrapHanger Thanks for the photos. My Grandfather worked in the Duluth - Proctor Minnesota Roundhouse. They ran ore from the iron range to the ships in the Duluth harbor.Your engine from the Messabe/Iron Range caught my eye and made me smile. Thanks for the Memories! Were you originally from Minnesota? Just wondering what caught your eye for the Beautiful Engine from Northern Minnesota.

I am still looking for a caboose in Lionel O size... May have to do a rattle-can repaint of a scrap caboose.. Smile

Thanks again

@Miggy posted:

@StrapHanger Thanks for the photos. My Grandfather worked in the Duluth - Proctor Minnesota Roundhouse. They ran ore from the iron range to the ships in the Duluth harbor.Your engine from the Messabe/Iron Range caught my eye and made me smile. Thanks for the Memories! Were you originally from Minnesota? Just wondering what caught your eye for the Beautiful Engine from Northern Minnesota.

I am still looking for a caboose in Lionel O size... May have to do a rattle-can repaint of a scrap caboose.. Smile

Thanks again

Miggy, not from Minnesota, but on a school trip to the 42nd street Public library in my youth, I read a book on the Iron Range and fell in love with the powerful engines of the Duluth Missabe  line  The first engine I bought on my own (with what seemed like a years worth of after school earnings),  was a DM&IR Lionel diesel in those reddish colors.  I picked up a beautiful Lionel DM&IR caboose as well back in the 70s, which I still have. In fact, when I got back into the hobby and discovered MTH in the early 90s, my first engine was a premier DM&IR GP38-2.  I’ve since limited my purchases to LIRR and MTA but still love and maintain my old DM&IR fleet.  I’d really like to add a smoke unit and lighting to that RS4 dummy.  It’s a real  beauty.

Last edited by Strap Hanger

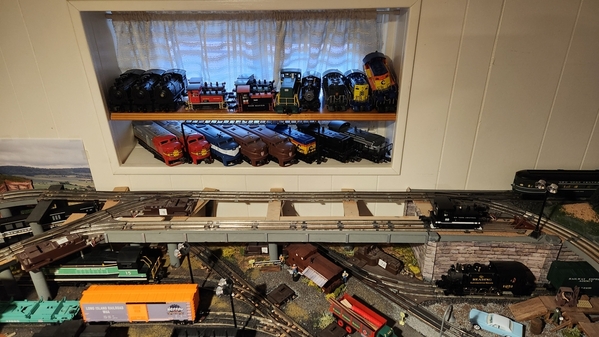
Not on the layout but some testing for the next project. I want to finish the scenery on my upper level in the back. Kind of the last major piece to do and it's been on my list for a long time. Here's the target area.

2024-01-14 16.12.02
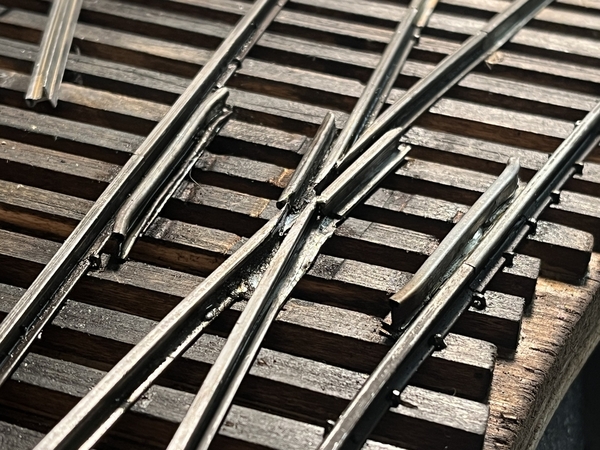
Before I start, I need to fix the track and turnouts. I noticed that the strait sections of track have started to bow from the weight of the trains passing. So since I need to replace them, I want to change out the 3 Lionel 5122 turnouts for K-line tubular turnouts. I have two right-hand, just need to find a left (a WTB post will be forth- coming). I hate the 5122's...the solenoid buzz drives me nuts. The K-line's are quiet. Wish I knew about K-line before I built the layout.

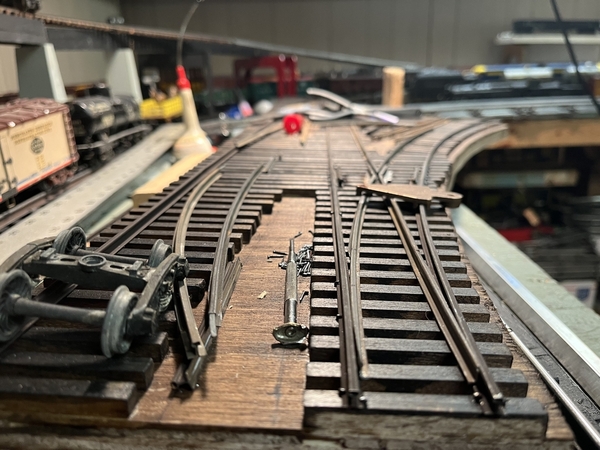
So getting to the point- I assembled the two turnouts I have with some track on my temporary workbench to see how various engines run through them. I tried a couple shorties, a Plymouth, BEEP and 0-6-0t steamer, and a SW1200 diesel. Everything went fine so at least I have a solid plan for the track work.

2024-01-14 14.00.30

As a side note- the SW1200 is a Lionel Legacy w/Bluetooth. Nice option to grab my phone and use the LC app on track without a base connected. I still prefer my Cab-1L but the BT connectivity is convenient.

Bob

Attachments

Images (2)
  • 2024-01-14 16.12.02
  • 2024-01-14 14.00.30
Last edited by RSJB18

I think this was an old NYC shell that had been repainted to a red/yellow something that was never finished. (I should've taken a 'before' picture) After a several days of soaking & gently scrubbing down the old finish this week it looked ready to repaint again. I decided to use some old N & W decals I found in the boxes of stored trains to try a repaint to a short-lived N & W paint scheme. I think the prototype was actually an F7, but I'm pleased with this so far. I noticed that the masking line on the nose got a bit loose a little too late - maybe I can touch it up before a clear coat

Attachments

Images (2)
  • Repainted Lionel F-3 Shell  to N & W: Repainted Lionel F-3 Shell  to N & W
  • Repainted Lionel F-3 Shell  to N & W: Repainted Lionel F-3 Shell  to N & W
Last edited by woodsyT

Bob, good luck on that project! Looks like a lot of f stuff that needs to be moved. I can't wait to see the finished product!

Woodsy, nice job on the paint job! I think it's going to be great when done!

Well as most of you know there won't be anything from me for a while, but I am here checking out what you guys are doing!

I hope you are all well and finding time to have fun with your layouts and trains!

So after an inexcusably long hiatus, I finally got motivated to go down to the train room.   Installed some hand made weathered fencing I bought at a local train show couple of months ago and then finally got around to stitching two Pennsy Block wall sections together so they fit the opening at the tunnel entrance.   Going back to work on my 2 NYC Woodside Caboose(s), scratch building project that I started back in the spring....  Not too many more tasks on the to do list for these cabooses...   Hope everyone is well.   DSC01951DSC01952DSC01968DSC01967DSC01963DSC01966DSC01965

Attachments

Images (7)
  • DSC01951
  • DSC01952
  • DSC01968
  • DSC01967
  • DSC01963
  • DSC01966
  • DSC01965
@chris a posted:

So after an inexcusably long hiatus, I finally got motivated to go down to the train room.   Installed some hand made weathered fencing I bought at a local train show couple of months ago and then finally got around to stitching two Pennsy Block wall sections together so they fit the opening at the tunnel entrance.   Going back to work on my 2 NYC Woodside Caboose(s), scratch building project that I started back in the spring....  Not too many more tasks on the to do list for these cabooses...   Hope everyone is well.   DSC01951DSC01952DSC01968DSC01967DSC01963DSC01966DSC01965

Chris, I was wondering what happened to you, welcome back! I always enjoy your posts with your layout updates. Fence looks great, good luck on the caboose’s.

@RSJB18 posted:

Found the K-line left hand switch I need for the upper level. Just need Mr. Brown to deliver....

@chris a Welcome back Chris. Cabooses look good.

Ran some trains tonight too.


Bob

Nice score, Bob. Kline makes excellent tubular switches. I have 3 shadow rail ones (the ones with the built in plastic ties) on my elevated line that replaced lionel's version about 15 years ago and they are definitely superior and have operated flawlessly.  Crisp, forceful  switch action.  Its a shame that these aren't still manufactured and we now have to scour the secondary market for dwindling supply.

Last edited by Strap Hanger

Thanks so much to all of you for the heartfelt "welcome back" messages and Likes....  Mark,  Not sure if you found it or not, but I was replying to some YouTube Video messages the other day and found a YouTube video that I did to kind of close the book and review the large Coal Mine Scene Mountain that was done with the Batting, Spray Foam, Latex Paint etc... It's not obvious from the title of the video that it's kind of the "finished product" video on the result.   So here's a link in case you didn't see it.  If nothing else it provides some decent views of what's possible on a rather large, steep slope.    As it is my video, hopefully copying in a link won't send up alarms with the mediators.   I also added some photos taken back in March 2018 showing still shots of the mountain/hillside.   I would even want to think about how much plaster, frame work, cardboard webbing etc it would have taken to build this the traditional way, plus I had fallen on ice and completely tore 3 out of 4 roto cuffs in my right shoulder so building anything I couldn't pick up and move wasn't an option.  this entire scene was built on a work bench table, then moved into place.   

Chris

https://www.youtube.com/watch?...gdSkZSXBQ&t=100s

  DSCN3914DSCN3917DSCN3920

Attachments

Images (3)
  • DSCN3914
  • DSCN3917
  • DSCN3920

Nice score, Bob. Kline makes excellent tubular switches. I have 3 shadow rail ones (the ones with the built in plastic ties) on my elevated line that replaced lionel's version about 15 years ago and they are definitely superior and have operated flawlessly.  Crisp, forceful  switch action.  Its a shame that these aren't still manufactured and we now have to scour the secondary market for dwindling supply.

Yes they did. I wish I knew about K-line switches when I built my layout. I hate the Lionel 5121, 5122's with a passion.
The solenoid buzz absolutely kills me. I have too many on the layout to change out without tearing half the layout apart so I'll just grin and bear it. Mine are on track power so when I'm running conventional locos, it's not too bad but now that I'm running more command locos- they really sing at 16-18v.
Another regret is that I didn't rewire them for accessory power......at least then I could manage the noise a little better.

Bob

@Mark Boyce  Mark when you are ready for the batting, take a cheapie 2 or 3 inch paint brush, pour on the glue (buy a gallon) and spread it around on every contact surface. This coat should be relatively thick - not thin like a paint coat. Take the precut batting and apply it to the glue pressing down (light to medium pressure) to get a good bond. You can use a different stiff brush to push it into "cracks". It will take a day to dry. Then trim the edges as needed. I usually use craft scissors. Prepping the substrate is the real work as you have to decide what kind of surface structure you want.

Precut batting - take the batting and lay it on the surface press it into the substrate, and mark the outside perimeter, then cut to shape. Sometimes you will need to cut the batting to eliminate bunching or thick folds in areas.  Reset it in place and make any final needed cuts. I usually leave an inch or so overlap. Its easier to trim if you have something to hold on to while cutting. If this is an in-place application, just cut to size.  I have not had great success at hiding seams so I try to minimize them or apply the batting joints into inside corners to make them "invisible".  Otherwise they have to be covered with landscaping.   

Regarding the glue - you want to apply the glue as fast as possible to prevent skinning. I can do 6 to 8 square feet pretty quickly. Picking up the glue onto the brush is too slow for me, so I pour a puddle and spread, etcetera - etcetera - etcetera  (think of the voice of Yul Brenner - King and I).

Regarding painting - this is a load the brush and dab, pushing the paint into the batting. I always have to go back the next day and reapply to areas that did not take the paint well.

BTW if you have been that busy outside - you must have had a great surgeon. Glad to hear it is going well long term.  Jeff

Chris sorry I am a day late, but welcome back! I really like the new fencing and I thing the wall turned out looking great! I was wondering about the caboose switch over then I see it in your second post about it. I think i like the original look, the switch looked a little off! The hill sides you had done in the past look outstanding and I can't see why the moderators would flag this because a lot of people put links to that they do here!

Bob, I for your sake I hope the big Brown truck shows up soon, who knows what trouble you could get into with idle hands! LOL

Jeff your step by step is a great course! I know I tried it on my first layout and really liked it!

Well guys I hope you all are doing well and are finding time to have fun with your layouts and trains!

@chris a Chris, thank you for the link to the other video.  I recall seeing it when you first posted it, and even saw I had 'liked' it.  The scene looks great!

@ScoutingDad Jeff, thank you for the detailed description.  The area I will be doing first is basically flat level.  Thank you, I will put one sheet of batting with no seams, and cut it oversize to start.  I can always be tempted to use miscellaneous smaller pieces of whatever material; as you well know.   

I remembered the scene from the 'King and I' before I even watched the clip.    Watching Chris' videos and reading your description, I do need to get a can of brown paint for coloring the batting once set.

I don't want to belabor it here, but yes, my surgeon did a great job on both back surgeries.  I just passed the 6-month point and have no restrictions.  I take things carefully and am getting along well.  Thank you!

About to take the 42" x 62" Northern Forests Christmas table down but wanted first to take a picture of two "reclaimed" cars: the Rutland car had badly damaged roof paint and rubbing of the lettering on the yellow band, so both were corrected with the help of K4 decals (S for the roadname and HO (!) for the herald. The Maine Central car is a repaint of a 6464-75 Rock Island car with totally faded out lettering. The K4 decals are O scale. The buidings are Weaver brass. A nice, simple winter scene . . .

Tree Train Loading on Northern Forests

Attachments

Images (1)
  • Tree Train Loading on Northern Forests
@aubv posted:

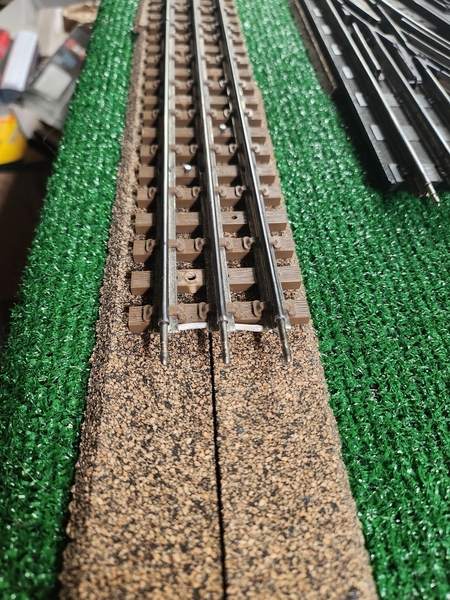
It could be MidWest cork…typically comes in a white box with blue ink.

The pieces, if not separated, have a bevel cut in the center.  You split the piece into two and position the bevel to the outside. Allows for very quick installation even with curves and switches…

@jim sutter


Here is a picture of the roadbed. Holding it down with 4D nails through the ties

20240118_215934

Attachments

Images (1)
  • 20240118_215934

So made a bunch of progress on the caboose last 2 days, wish I could say I was done, but it's a process, not an event.

Down to interior lighting, installing the windows, introducing the crew and then I can button it up.   This was originally a K Line PRR woodside caboose from circa 2000 ?  Made some brake wheel stands, anchored the brass railings I fabricated, 1st coat of weathering on the trucks and under chassis with grimy black, painted the interior, glued down the wood planking on the end platforms and the covered the metal grate steps with wood planks then painted and weathered both platforms and steps. 

DSC01969DSC01971DSC01973

Attachments

Images (3)
  • DSC01969
  • DSC01971
  • DSC01973

Add Reply

Post

OGR Publishing, Inc., 1310 Eastside Centre Ct, Suite 6, Mountain Home, AR 72653
800-980-OGRR (6477)
www.ogaugerr.com

×
×
×
×
Link copied to your clipboard.
×
×