


Sweet Bryan, now all you need to do is add a passenger terminal....Paul
Populating. Working primarily on the passenger station area. I saw a trick about using 100 grit sandpaper sheets for a parking lot, so I'm going to lay that down and put in some white stripes for parking spaces for the buses. Will set a small section aside for "repairs" as I have some brick masons that I want to use in a scene. Once that is done, I plan on working on the back area with the house ... I have a couple of playground items which I will set to the side of the house, along with a garden and will do a white privacy fence as well.

Am I going to decorate the entire layout? I figure if I do, I'll tear it up sooner rather than later for an expansion, and if I don't, the layout won't change for several years.
Attachments
Images (1)


Attachments
Images (2)


Deuce, the station area is looking good! Yes you won’t know what you could make better until you put in initial scenery !
briansilvermustang posted:
Brian, you captured the rusty look on that bridge very well. What did you use?
Art
hello Art, was just messing around out side with a cheap black snap together bridge and some spray paint. there are 3 different colors of red primer, some flat black mixed in (actually was spraying black and brown at the same time), and then some grey misted in for some highlights, just got lucky on the outcome...
New pantograph for the Red Rocket II!
https://ogrforum.ogaugerr.com/...or-the-red-rocket-ii

Fortescue and Flamingo were observing from atop the parts drawers.
Mitch
Attachments
Images (1)

Attachments
Images (1)

Broke out my Canadian National set for a spin around the layout...
Attachments
Images (1)
Forgive me guys, it's been over two weeks since my last "confession".
Some of you already know that my layout is now listed on the convention website. I've added links to my signature to reflect that. Now the sprint to the finish!
I took this plain Jane Plasticville signal bridge and jazzed it up by painting and weathering it. This one will have a very prominent place on the layout, directly in plain view.


I got the signals on my new triple track bridge.

In order to try and light some of the signals, I started to wire the first panel. I have to hang it, power it, then run the wires from there out to the signals.


I put a coat of brown paint over all the plaster cloth at Newport.


I made my static grass applicator from an electric flyswatter and a strainer. Still needs work though, I may have screwed up the on / off switch.

I started to glue together my grain elevators over at Hiawatha. Don't have to worry about knocking them over anymore, they're heavy.

I'm using the regular PVC pipe cement from the plumbing department. Stinky stuff! The problem with this group is it is just a single line, so I took a chunk of pipe and ripped it on the table, then glued the strips on as reinforcement.

Stood the unit up against the backdrop. HEAVY!

I've been working from Google Earth to get a feel for sizes and shapes. I'm going to use Art's Masonite construction method to do all the non silo bits.

I decided to offset this batch because the angle fits the street rather nicely, and for full support. It's tricky getting the glue on six surfaces before it dries.

There's still a lot to be done here, but it's taking shape.

Finally, I hung a section of pegboard, to organize some of my scenic supplies. Makes me feel like I'm working back at the hobby store again.

A few items couldn't be hung.

Attachments
Images (17)
looking GREAT Elliot !!! WOW ![]()
Wow, Elliot, that is a grain elevator complex. I love grain elevators. The PVC pipes are heavy when you have a lot of them glued together. But they sure look great.
Art
Fantastic work!
Mike ![]()
Nice engines Mitch, Brian, and Howard!
Elliot, The silos are looking good! Wow, your scenic supplies do look like right from the hobby shop; you bought the wall along with them!! ![]()
Last night I moved the summit back to the layout and filled the seam with Sculptamold modeling compound. Also added a few more rock castings here and there. Placed the buildings and rail cars and hit the power button. Next step will be to complete the summit scenery and add some larger pine and spruce trees on the slope. Dave


Attachments
Images (5)
Dave, You are literally moving mountains!!! Looks good. I like the United States Steel plant too. Reminds me of their old sintering plant that was near here on the B&LE. Even the snow got that oxide tint to it. ![]()
Well the weather has been warming up so I've been busy with outdoor activities, including tinkering with my old Thunderbird. I have managed to make some progress on the downtown redo the last few days. I added the plywood base yesterday and then painted it with asphalt colored paint before work this morning. I just just need to add lighting to the "underground" terminal tracks and then start on the downtown scenery. About half way to the end now.
![20180509_103553[1]](https://ogrforum.ogaugerr.com/fileSendAction/fcType/0/fcOid/12129987997660671/filePointer/79142442785054294/fodoid/79142442785054287/imageType/LARGE/inlineImage/true/20180509_103553%255B1%255D.jpg "20180509_103553[1]")
![20180509_103604[1]](https://ogrforum.ogaugerr.com/fileSendAction/fcType/0/fcOid/12129987997660671/filePointer/79142442785054295/fodoid/79142442785054288/imageType/LARGE/inlineImage/true/20180509_103604%255B1%255D.jpg "20180509_103604[1]")
![20180509_103703[1]](https://ogrforum.ogaugerr.com/fileSendAction/fcType/0/fcOid/12129987997660671/filePointer/79142442785054296/fodoid/79142442785054289/imageType/LARGE/inlineImage/true/20180509_103703%255B1%255D.jpg "20180509_103703[1]")
![20180509_103650[1]](https://ogrforum.ogaugerr.com/fileSendAction/fcType/0/fcOid/12129987997660671/filePointer/79142442785054297/fodoid/79142442785054290/imageType/LARGE/inlineImage/true/20180509_103650%255B1%255D.jpg "20180509_103650[1]")
Attachments
Images (4)
![20180509_103553[1]](https://ogrforum.ogaugerr.com/fileSendAction/fcType/0/fcOid/12129987997660671/filePointer/79142442785054294/fodoid/79142442785054287/imageType/LARGE/inlineImage/true/20180509_103553%5B1%5D.jpg "20180509_103553[1]")
![20180509_103604[1]](https://ogrforum.ogaugerr.com/fileSendAction/fcType/0/fcOid/12129987997660671/filePointer/79142442785054295/fodoid/79142442785054288/imageType/LARGE/inlineImage/true/20180509_103604%5B1%5D.jpg "20180509_103604[1]")
![20180509_103703[1]](https://ogrforum.ogaugerr.com/fileSendAction/fcType/0/fcOid/12129987997660671/filePointer/79142442785054296/fodoid/79142442785054289/imageType/LARGE/inlineImage/true/20180509_103703%5B1%5D.jpg "20180509_103703[1]")
![20180509_103650[1]](https://ogrforum.ogaugerr.com/fileSendAction/fcType/0/fcOid/12129987997660671/filePointer/79142442785054297/fodoid/79142442785054290/imageType/LARGE/inlineImage/true/20180509_103650%5B1%5D.jpg "20180509_103650[1]")
Big_Boy_4005 posted:
Boy, I wish my LHS was that well stocked. ![]() Good progress, Elliot.
Good progress, Elliot.
Elliot, Dave, and Lou- great progress by all three of you. Keep up the good work.
Bob
Elliot, the signal bridges are looking wonderful! The silo's are great, just wondering what size pipe you are using? Lol it sure looks like you have your own train store there! I have never seen one so well stocked!![]()
Dave you sure are doing some great work there and once again I really love the lighting effect!![]()
Lou, you are moving right along there, next thing you know there were be streets and buildings with tons of people hanging around!![]()
Attachments
Images (1)

I have Lionel's Milwaukee Road four car 18" passenger car set which I purchased a few years ago. None of the cars had been out of the box until last month. I discovered that the rear red light did not light and the wrap around bright metal strip on the rear had come unglued at the ends on the Skytop lounge observation car. I took the frame off the body and found that one of the wires to the light had broken at its solder joint. I re-soldered it and used contact cement to fix the unglued metal strip. Larry
Attachments
Images (1)
looks good Larry, can you get a photo of engine to the right in the photo, thanks...
Larry: Nice looking train, (although, maybe the wrong colors! To me the Milwaukee ceased to be the day they took on the U.P. paint scheme) Note the differences between the Skytop Parlor cars (on your model) and the Skytop Pullmans like those produced by MTH. The parlor cars had more, somewhat smaller windows on the sides of the car compared to fewer, larger windows on the Pullmans. Also, the Pullmans had their Skytop Lounge area with the glass enclosed rear end, extended more forward, into the sides of the car than did the parlors. Also the chrome band below the lounge windows was smooth on the parlor cars, whereas on the Pullmans that strip was corrugated. Finally, but not very noticeable, was the fact that the parlor cars were actually six inches wider than the Pullmans. Of course, the Pullman Skytops were built by the Pullman Company and the Milwaukee Road built the parlor cars in their own, Milwaukee Shops.'
Just thought that some of you might be interested in these differences.
Paul Fischer
Big_Boy_4005 posted:
I got the signals on my new triple track bridge.
In order to try and light some of the signals, I started to wire the first panel. I have to hang it, power it, then run the wires from there out to the signals.
I made my static grass applicator from an electric flyswatter and a strainer. Still needs work though, I may have screwed up the on / off switch.


Elliiot, your electronic applications never cease to amaze me - your panel & grass applicator, case in point! Also, your scenic storage area looks like an aisle at Scale Model Supplies on Lexington & University! Looking great as always!
Dave
I just hung out with the Building inspector from the County till he gave me the final signature! All set to start on the inside!![]()
Elliot, great update report. Just amazing how you can zip through so much so fast. Can hardly wait to see your work in person. Mike G, congratulations on the final inspection for the outside. Now no matter what the weather you will have no more delays. Now you can really roll up your sleeves and got to town. I have had to work outside on the yard for the past few days. I got a nice package today of train stuff and tomorrow I should get my Scenic Express package so at least with that I can start on scenery again. I going with the policy of if it is raining it is going to be a work on the layout day the rest of the year...................Paul


This one work, Brian?
Attachments
Images (1)
Working on first scene.


Need to figure out how I'm going to join each sheet of sand paper. Thinking of a small bead of black roofing caulk that I can then flatten down. Then if I weather it a bit (dry brush with some brown and some grey acrylic paint) it may look like a repaired parking lot. I hope.
Attachments
Images (3)
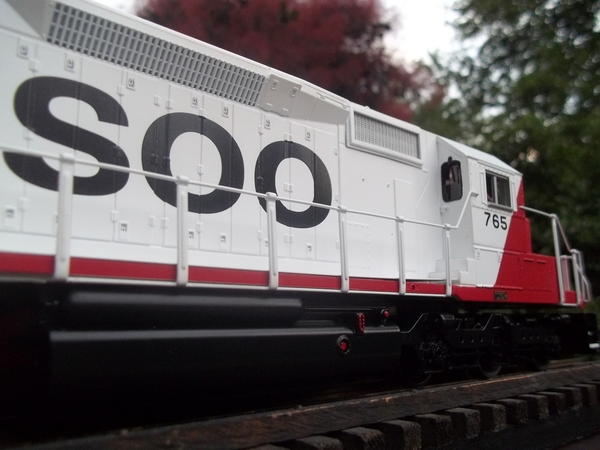
PSAP2010, Very sharp looking engines!
Deuce, Good looking scene. I like the bus and microbus! Your idea for the seam sounds like it would work. I don't know of any others.
PSAP2010 posted:This one work, Brian?
yes, great looking engines Larry !! thanks ![]()

Attachments
Images (1)

Deuce, the parking lot is looking nice! you might be able to hide the seam by taking a black marker an running it along the edge of the paper to hide the light edge!![]()
DUECE, station area is looking good. Mike beat me but I agree with him. Maybe a sharpie pen may blend in the edges..,.....Paul
paul 2 posted:DUECE, station area is looking good. Mike beat me but I agree with him. Maybe a sharpie pen may blend in the edges..,.....Paul
Paul, I would say great minds think alike but mine has been slipping lately! LOL![]()


Deuce posted:Working on first scene.
Need to figure out how I'm going to join each sheet of sand paper. Thinking of a small bead of black roofing caulk that I can then flatten down. Then if I weather it a bit (dry brush with some brown and some grey acrylic paint) it may look like a repaired parking lot. I hope.
Deuce-
I made my roads out of cardboard and painted them with Rustoleum textured paint. For the seams I just painted them with some black paint to simulate a tar-filled joint.
Bob

Attachments
Images (1)

Mike G, you can come build be a out building for my train layout. You would only have to travel about 20 minutes to get to my place. ![]() Congratulations on completing your addition!
Congratulations on completing your addition!
I've have been slowly replacing the batteries with BCRs in my 23 MTH PS-2 engines. I've done maybe five or so since I got all the components.
Paul, Mark and Brian, thank you for all you nice comments!
Paul, I'm not really crazy about the Union Pacific armour yellow but I really like the FP45s in that scheme. I bought the Lionel Legacy Milw. E8 AA set and four car passenger set to go with them several years ago. Since I have mostly MTH engines I was reluctanct to buy the Legacy system, but bit the bullet and got it when I decided to buy the Lionel Legacy engines. Even though DCS can run the Legacy engines it isn't quite the same as running a DCS engine. I have always liked FP45s and had bought an MTH Milw. FP45 in Milwaukee's freight colors several years before I came across the three in the UP livery. I will probably sell the Lionel E8 set.
Larry
Yesterday ordered from Scenic Express at the right time. It showed up on my door step today. Not sure but I think it was Mr Brown again. I am going to have to find out his name. He stops here so often I should offer him something of sustenance. So now I have the materials needed to finish of the scenery in the section I have been working on. Hoping tonight to do that. It is suppose to rain. Pics..............................Paul


Attachments
Images (5)
Add Reply
Sign In To Reply
