@Mark Boyce posted:

Wow!  That looks great, Dallas!

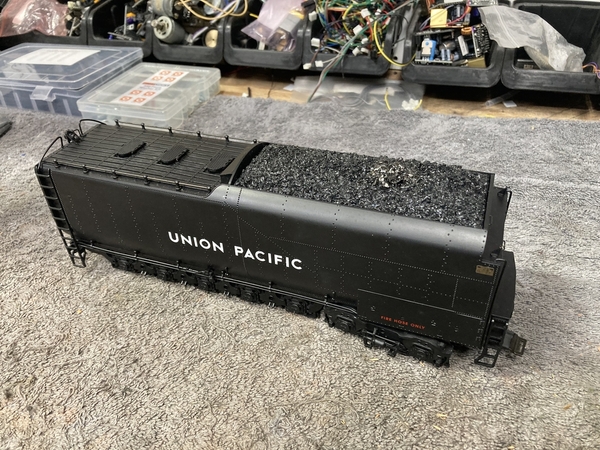
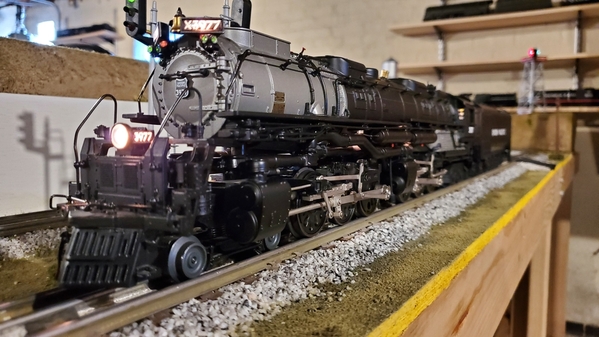
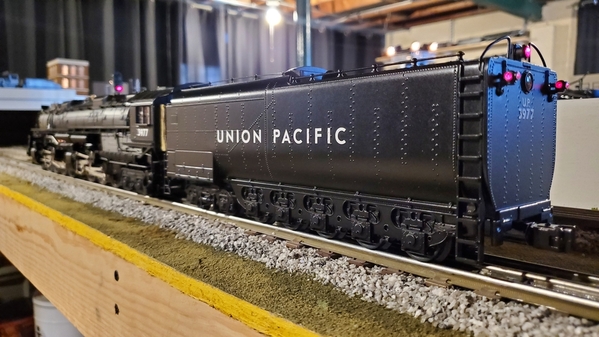
Thanks Mark.    Every once in awhile I get some extra time on my hands when Judy is snowblowing the sidewalks and driveway.

@Artie-DL&W posted:

Backup and markers look great, Dallas! I wonder how many other tenders have open connectors!

And thank you Artie.     I had no idea what as available in this tender except for a little piece that I remember the wizards of tech riting about.     

This tender was pretty plain so I didn't think anything was going to work.......but since it was a Ps 3  engine and all my other Ps3s have reverse lights on the tenders  , well ....I thought ............. hmmmmm?

@Mark Boyce posted:

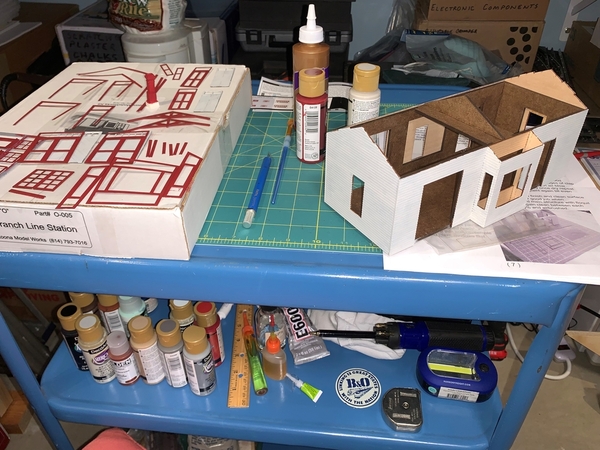
I don't know why I have neglected responding to this topic for so long.  Maybe it is because I don't have room for a regular workbench.  I pull up whatever layout space or shelf space I can find empty to use as a workbench.  Well, since the wiring is basically done on my layout, and I put a lot of tools, screws, lugs, wire away, I am using the roll around cart as a workbench.  So, this Altoona Model Works Branch Line station kit is there right now.  It is a little farther along than in this photograph with the windows and doors installed, but you get the drift.  Drift.  Yes, it is snowing again outside. 

2022-01-16 16.18.47

I like the idea of a role around cart for a workbench Mark.    It beats going back and forth between the work area and inventory bins.

Snowing here again too but I bought one of those battery operated snow blowers.      Judy loves it .

I like the idea of a role around cart for a workbench Mark.    It beats going back and forth between the work area and inventory bins.

Snowing here again too but I bought one of those battery operated snow blowers.      Judy loves it .

Thank you, Dallas.  I can roll the cart between two shelves under the layout too.

it’s snowing here too.  I got a snowblower this year too

I really need to get at it.  My workbench is a mess.  I have a Legacy PRR F3A and two TankTrain cars in a pile after the cats knocked them off the layout.  There’s also two older Atlas SD35s that I upgraded to cruise and then the LED marker lights burnt out on one (wired series) and the other one is getting all the steps and hand rails replaced since the previous owner must have been picking the thing up with oven mitts.  

What else…  Oh, a MTH C&O Greenbrier that needs a BCR and a new speaker as the current one has the typical flaking magnet.  Then there’s an MTH R50b that needs a hanger step glued back on.

I dare not take a picture of the mess.  You all will shame me for it!

AND… I heard a “bump in the night” a few days ago.  Went down this afternoon to put away some tools.  Found a shelf I had installed on the floor along with bench scope and 5 disc CD changer that it held.

I didn’t have the heart to look closer.  I just turned the light out, about face, and out the door.

@coach joe posted:

Dallas the tender likes look great.  I'll have to keep this in mind.  I've got 3 MTH steamers I haven't run in a while so I don't even remember if the tenders are lighted so I may be looking at this in the future.

Alex are the smoke and coal load repairs on the same Big Boy?

This was a first for me Joe.   I don't  know if they all have to be Ps3 s or not.   

Sure was fun to do instead of trying to rattle my brain to find out why a non functioning unit has died.

Not on the work bench, but on the test track. This 627 was given
to me with stripped gears and full of dirt. After cleaning and replacing
gears it ran good so conversion to TMCC was begun. Electrocouplers were
installed and an old LCRU was installed. This model did not com with  
lights so LED's were installed. The locomotive ran good and the
electrocouplers worked but the headlights did no work to well. The LCRU
headlight circuits change polarity at random times. This does not bother
incandescent lights but LED's don't work on reverse polarity. A bridge
rectifier and filter capacitors were added and the LED's then worked.
Now back to the work bench to make a clean version of the added
electronics.

627 Project

Attachments

Images (1)
  • 627 Project

The LCRU headlight circuits change polarity at random times. This does not bother incandescent lights but LED's don't work on reverse polarity.

I learned this lesson a number of years ago.   I tried to use the LCRX to add command to the Hot Box Reefer, I had one in the parts box.  I worked occasionally, and then it wouldn't work, drove me crazy!  I finally put a meter on it and found out about the polarity reversals!  I never ran across this with the LCRU as I always had incandescent bulbs back then, so it never came up.

I admire the kind of work you do on this kind of project Dave

Not on the work bench, but on the test track. This 627 was given
to me with stripped gears and full of dirt. After cleaning and replacing
gears it ran good so conversion to TMCC was begun. Electrocouplers were
installed and an old LCRU was installed. This model did not com with  
lights so LED's were installed. The locomotive ran good and the
electrocouplers worked but the headlights did no work to well. The LCRU
headlight circuits change polarity at random times. This does not bother
incandescent lights but LED's don't work on reverse polarity. A bridge
rectifier and filter capacitors were added and the LED's then worked.
Now back to the work bench to make a clean version of the added
electronics.

627 Project


.

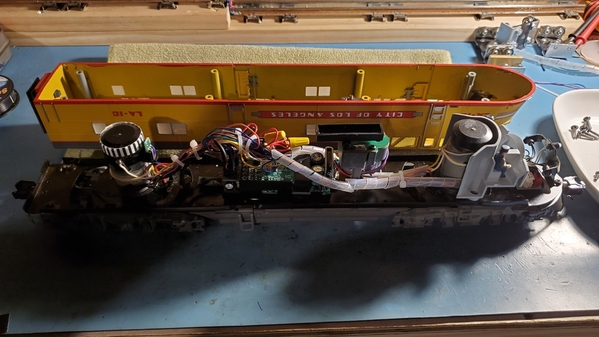
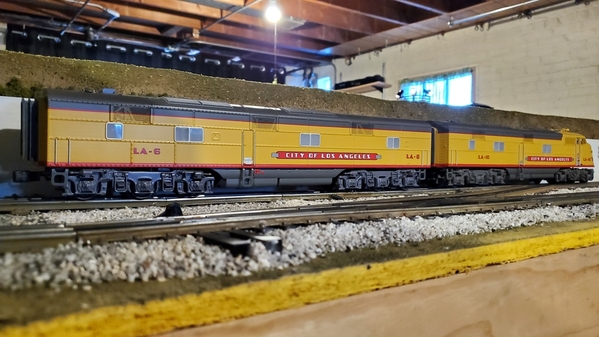
Well I finished up the COLA E6 AB set that needed boards. I picked up the trailing A unit and B unit from the MTH Premier COLA set that came out in the early 2000s. Both pieces were mint but the A unit lacked any boards but had wiring for the slave board. I have a bunch of PS2 5V harness connectors from other projects in my parts bin so I combined them with the harness in the locomotive along with a tach sensor. With a little repining and some soldering I was able to cobble together a harness. I added a PS32 board with 5V connectors and a speaker. I modified a Premier PS3 E unit sound set with COLA PFA announcements and ta da it was done.

20220126_11124720220126_12344820220126_123527

Attachments

Images (3)
  • 20220126_111247
  • 20220126_123448
  • 20220126_123527
@Lou1985 posted:

Well I finished up the COLA E6 AB set that needed boards. I picked up the trailing A unit and B unit from the MTH Premier COLA set that came out in the early 2000s. Both pieces were mint but the A unit lacked any boards but had wiring for the slave board. I have a bunch of PS2 5V harness connectors from other projects in my parts bin so I combined them with the harness in the locomotive along with a tach sensor. With a little repining and some soldering I was able to cobble together a harness. I added a PS32 board with 5V connectors and a speaker. I modified a Premier PS3 E unit sound set with COLA PFA announcements and ta da it was done.


Boy , I wish I  could " cobble "  together something like this !

REALLY Nice Job Lou .

Boy , I wish I  could " cobble "  together something like this !

REALLY Nice Job Lou .

It's not so bad when you have a bin full of scraps from prior projects 😄.

I have 30 locomotives, all of which have PS2, PS3, TMCC, or Legacy. Only 12 of them were fully functional when I got them. The other 18 either needed boards, wiring, or complete rebuilds. I've become proficient at buying stuff cheap and building it.

I've got 3 more locomotives (so I really have a total of 33) that need boards, wiring, or both and paint work. So I'm not done yet.

@Lou1985 posted:

It's not so bad when you have a bin full of scraps from prior projects 😄.

I have 30 locomotives, all of which have PS2, PS3, TMCC, or Legacy. Only 12 of them were fully functional when I got them. The other 18 either needed boards, wiring, or complete rebuilds. I've become proficient at buying stuff cheap and building it.

I've got 3 more locomotives (so I really have a total of 33) that need boards, wiring, or both and paint work. So I'm not done yet.

W O W    You sure know how to have fun with your " bin "  and knowledge.

Thanks for sharing.

@Lou1985 posted:

Thanks.

Yes those are K-Line 027 profile 072 curves.

I always loved the look of O27 track.  The profile is much more realistic.  I never understood why Lionel didn't make that their standard in the postwar era and beyond as it seems like it would be cheaper to make since there is less metal.

If they had offered it in more radii and turnout options I would have considered using it.

@rplst8 posted:

I always loved the look of O27 track.  The profile is much more realistic.  I never understood why Lionel didn't make that their standard in the postwar era and beyond as it seems like it would be cheaper to make since there is less metal.

If they had offered it in more radii and turnout options I would have considered using it.

I believe they made O Gauge track intentionally taller so that it was easier to set up on carpet.

Pure speculation on my part, though.

Back in the late 1980s, I thought I was the cat's meow with 54" diameter 0-27 track and non-derailing switches.

@rplst8 posted:

I always loved the look of O27 track.  The profile is much more realistic.  I never understood why Lionel didn't make that their standard in the postwar era and beyond as it seems like it would be cheaper to make since there is less metal.

If they had offered it in more radii and turnout options I would have considered using it.

I ended up using 027 profile 072 and 054 curves on my layout with Ross switches. Here's the funny part. The 027 rails are actually shorter than Ross or Gargraves rails. I'm not talking about overall height with ties, just the rail itself. I added extra ties and it doesn't look half bad. One day when I rebuild this layout or build another I'm going to go with 084 and 072 curves, so I can run articulateds on the inner main as well.

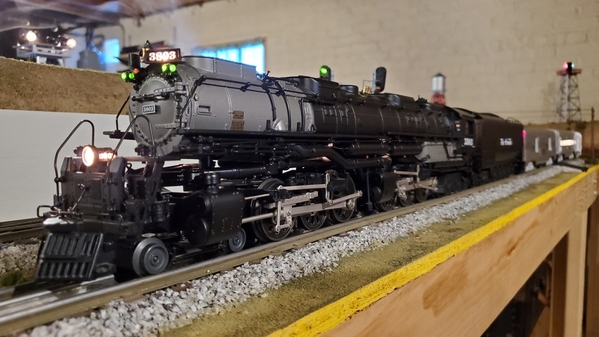
Funny reason why I have a Challenger. So a UP Challenger is big. I have 3 other articulateds besides the Challenger: SP AC6 4-8-8-2 Cab Forward, SP AC9 2-8-8-4 Yellowstone, and a DM&IR M3 2-8-8-4 Yellowstone. They other 3 locomotives are about the same length (locomotive only, not counting the tender) and the Challenger is only about 1/4" or so shorter than them. So if you look at the video you'll notice the Challenger is running next to a wall on my layout that supports an overhead "downtown" and passenger train parking below. That wall is 1X6 pine and can't be moved. Inside the tunnel the trains run through on the main line is an 072 curve. All the articulateds I have clear that wall by at least 1/4"coming off that 072 curve, so plenty of room. I originally wanted a Big Boy instead of a Challenger (who doesn't?) so I borrowed a friend's to check clearances. It cleared everything on my layout except that wall. The Big Boy is so much longer than my Yellowstones that it's smokebox door smacks right into that wall. So that showed me if I want a Big Boy I'd either have to rebuild my layout or get a Challenger. I went the easy way and bought a Challenger 😉.

Lou:  I totally agree.  The size difference between my recent VL Challenger and my JLC Legacy Big Boy is shocking.  The difference in overhang is even more shocking.

I hate to say it....but I don't run my Big Boy that much b/c the overhang is so massive.  And I have to move "things" out of its way.

Fortunately, I've got a Big Boy Running Base.......

@Lou1985 posted:

Thanks.

Yes those are K-Line 027 profile 072 curves.

I used them too, along with O42 and O54.

K-line is the only company that made O27 height O72 curves, and then for only about 2 years. I buy 'em up whenever I see them (as long as the price is not nuts!). Trouble is I rarely see them. I have a small inventory of them for future possible use

I commented because the Challenger looked so good on them - would have thought it required a wider curve tol ook so good.

@Lionelski posted:

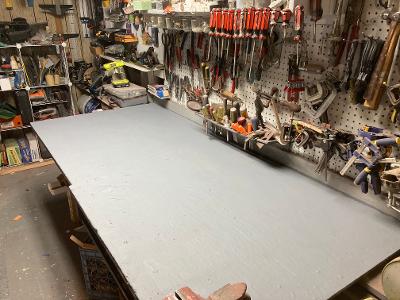
For the first time in years, NOTHING on my workbench but a fresh coat of paint!

No mess, no woodworking projects, no household repairs, no train repair projects, no scenery projects, no test station, no engine cradle, no tools, etc.

I'm sure this will last about 10 minutes after the paint dries!

painted workbench

I knew this would not last long. Here is my workbench with my Plasticville treasure box emptied on it - I know that there is at least on more project in there. As a matter of fact, I already have something in mind.

IMG_7217

Attachments

Images (1)
  • IMG_7217

Add Reply

Post

OGR Publishing, Inc., 1310 Eastside Centre Ct, Suite 6, Mountain Home, AR 72653
800-980-OGRR (6477)
www.ogaugerr.com

×
×
×
×
Link copied to your clipboard.
×
×