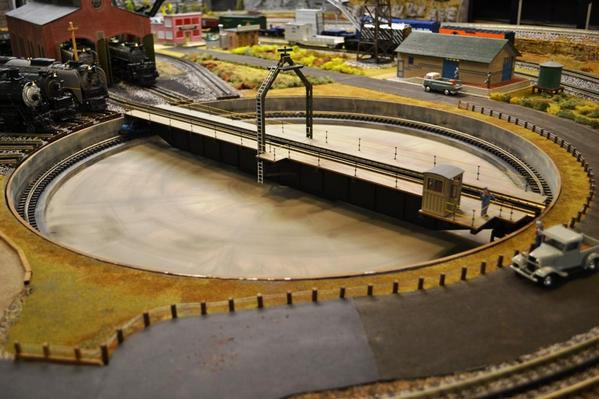
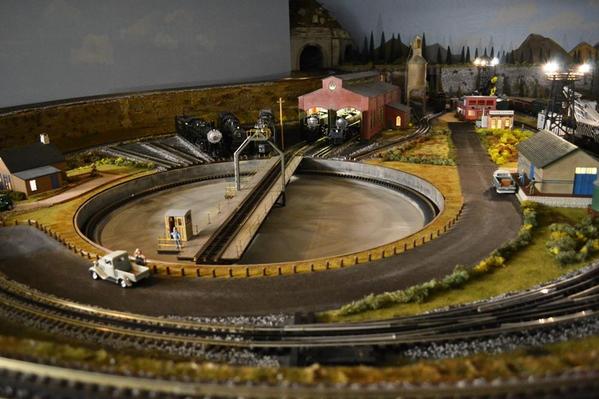
Wow, all looks fantastic! I think we should all move to the same neighborhood and just rotate what house to go to for dinner every night. We can start at Alex's house.
Hello to you and your wife. Thanks as always for your willingness to share your layout.
Buzz Lee
Fantastic layout.
Alex, Fantastic job. I really like the weathering.
VERY NICE Alex
Ken M
The layout looks great Alex. Really love that grain elevator, especially the way you got it to fit that curve.
Thank you all for your comments! Makes sharing a joy.
Zett,
Cooking is my wife's favorite hobby, so you are very welcome to dine with us!
Buzz,
Judy says hi as well.
Al,
I was apprehensive of weathering the turntable and mess it up, same concern I had with the grain elevators. But they turned out OK. See below - - -
Ken,
Will you be coming to the Great Train Expo in St Charles next weekend? If you do, make sure to stop by.
Elliot,
Oh, yes - Alan (leavingtracks) made that for me. I gave him the dimensions and a sketch of the space I had available, he custom made it, and it fit perfectly! I just added the piping and the weathering - very cautiously.
Thanks to all again.
Alex
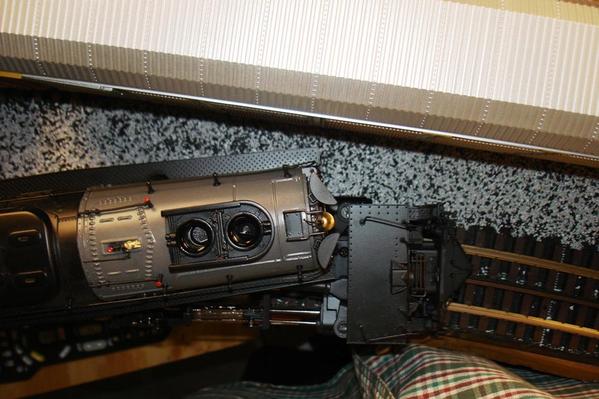
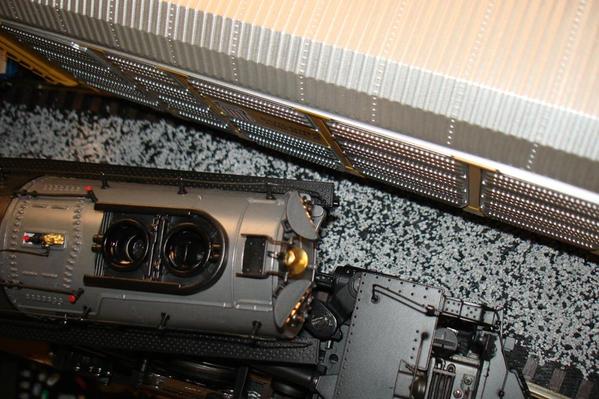
A couple more picture of the Millhouse River Studio turntable under different lighting.
Attachments
Looks great Alex............ ALOT of new details. Really nice job buddy.
Alex - simply fantastic! I wish I had your skill.
Hi Alex,
The layout looks fabulous, awesome scenery and superb detail !!!!!
Say hello too Judy
Thanks,
Alex
Alex,
It's always a pleasure to see your updates. Great work.
Andy
Patrick - Yes; going around the second time allows for more details as I am not in that great of a hurry. (Still trying to catch up with you, though.)
Sean - Oh, I don't know about skills, but old age does provide experience.
Alex - I will.
Andy - I'm always glad to share.
Thanks a lot for you nice comments!
Alex
Alex...just caught this update... The layout looks fabulous!! Going over it several times like you have...and adding details has really turned it into a museum masterpiece. I like the weathering as it is not overdone...it looks perfect to me. That grain elevator is nice too!!![]()
By the way, when Alex says Judy's hobby is cooking...what he really means is Judy is a master chef...let me tell you...I know this from experience. The layout is nice but the cherry on top is Judy's cooking. When you are a guest at Alex and Judy's home, it is like being on the best vacation cruise![]()
![]() .
.
Alan
Wow Alex, looks great. Love all the new details and weathering....especially on the grain elevator and the TT pit. Excellent job.... OGR should do a feature in an upcoming DVD/Blu Ray for Great Layout Adventures ![]()
Alex hope to come to the show
Ken M
Looking great with the details Alex. Ive learned quite a lot from your thread. Thank you!!
LOS,
• The grain elevator and the turntable are among the most eye-catching elements on my layout; fortunately, the weathering did not change that, and perhaps made them even better.
• Good enough for Great Layout Adventures DVD? Well, I am not sure about that, but really do appreciate your compliment.
Ken,
I'll be looking for you.
Louis,
Details are slow to develop but lots of fun, and the end results 'usually' are rewarding.
Judging by the progress on your excellent layout, you will be doing your own detailing very soon.
Thanks to all!
Alex
First the "gushing" awesome..inspiring amazing..a worthy accomplishment since 2011...
you have set the bar quite high...(makes my layout look awful..which it is.but I have reasons) . such focus and single minded determination.a clear plan is a must...
.I am always second guessing my designs...(I built many Ho layouts that never got past track because of track changes, in search of the layout that would do it all..)
now I have MTH O scale..collecting for over 10 years..have DCS and only 5 steam and one diesel switcher..and about 40 rolling stock..cost has been a barrier..
which leads to my questions, please pardon if you have already answered, I have not perused every page on your posts,,,
What system are your running..?
Are all your engines and cars MTH?
is there any pictures of your system?
Also interested in your upcoming patented idea..
a few personal questions..
what was your estimated budget for this extravaganza? did you manage to stay with in it..did you start collecting before 2011 or is all this rolling stock and engines since 2011?
will you adopt me? lol
thanks
1drummer,
I started in O-Gauge in January 2008. Prior to that I was in HO for many years and five layouts.
I started with MTH Premier locomotives, the DCS system with one Z-4000, Fastrack and mostly MTH Premier and RailKing cars. I added the Legacy system a couple of years ago and now really like the Lionel Legacy locomotives. I have added another Z-4000 and one ZW-L.
There are many pictures and videos of my current layout in this thread. If you start at the beginning, you will get a good idea of the construction process and progress. I also have tried to provide useful hints along the way.
My 'patent pending' deals with the detection of the actual position of the turnout points using a non-contact method. I learned that monitoring the switch machine may give you the wrong feedback if something blocks the points. The turnout machine may have moved to the desired position, but not necessarily the points. My method, which does not place any load at all on the turnout machine (and does not use reed switches) will let you know if the points are not fully thrown in the correct or desired position.
Well, we have five grandchildren plus two more (neighbors) for whom we are surrogate grandparents, and they keep us plenty busy already, but I appreciate the offer.
Thank you.
Alex
While filming the video below, I had the opportunity to measure the clearances between the Big Boy and auto-rack cars passing each other. The auto-rack cars are 20" long, and the tracks are 4-1/2" apart, center to center.
There was no problem when the Big Boy was on the outer Ø108 curves, as it really does not encroach much in the inner part of a curve, but I was concerned about its front end protruding too far and contacting the auto-rack when the Big Boy was on the inner Ø99 curves with the auto-rack cars on the outer Ø108 curves.
Well, it was close, but no too bad - at least a 1/4" clearance.
And my most recent video. Yes, I posted it elsewhere, but it should be part of this thread as well.
Thanks!
Alex
Attachments
Great!
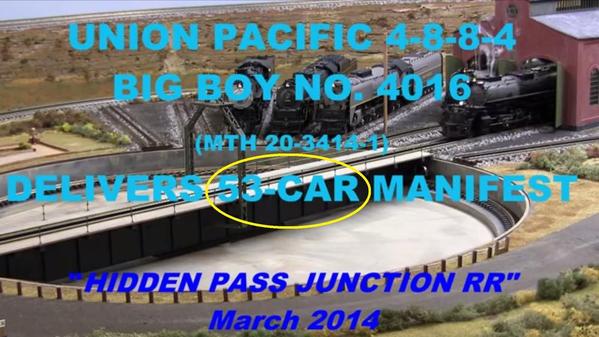
Alex, how many cars are you pulling with that
Big Boy. I counted 53
Very nice
Ken M
Hi Ken!
You counted correctly - 53 cars. The opening screen includes this bit of information, but I selected a color for the letters that makes them hard to read.
Thank you, and we look forward to you visiting us soon!
Alex
Attachments
Alex opens his house a number of times a year for all who can come by and view first hand what a marvelous layout it really is. I have been fortune enough to visit twice and am in awe each time. Thank you Alex for sharing your layout AND they technics you use to build and tweak it into the dream it is today.
An electronics magician, Alex comes up with ingenious ideas on how to get something to work the way he envisions it should.
And Alex, thanks for showing me the MTH remote capability to “Record/Play Back” what a neat feature, and so cool to watch it on Your layout!
Dan
St. Louis
Dan you are so right, if you come within 100 miles of this layout, you need to contact Alex. He and Judy will make your day....by the way, you will enjoy the layout also.![]()
Dan,
I am so glad you have enjoyed your visits here; we enjoyed having you over as well. And I really appreciate all the factual information you have shared with me on how real trains (currently) operate – most interesting and educational.
I have a video planned of the UP diesels operating in the diesel facility using the DCS Record-Playback feature as you saw – it will be called “UP Diesel Shuffle”, coming soon to a YouTube near you.
Roger,
Don’t let the few extra miles over 100 keep you away for long; we are anxious to have you guys visit us again, and Judy is ready.
And thank you both for your nice and considerate remarks.
Alex
Alex, This is Gary, Auburndale Florida. We talked on the phone right after you completed your Trestle Bridge back in 2011. I took several notes and still have them on building the trestle bridge. It is now 3 yrs later and I am just now getting to the trestle bridge. I was wondering if you ever wrote any instructions and building tips? If you did I would sure be interested in getting a copy. You mentioned an excel spread sheet in a very early post where you figured out all the lumber dimensional cuts. Would you be willing to share that also?
Thanks,
Gary
I just re-watched the Big Boy video.....it is fantastic!
Peter
Hi Gary,
Yes, I remember our conversation well. And yes, I wrote rather detailed instructions for building the trestle, and they were published in a 9-page article in OGR Magazine Run 256, April/May 2012. A printout of the resulting Excel spread sheet was also included. Whether you are able to get a hold of that OGR issue, don't hesitate to contact me if you have any questions.
Peter,
Thank you very much for you comment. That video did turn out well and a lot of people liked it.
Here is a link to that video:
Alex
Alex, Great video. I guess I must have missed this the first time around. Hope that you and Judy are doing great.
Thank you so much Alex, this is great. I found the magazine and article. Hopefully I can start working on mine soon. Will keep you posted.
Alex,
As you know I am also using Atlas track. I just wanted to tell you that I used your method of fastening the power to the track and it works perfectly. Also wanted to thank you for figuring it out and posting here for the rest of us. Can't wait to add your point indicators (after I get the switches wired that is, coming soon).
I used the 5/64" bit, ORG's #16 wire and the #0x1/4" pan head screws from Micro Fasteners just as you described. It got pretty easy to do after the first couple connections. It's only a 6'x16' layout and I only have my DCS hooked up right now, but it works perfectly also black rails and all, even with some of the still dirty, used track I have recently purchased (today may be cleaning day).
I also followed your method of track laying using wood blocks with notches for the rails. Drew the curve radius (radii?) with a compass attachment I had for a yard stick (O-63 is the biggest curve I have and O-54 the smallest). It came out pretty well. Had a small gap here and there, less than an eighth of an inch, but for the most part it fit very nicely. I am thinking the few gaps I had may have been due to the used track I had? I had to adjust some of the rails by sliding them one way or the other by about 1/4" or so. One rail would be uneven with the rest on the same piece of track. Atlas track and switches have been a little hard to come by lately, or I would have probably tried to use all new.
Anyway, thanks again for posting all the tips for the things you did while building your layout. It's helped me a lot. I plan to re-do all of mine in a year or two as I can afford to enlarge it, so your post here has been a great learning experience, especially since we are using the same track. That's a great way to connect the power feeds and will allow me to easily re-configure when the time comes.
Alex, this question is a couple of years overdue but when I first joined the Forum, I was checking out everyone's techniques, style of building and designing and I was impressed with the deliberate way that you built and designed your layout and also the incremental steps that you took when building. My question pertains to your spacers that you designed for your track elevation. What type of wood did you use, I believe I can do the same thing in creating the elevation but I'm kinda questionable on what type of wood stock did you use to cut the individual segments.
Alex, I love following your progress. It has been some time since I visited your layout due to health issues. Hope to get up that way again soon, maybe when there is a show near by. Keep up the great work.
That's a great video and a beautiful layout. You have really created a beauty.
I don’t know how I had the time to finish the basement and then the layout while I was still working! I have now been retired for almost three years, and I don’t have enough time to do all I want to do!
I apologize for not answering your posts sooner. I have been reading the “Hi-Rail, O-27 . . .” section o the forum almost exclusively, and did not see these posts.
Roger, Gary, Tom, Maershelangelo, Mike, Chris -
Thank you all for you very nice comments – they are much appreciated!
Gary,
Yes, please – do keep us posted with your progress on the trestle.
Tom,
Glad to see that some of my methods are working for you as well; and you are coming along fine. Hopefully, the Point Position Detectors will also complement your layout.
Marshelangelo, you wrote, in part:
"My question pertains to your spacers that you designed for your track elevation. What type of wood did you use, I believe I can do the same thing in creating the elevation but I'm kinda questionable on what type of wood stock did you use to cut the individual segments."
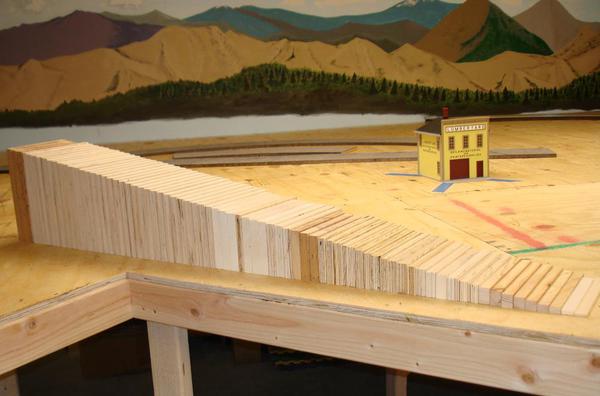
I used an assortment of mostly scraps of 3/4" plywood and some pine. I spaced the supports every six inches, and each is 1/8” higher than the previous support. This results in 1/4" rise per foot, or about 2% grade (0.25”/12” = 0.02). I used 76 supports for a total of 9-1/2” rise, which took about 38-feet of track.
One thing to keep in mind is that although the track may rise 9-1/2” (in my case) the clearance is not this at all. ![]() This 9-1/2” is from rail top to rail top, so we have to subtract the rail height, track ties, and roadbed surfaces under the track, and any other support.
This 9-1/2” is from rail top to rail top, so we have to subtract the rail height, track ties, and roadbed surfaces under the track, and any other support.
For the upper level, in my case, I ‘lost’ about 1/2" for rails and ties (Atlas track), 1/2" for the QuietBrace, 5/8” for the plywood, and 1-1/2” for the cross braces under the plywood; all of which added up to 3-1/8”, which left me with a net 6-3/8” clearance for the trains.
To support the grade track itself I used only the wood supports and the QuietBrace under the track. I tested the rigidity of the Atlas track over just the QuietBrace, and with the supports every six inches there was no detectible deflection with a 15 lb load applied at a single point between the supports. This would be the extreme, as heavy engine would not be supported by the track at a single axle, but the load would instead be spread over a foot or more.
Hope this helps, and good luck!
Alex
Attachments
Thanks Alex, you have been a great help. The position indicators are definitely in the cards for my layout! I might add, they just keep getting better too. I am changing things around a bit and hope to have things figured out and my mind made up pretty soon.
I don’t know how I had the time to finish the basement and then the layout while I was still working! I have now been retired for almost three years, and I don’t have enough time to do all I want to do!
I apologize for not answering your posts sooner. I have been reading the “Hi-Rail, O-27 . . .” section o the forum almost exclusively, and did not see these posts.
Roger, Gary, Tom, Maershelangelo, Mike, Chris -
Thank you all for you very nice comments – they are much appreciated!
Gary,
Yes, please – do keep us posted with your progress on the trestle.
Tom,
Glad to see that some of my methods are working for you as well; and you are coming along fine. Hopefully, the Point Position Detectors will also complement your layout.
Marshelangelo, you wrote, in part:
"My question pertains to your spacers that you designed for your track elevation. What type of wood did you use, I believe I can do the same thing in creating the elevation but I'm kinda questionable on what type of wood stock did you use to cut the individual segments."
I used an assortment of mostly scraps of 3/4" plywood and some pine. I spaced the supports every six inches, and each is 1/8” higher than the previous support. This results in 1/4" rise per foot, or about 2% grade (0.25”/12” = 0.02). I used 76 supports for a total of 9-1/2” rise, which took about 38-feet of track.
One thing to keep in mind is that although the track may rise 9-1/2” (in my case) the clearance is not this at all. ![]() This 9-1/2” is from rail top to rail top, so we have to subtract the rail height, track ties, and roadbed surfaces under the track, and any other support.
This 9-1/2” is from rail top to rail top, so we have to subtract the rail height, track ties, and roadbed surfaces under the track, and any other support.
For the upper level, in my case, I ‘lost’ about 1/2" for rails and ties (Atlas track), 1/2" for the QuietBrace, 5/8” for the plywood, and 1-1/2” for the cross braces under the plywood; all of which added up to 3-1/8”, which left me with a net 6-3/8” clearance for the trains.
To support the grade track itself I used only the wood supports and the QuietBrace under the track. I tested the rigidity of the Atlas track over just the QuietBrace, and with the supports every six inches there was no detectible deflection with a 15 lb load applied at a single point between the supports. This would be the extreme, as heavy engine would not be supported by the track at a single axle, but the load would instead be spread over a foot or more.
Hope this helps, and good luck!
Alex
Hey Alex, pardon me for the utmost case of extreme tardiness, I was looking over at your page one of the Hidden Pass Junction and saw that you needed a coating of some sort for your wall mural, (I apologize because this was on page 1 and you're on page 10 now) try Krylon Fixative, I believe it comes in a matte finish, maybe even a gloss finish but you can get this maybe at a local hardware store but definitely at an art store, it will serve as a protective for drawings, photos and paintings. I hope it will work on your mural depending on what type of surface you painted on. Once again, apologies for my tardiness, I didn't see that until my second time around reading. - MARSHELANGELO
Thanks to marshelangelo for reactivating this thread. My father introduced me to Marx/Lionel back around 1950 & this is one of the most impressive projects I've seen to date. I've read the 10 page thread & watched all the videos over the last 3 days. All the superlatives have already been used & all I can add is my own WOW! I've been using TMCC & DSC for over 10 years, but am new to OGR (thanks to LHS). I can't decide what my favorite area is; there are so many. It comes down to the Trestle, TT, & Subway Mall. I also like the eclectic style of weaving the Game of Thrones, Downton Abbey, etc. themes into the videos.
My wife has been after me to free up some storage areas & your under table cart idea is perfect. I plan on moving the swinging/hinged doors & attaching them to the end of each cart. When the carts are in place, they will be located under the table using 1/2" dia. tapered pins & bushings in each upper corner.
Thanks for the education.
To me, you are ingenierio/artista, a true Renaissance DaVinci!
Matt


