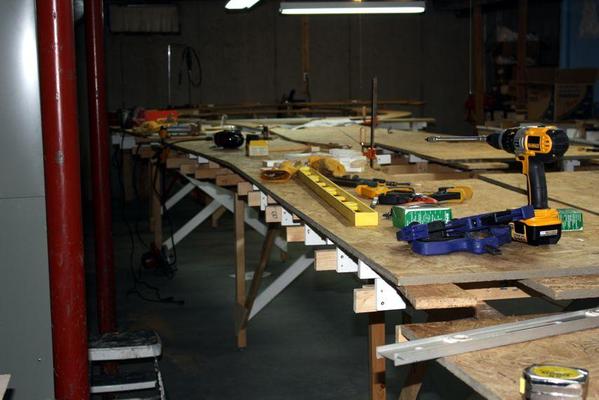
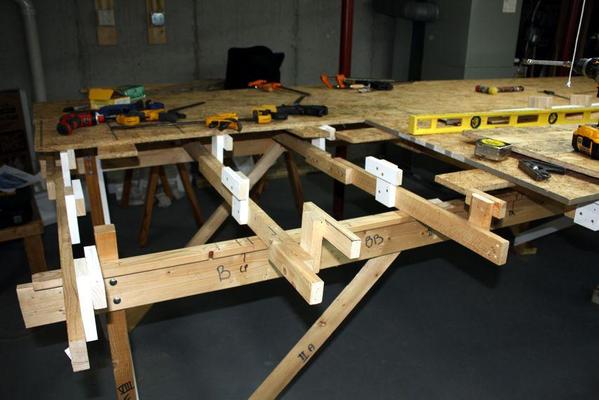
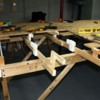
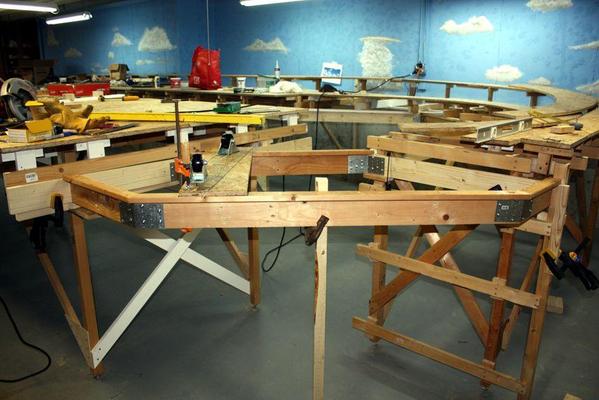
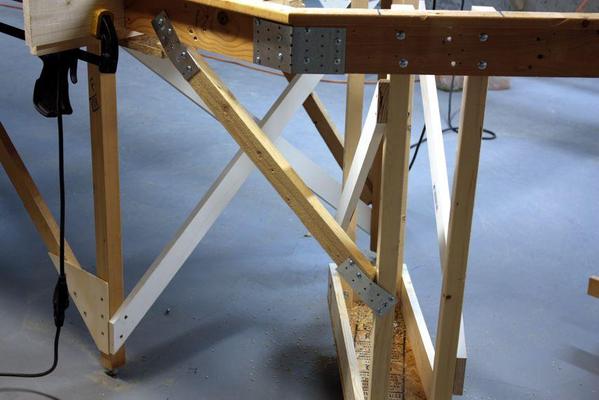
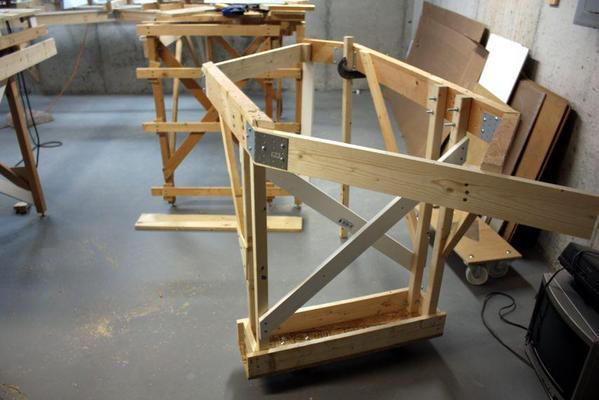
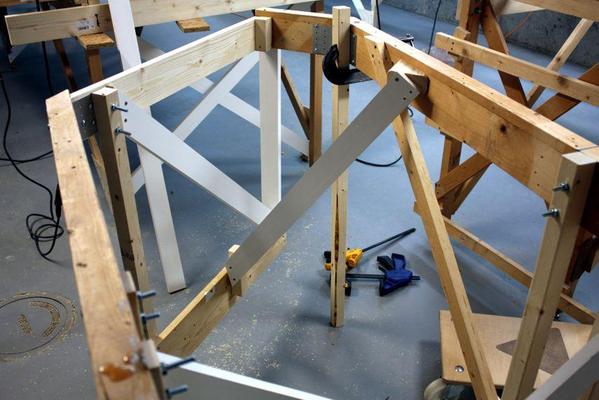
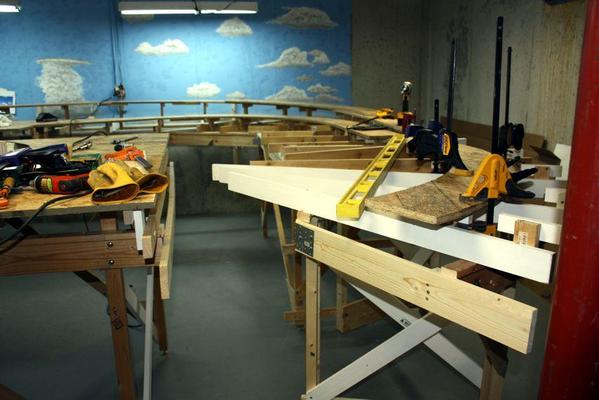
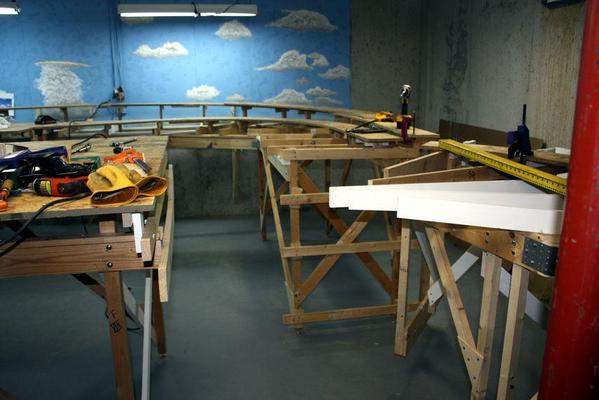
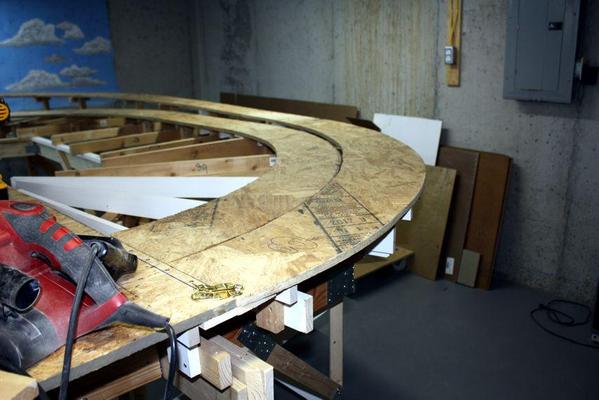
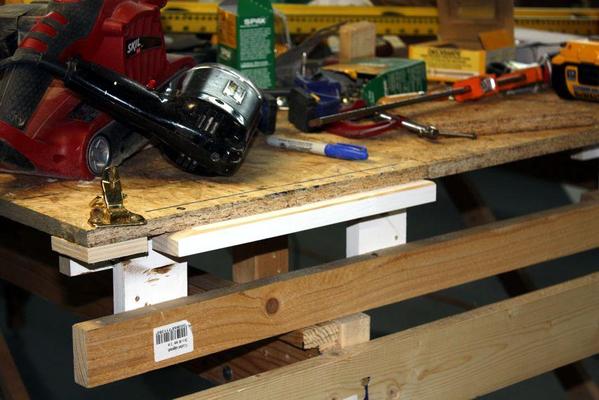
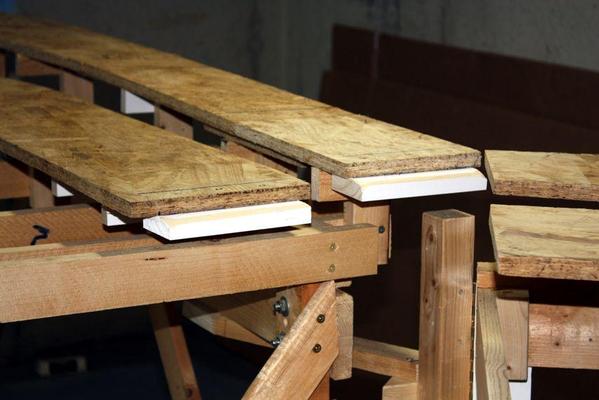
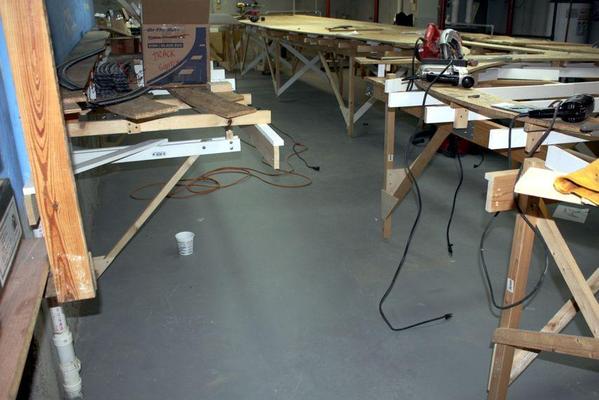
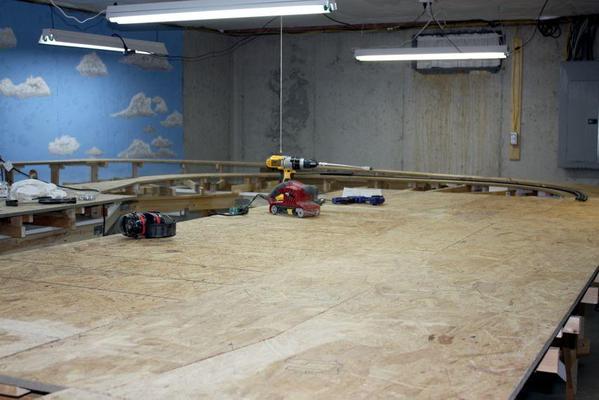
Didn't have much time to work today and got one more sub-roadbed piece tied in, plus positioned another one. It was time to break out the "water-tube level'.


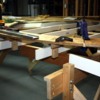
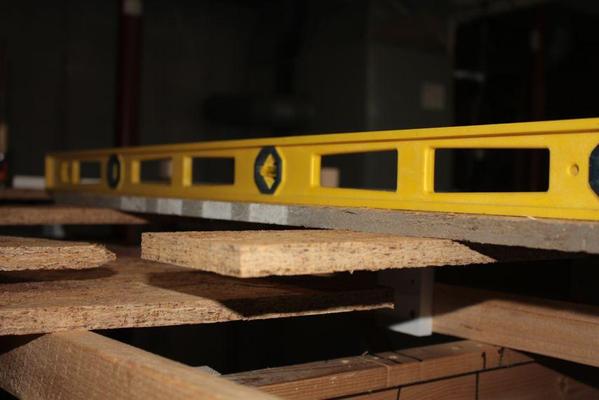
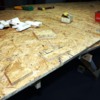
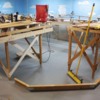
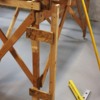
 Left end 01


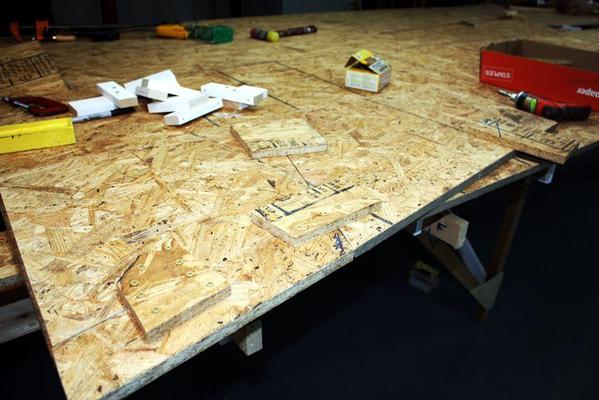
Besides using the carpenter's level, I periodically take a measure with a tape from the floor to the top of the OSB. It's supposed to be 43-1/4". This is just a check since I have no idea how level the floor actually is. When I put this piece in I noticed that the floor-OSB measure was over 43-1/2". I don't want any errors to start stacking up since the layout is so big it could be a couple of inches off at the other end, so it was time to break out the water-tube level. I used this originally in the layout's German iteration. If you've never used one, it's a great way to capture a level reference point and replicate it over a large area.


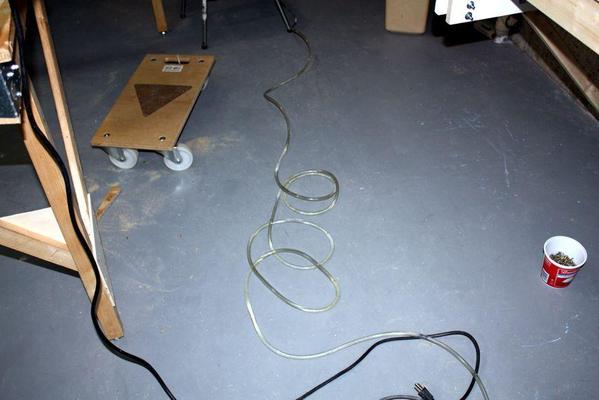
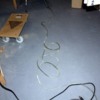
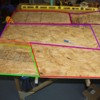
It works on the principle that water in a curved tube will always seek the same level at each end. You fill the tube with water and make sure there's no entrained air. Hold the two ends together and bring them to the reference level point. Find a way to affix one end of the tube next to this reference point and use a sharpie to mark the water level in the free end of the tube.


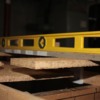
Water Level 1


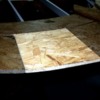
Carry the free end to the point you want to measure, making sure there are no kinks


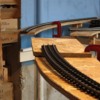
Water Level 2


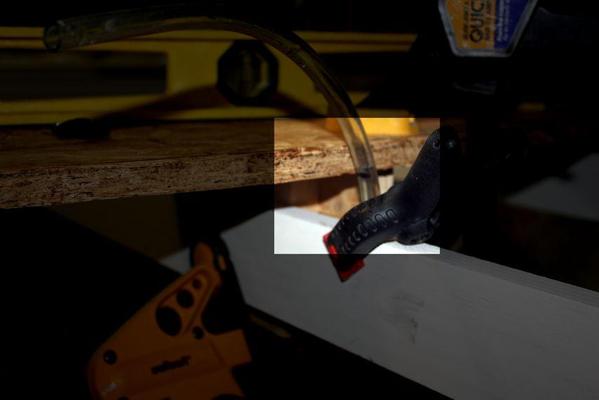
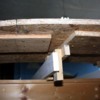
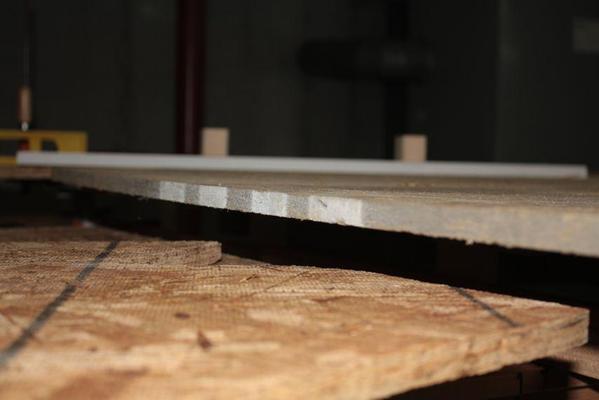
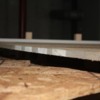
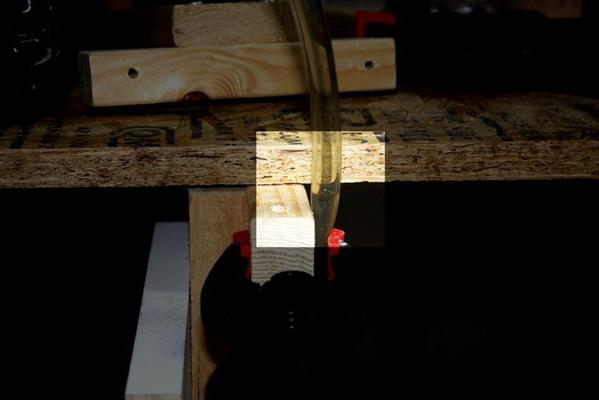
There's a little stopper you put in the free end so it won't spill when moving. At the working end, align the water level with the Sharpie reference mark and hold it up the piece you want to level. Use a clamp or tape to hold the tube there so you can clamp the riser at this location. The two points are now at the same point regardless of what the floor is doing. Make sure you remove the stopper before taking the measure since the water won't move with the stopper in.


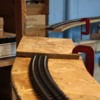
Water Level 3


I won't have to use it everywhere, but will use it every so often just to make sure there's no systematic error creeping in. An easy way to fill the tube without air bubbles is to siphon the water into the tube. I filled the utility sink, put the tube in and laid the rest of the coil on the floor. Suck on the end of tube to get it going and just watch the tube fill up. When it reaches the end, you're done.


Here's an interesting before and after showing how all the old layouts have now been subsumed into the new one.


BEFORE

Before


AFTER

After


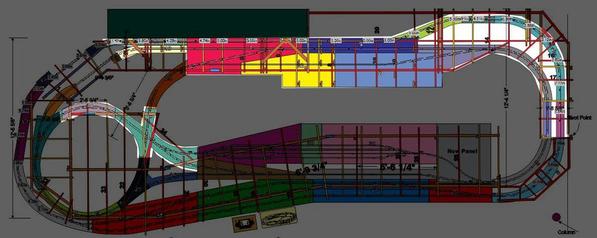
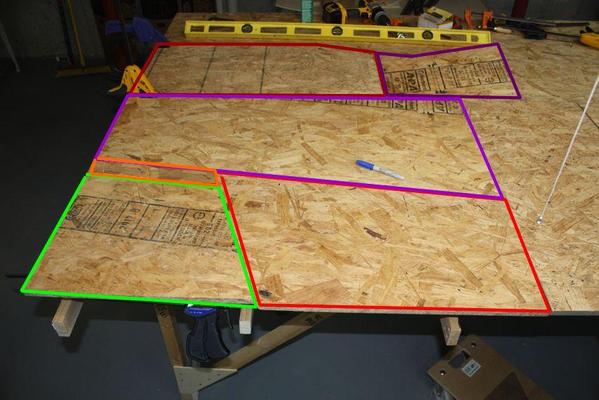
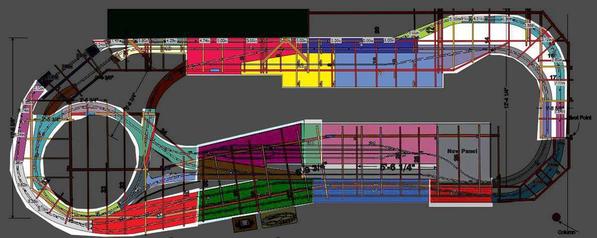
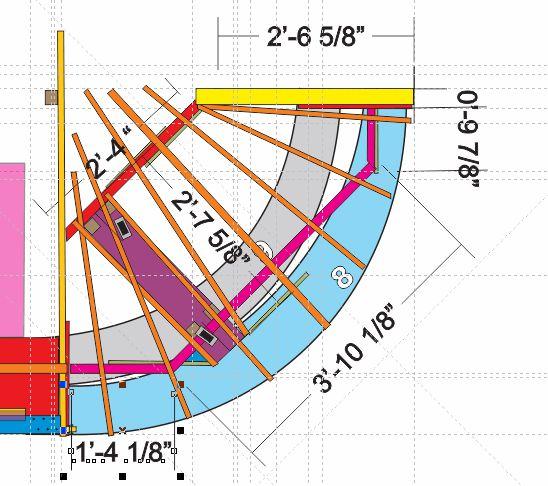
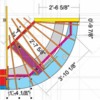
And here's the progress schematic pic for today.


Progress Schematic 4


Little by little, OSB panel by OSB it's starting to fill in.

Attachments

Images (7)
  • Progress Schematic 4
  • Water Level 3
  • Water Level 2
  • Water Level 1
  • Left end 01
  • After
  • Before

I've been working on the railroad almost the entire week and have made significant progress on the benchwork. I've have six pieces of conventional benchwork left to install with the rest being the swing-out portion and the area for the bridges. I've got a lot of pictures today.


After I measured and laid down the left end elevated curve (actually its a grade that returns to base level) I was getting suspicious that all was not right. So I clamped up some pieces to better visualize what was happening and here's what I saw.
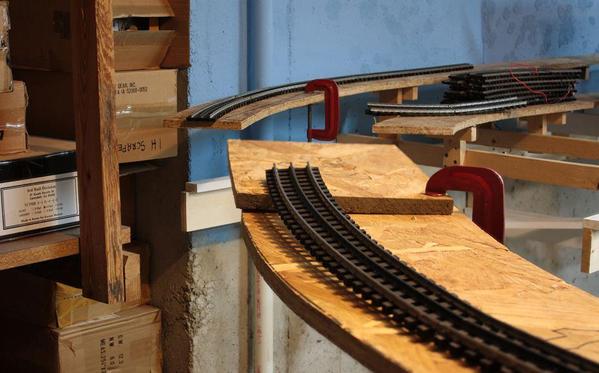
 

 Bridge end before


You can clearly see that both ends leading up to the gorge do not meet. I'm not sure why since I measured from the center of the inside circle to the center of the outside and used this dimension to position the outer curve relative to the rest of the installed road bed. So I removed all the screws holding the OSB to the risers and pulled the whole curve assembly out about five inches. I basically just sighted over the corner and stopped pulling when they lined up. It took less than a half hour to make the adjustment.


Here's the after picture. While it's still not perfect, I can work with it.
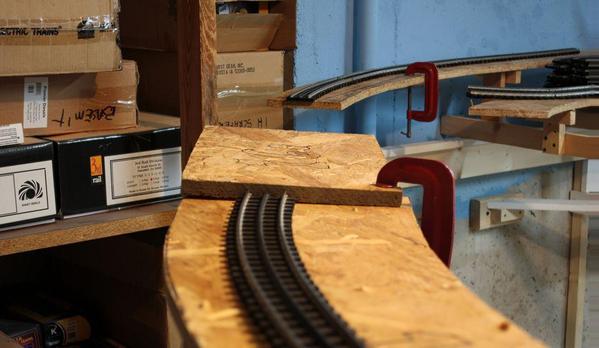
 

 Bridge end after


With that fixed, I glued filler pieces into the v-shaped gaps that showed up as I "bent" the curved piece to conform to the new pattern needed for the bridges; which BTW have been ordered and are in transit. They're kits by Plastruct and look pretty real. I may have to shorten their 30 inch length since I still don't have enough straight track leading into the bridges. My long steam engines have some significant overhang on the outside of corners and they may hit the bridge. Being kits of a bunch of structural steel replicas, I may invert the bridges and make a truss deck bridge. With all the structure under the tracks, the engines won't have anything to hit. I will have to make the gorge deep enough to give realistic clearance under the bridge.


Working around the curve, I tackled the big piece that I laid out backwards. It required a "radical" fix, squaring up the angular end that was backwards, and pulling in a filler piece that matched up to both pieces.
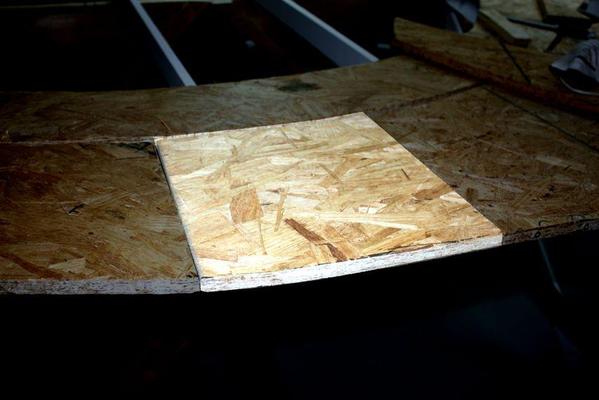
 

 Right end patch


And here's the splice plates underneath that stiffen up the whole assembly.
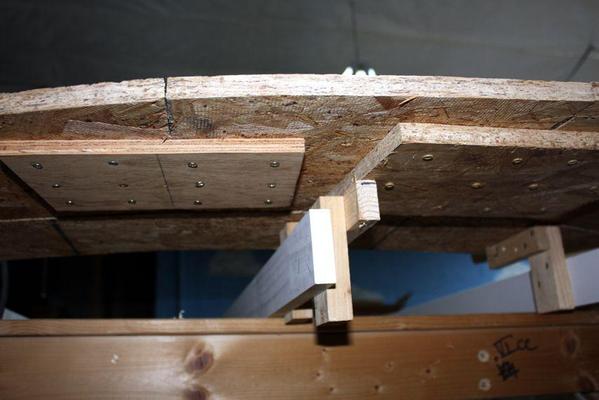
 

 Left end large fix 3


I'm using ply and OSB for splice plates instead of the Simpson Strong-tie plates, partly because I have too many screws sticking through that I need to grind off when I use the thin sheet metal plates. They're also stiffer. I'm making sure that I put the splice plates on each piece before it's onto the risers. It's easier to put them on at least one side when I can flip the OSB upside down and work standing up. Once the piece is one, I still have to put the screws into the other half working over my head, but it's only one side.


I then moved on from sheet to sheet. I'm now having to handle some pieces that are almost a half sheet of OSB and they're heavy; too heavy to push up in the air with a riser in my left hand and a quick clamp in my right. I needed a tool to help me out. This morning I realized I could make a simple jig that would support the sheet at the proper height making it easier to fit the remaining risers underneath. Remember; one end is already resting on the splice plates of the previously installed OSB panel, so I just have to raise the other end under it's level. The sheets are bowed in both directions, so I put the level between the high spots and push a riser into the middle until there's no gap under the middle of the level. Here's the jig.


 Setup Jig


I just lift the sheet, slide the jig under it and supported across a joist. It works. It greatly sped up the installation of the big pieces with less wear and tear on me. I don't place all the risers under the sheet. I Just install one at each joist with one screw. I then take the OSB off, level the riser cleat and put the 2nd screw in to fix it. Then I clamp the level to the top of the installed risers and clamp the other riser on the joist so it's pressing up against the level. I fasten this one with one screw also, level that cleat and then put in the second screw. This insures that all the risers are dead flat and at base reference. When I put the OSB back on top and start screwing the cleats to the OSB from underneath, it usually pulls out all of the warp and the sheet is dead flat. Neat!


Here's what it looks like when the OSB is pulled off and all the risers are in place.
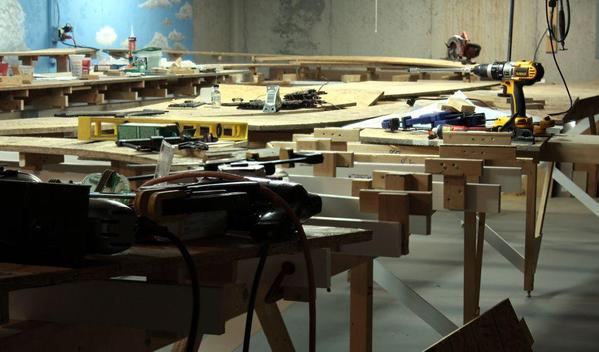
 

 Riser Forrest


Here's the progress shot showing the sheet that was just being installed in the above picture.


 Progress Schematic 8


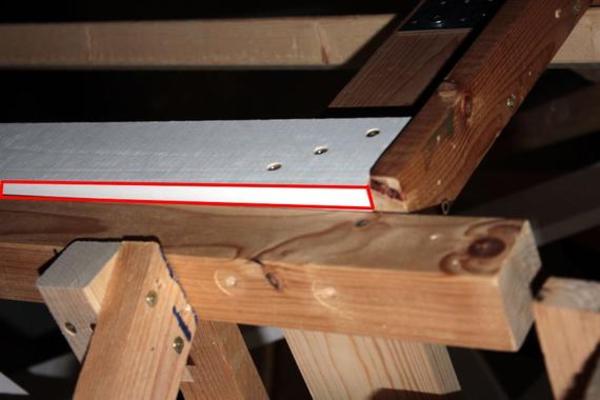
The next piece went in cleanly. The piece after that needed a little trimming to align perfectly to its neighbor. Here's a shot showing the edge that I needed to trim with the saber saw. It's getting easier to saw stuff since I have a lot of study tables all over the place to clamp a work piece to use the saber or circular saw. Speaking of saws, I think something's going wrong with my Craftsman Power Miter saw. After cutting a lot of pieces in succession, the auto-brake is not working or working intermittently. It just started doing this. It's not to scary since the saw has an effective blade guard, but I have to be careful when bringing the saw down to align another cut.


I've photoshopped this picture to highlight the area.
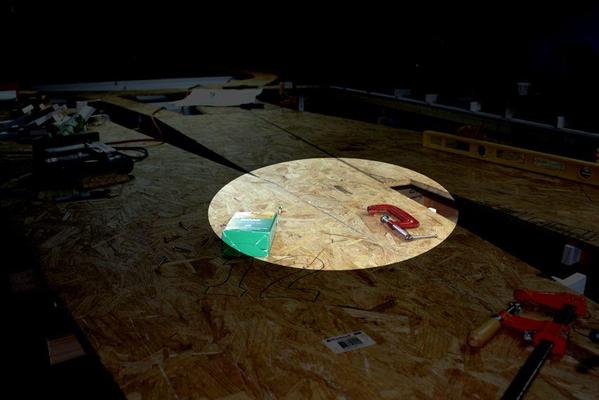
 

 Joint repair


And here's the schematic showing where we are now.
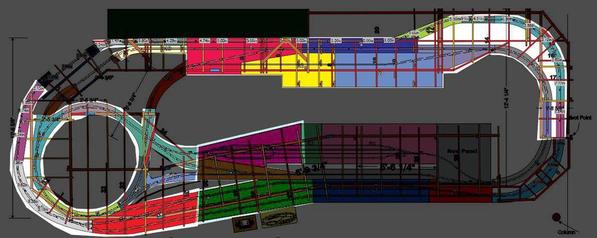
 

 Progress Schematic 9


The gray OSB panels are added since the original design. When I added the run-through rail yard, I needed to put some wood into the gap. I'm also adding some rectangular OSB to fill in what would be just open joists. There are buildings and structures that are going into these spaces. All of the OSB will be done by the end of the month. We're taking a trip back East and my wife and I going to York. I used to attend them religiously even when I was living in Germany, I got the York show. Since we moved to Louisville, it became a bigger deal to get there. This will be my first visit in 3 years. Unfortunately, I've dropped so much cash on the rebuild so far that I may not be able to buy anything.


One thing that's sure when you almost double the square footage of a layout... it takes tons of risers and cleats. I've completely consumed all the risers from the earlier versions and now in production making new ones. Here's what that looks like.
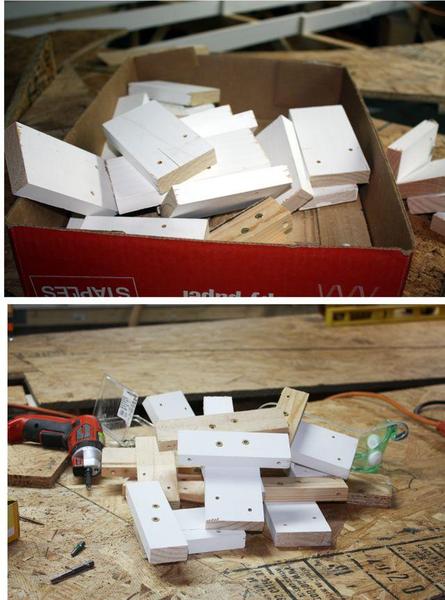
 

Risers-stinking risers


I thought I had enough 1X3 stock to make the riser leg. I had four 8 foot lengths of furring strips that I've had for years. However it is warped on it's length, and very dried out. When I screwed the cleat into it, it split in half. I chucked the whole lot of it and am using the fancy, primed finger-jointed stock, which I am now out of. I'll need some for the bracing on the bridge end and the swing-out so I'll probably get another 6 pieces. Having a drill press is an essential tool in this project.


The target is still to get trains running by Thanksgiving when my son and his family come to visit. My oldest granddaughter, Anna, is tech savvy and the trains.


Attachments

Images (10)
  • Left end large fix 3
  • Right end patch
  • Progress Schematic 9
  • Joint repair
  • Riser Forrest
  • Setup Jig
  • Bridge end before
  • Bridge end after
  • Progress Schematic 8
  • Risers-stinking risers

Today's session involved some young helpers. My grandsons actually helped. Jack (8) did some fastening of splice plates using the small B&D cordless driver, and Alex (11) did some serious work using the big DeWalt. He put in all of the underneath screws holding on three panels. We actually got more done with the two of us. I was pleasantly surprised. He really wanted to get to work on the railroad and today we were able to.


Here's a progress schematic of project status. Notice there are only a few pieces left.


 Progress Schematic 10.


I need to hit Home Depot tomorrow for some more lumber (1 X 4, 1 X 3, and 1 X 2); not much just a few pieces. If I didn't have to scrap those old furring strips, I would have been fine. Alex also drilled splice plates and assembled a bunch of risers. I did a count today and I have 12 more, but need 30, so I have to build 18 more. There could even be more needed since I don't know how many are going to be consumed on the swing-gate or the bridge end. I haven't done a final tally, but I'd bet that there are 100 plus risers holding up this system.


 Progress shot 19


Here're some shots from today's work. Everything is nice and level. There is some slight height differences between some pieces of OSB, but I think I'm just going to fair them in with the belt sander. The kids really like the progress so far, and Alex is constantly commenting on how much bigger it is than he thought it would be. Funny... my wife keeps saying the same thing. The nice thing about the size is there will lots of clear space around the tracks so it won't feel all cluttered.


 Center front 2


Center front 1


In the above pic you can clearly see the splice plates waiting for the next adjacent piece to be installed. I'm making them out of OSB now since it's very stiff in short sections like this, and I've got lots of scraps to consume. I used 6, 1-1/4", #9 Grip Tite star-drive, Deck Screws on each side of the plate. They're not going anywhere, ever!


It's getting harder to see progress in these overview pics since it's all taking place at the other end. I've been building a PowerPoint presentation showing the time-lapse evolution of the layout. It's pretty neat, although, my positioning and lens settings varied slightly between some of them. I'll share it with those interested when the layout is further along (read... having some track with trains on it).


I've got to buy more screws today! While the SPAX and GripTite screws are great, they aren't cheap and I'm going through a boat load of them.

Attachments

Images (4)
  • Progress Schematic 10.
  • Progress shot 19
  • Center front 2
  • Center front 1

We got back from our 11 day trip back East on Sunday. We drove the entire trip in one gulp (11.5 hours) to stay ahead of Superstorm Sandy. It was a good decision since West Virginia, where we would have stopped for the night was experiencing some pretty weird weather themselves. Finally got back to building the layout today with the piecing together of various sizes of scrap to fill in the final areas of the main platform.


The reason for this "jigsaw puzzle construction" was this. I originally didn't have any OSB on the section near the swing-out door. After I was designing the place for the town, I realized that all that real estate needed to be paved over. But I didn't have any large pieces of OSB left so I used up some of the saved scrap and pieced it together.


Before doing that I had to make a fix. The last big piece I put on didn't have enough risers/cleats under it and it was pretty badly bowed in both length and width. The bow was down in the center as seen in this not-so-good picture.


[Warp 1


It's not so easy to see in the picture, but the dip was about 3/16" in the center. I tried to put additional risers in the middle and push them up to remove the bow, but it didn't work. At first I said, "what difference does it really make?", and then my perfectionism kicked in and I decided to make a permanent fix. I figured it would be easier to pull the bow down instead of trying to push it up. So I removed a zillion screws and removed the sheet. I then went back and added a full set of risers in the center of the sheet and made sure they were dead level. I turned the sheet upside down so the bow was up, and fastened it all down again. The result: Bow is gone and sheet in dead flat in both directions.
 

warp 2


With that out of the way, I started piecing together the "jig saw" which is what I'm calling the multi-piece assembly of scrap to make a large flat section. I fastened the various pieces together using splice plates, and then set up the riser field. Here's the splice plates holding a couple of pieces together.


Jig saw 1


And here're the risers in place


Jig saw 3


Here's all the pieces laid in place.


Jig saw 2


Only one problem... it seems that I've been getting some height stack up. The new pieces are somehow 1/4" higher than the big piece they're abutting to. While it seems like a simple thing to just lower the risers a quarter inch, but the last piece next to the jig saw is leveled perfectly with them AND the pieces down the front side. If I lower the jig saw risers, they won't be level with the front panels. So... I'm not sure what I'm going to do yet.
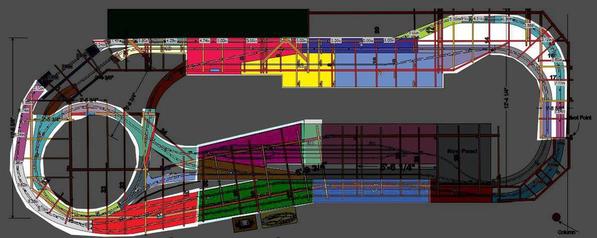
 

So here's the map showing where I am now.


Progress Schematic 11


It's quickly becoming the time to construct the swing-out gate. I've got the structural designs pretty close and I'm still working on the latching scheme. I bought a bale type case latch which should work. So, for the moment, I won't need to exercise Clem's offer. Clem's latch is much more robust than the one I bought, so it may still be needed.


I'm also designing the interlocking circuit so the power is shut off when the gate is opened. Dale's many relay posts have been very helpful! My grandson suggested tying the microswitch directly to the latch bale. This way as soon as the latch is moved, the power would shut off, even before the gate started to move. I believe I can do this. I've been researching some relay schemes with or without timing circuits so the trains would activate with some delay to let you get away from the gate. I'm also researching whether to use digital control (or not). I've read the manual and have decided I am going ahead with it. It will require using twisted pair 14 gauge wire for the best signal propagation.

Attachments

Images (6)
  • Progress Schematic 11
  • Jig saw 3
  • Jig saw 2
  • Jig saw 1
  • warp 2
  • Warp 1

That certainly sounds easier. I've got all of the parts to put the interlock together so I'm going to give it a try. 


I finished fastening all the pieces of the Jigsaw. I had to raise the panel next to it so they met correctly. I then turned my attention to making the swing-out gate. I did some re-design to make it deeper. It came to me that scenery could be installed on the gate so the space could be used effectively. Here's the final plan. When opened it gives almost two feet of clearance to access the inner parts of the layout.


New Door


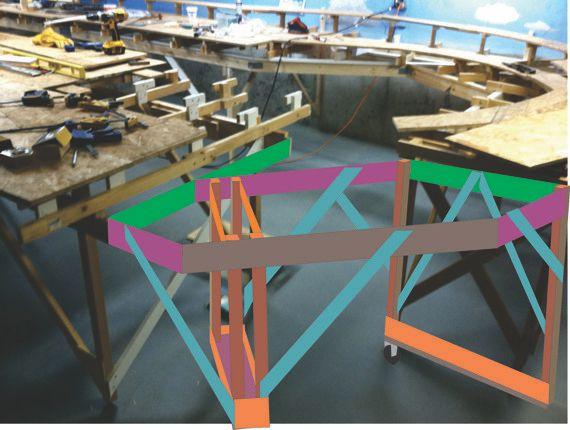
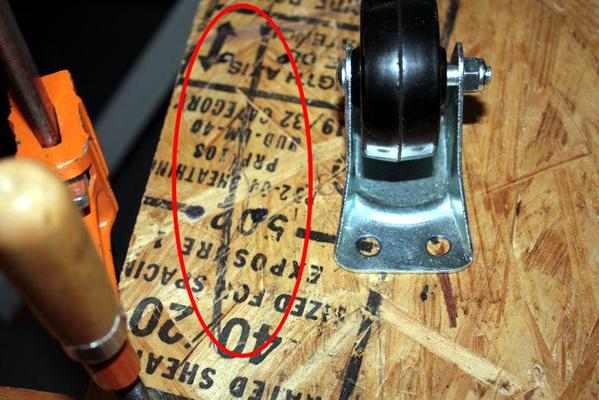
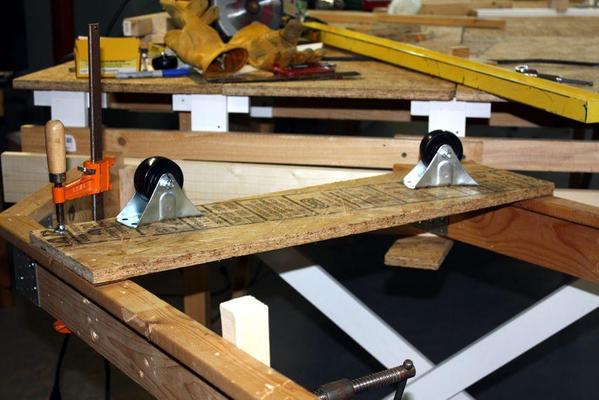
Two fixed casters are shown. I'm also installing a smaller caster under the yellow piece to support the other end of the hinge line. I didn't want to have any torque stress on the piano hinge. The fixed hinges will be mounted on the radius line from the hinge so there will be no scuffing when the door is opened. Here's a sketch showing some more construction details.


New Gate


For the sake of brevity and time, I didn't add any thickness to the members, but I wanted to understand the geometry. Here you can see the small fixed wheel on the hinge side. Just before I finished this afternoon I decided to check the level between the far right end on the curve and the platform that I just finished on the other side of the gap. As I feared, there had been some "level creep" so the right end which was completed months ago, was about 1/2" lower than the part I just finished. Rather than mess with a zillion risers, I'm going to adjust the leveling screws on the bottom of the legs. A 1/4" down on the left side and a 1/4" up on the right. I can change the value over a broad area so there won't be any grade inserted in what should be level track.


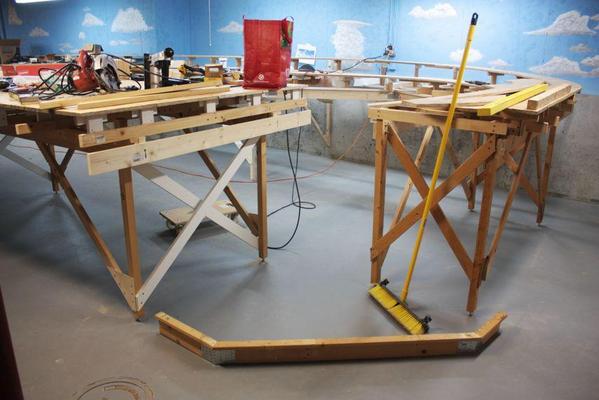
I used a temporary fence and the circular saw and sliced of the edge of the new OSB so it was all even AND on the same line as the structure below it. Then I fastened a 1 X 4 below that will act as a "door jam". I then built the first part of the gate itself, the front L-girder beam. Each piece was mitered at 22.5º and held together with wide Simpson Strong-tie splice plates on both sides. I finally bought screws that won't poke through to the other side. Lowe's had a good selection of Lath Screws which work nicely with Simpson plates. I dropped a line directly down from the jam area on the left and the hinge point on the right and made marks on the floor. I then measured and cut leftover old L-girder material for the beam. The back beam is a single piece and won't need any splice plates.


swing gate 1


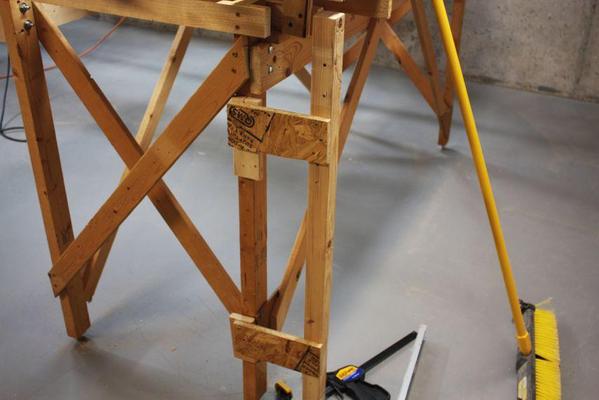
The last thing I did today was to start working on the hinge post. The problem with L-girder (if there are any) is that the structural members are few and inset from the edges so I had to create a hinge point. My first attempt wasn't good enough. I want the post to fall as close to the corner of the roadbed as possible. My first attempt used the wrong thickness of wood to space the post in the fore and aft direction. I also neglected to leave space for the movable part to butt up against the post so the hinge can be assembled.


swing gate 2


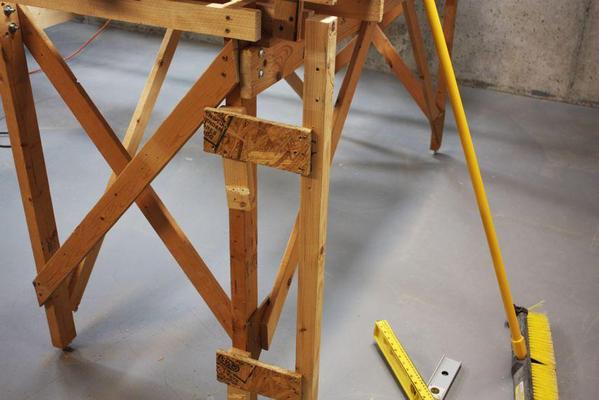
I removed this first attempt, used the correct sized packing pieces and realigned the mounting holes so there's a space for the mating part to the hinge. This space may still be too small. I find out next work session.
 

swing gate 3


The broom will not be part of the final assembly. I'm going to add a sway brace running 45º back from the hinge post to the girder behind it. This should add some rigidity. If not, I'll have to add some more boxing on the other side of the post.


Attachments

Images (5)
  • New Door
  • New Gate
  • swing gate 1
  • swing gate 3
  • swing gate 2

Good evening.... That hinge post has to be rigid. the sway brace will help. Maybe you can run a couple of 1x4s across the width of the table on the hinge end, tie all three legs together. kinda like making those short pieces of OSB longer. You might have to do that on the other side of the table legs.The extra wheel isn't really needed. I made my swinging gate table top first to make sure it was the right size, held in place with temporary legs and the 2x4 rest's on each end of the unmovable tables, then but the running gear and hinges on. Remember the latch has to pull the pieces together if you push the gate closed you could move the table ends. I have shelfs under my table. On the hinge side and the latch side I store heavy stuff so the ends of the table don't move should I bump into it. The gate I keep has light as possible. Take another look at my photo's. I can send you more pictures of any part you need more detail on


Clem 

Clem,

that's a good suggestion. I woke up this morning thinking about applying your ideas and working on the assembly sequence. I too am planning on putting the top pieces in place temporarily and working downward. I'm not working today on the layout which is a deal made with my wife that I don't spend nice weekend days in the "cave". But I'll will have the swing door built by next weekend.

Based on Clem's feedback I revised the hinge post...again. This time I ran the supports across the entire face of the legs. I then ran a diagonal from the back. Between these two changes, the hinge post is quite rigid and I think it will work okay. It's also nicely in line with the corner of the outer OSB end point. I wanted the hinge point to start exactly there since I know everything clears the lally column. The spacers under the horizontal braces are there to pack it out to the same point as the ends of the OSB.


 swing gate 4.


Here's the diagonal brace. As before, I like to fasten these kinds of assemblies to cross-grain wood, not end grain so I added the block under the brace to capture the screws properly. If this brace isn't sufficient, I can add another one deeper down the leg. It will join at a funny angle on both ends so I would fasten it with Simpson Strong-tie straps bent to conform to the various angles.


 swing gate 5


With the hinge post in place I was able to get back to building the upper framework. The piece I cut yesterday on the left side was too short so I to cut another one. Of course I had to make the 22.5º miter again. And of course if there a least four ways to cut the miter either in the wrong direction or the wrong end, I made three of them. I was still using left-over L-girder from the older layouts and didn't want to use new stock which I'm saving for building the structure under all the bridges.


 swing gate 6


I going to finish the framework, position and clamp it in position and then build downwards towards the wheel assemblies. Won't be able to work tomorrow or Tuesday, but may get some work in on Wednesday. My consulting "semi-retirement" just got busier with the addition of another project. I'm finishing up one and starting another. It helps the cash flow, big time, but more "real" work time means less train building time.


I tried adjusting the 1/2" difference between the two sections of the layout, but was unable to shorten the leveling screws on the high end very much since they were already near the end of the inner travel. I should have paid attention to their position when I was initialing putting the legs into position, but it was a detail that I missed. I did raise the low end a bit by lengthening their screws, but didn't want to add too much to that side since it would "unlevel" this part of the layout. It's not going to affect the grade portion since it's already unlevel. The ground level portion will require some adjustment. 


Attachments

Images (3)
  • swing gate 6
  • swing gate 5
  • swing gate 4.

Believe or not, I actually had a little over an hour today to do some work between a dentist appointment (hooray...not cavities again) and a work related meeting. I finished the top works frame for the swing-gate and reinforced all the joints with double Simpson splice plates. Then I put the whole thing into position and leveled it. I added a temporary leg in the front and made measurements for the middle support that's going to have the casters. I cut the OSB plank that's going to hold the wheels and support the legs.


swing gate 7


To get the correct radius to mount the fixed casters I used the Rotape with the center point being close to the hinge line and extending it out so it intersected the OSB base somewhere in the middle. The Rotape has a drafting pencil lead in the other end and I scribed the arc darkly on the OSB. I will use nuts and bolts to mount the wheels. The holes are 5/16".


swing gate 9


This is sort of how they'll look mounted, but I just realized something looking at this picture. I best make sure that I mount the wheels from underneath since the arc is not symetrical with the board since it is struck from a offset center point. If I were to screw them on in this orientation, and then turned the board over to mount the legs, the wheels would no longer be correctly aligned with the center of rotation. Believe it or not, this is actually a benefit to me in blogging this build in such detail. As I write, I'm thinking about what's been done and what needs to be done.


swing gate 8


I'm also going to reset the radius to move the wheels a bit more to the right giving me more clearance for the caster fasteners. I'm going to frame the top side with either 1 X 3 or 1 X 4 as a mounting point for the legs. I will screw these parts on from the underside of the OSB into the regular grain of the dimensional lumber. I don't trust OSB with screws into the side. I can't twist the board since the legs must mount square to main rail. The legs will be fastened with carriage bolts and nuts. Then I'll add sufficient diagonal bracing to stiffen up the whole deal.

Attachments

Images (3)
  • swing gate 7
  • swing gate 9
  • swing gate 8

I got done work early today and my wife had a night out with the 'girls', so I worked before AND after dinner on the Swing Gate and it's getting near done. I got the wheels mounted, built the center pillar and braced it. And then built the hinge structure on the door. When it was all done, I realize the the hinge plank was not plumb and will have to be adjusted. I speak more on this later.


I did change the wheel path just a little bit to ensure that their hardware cleared the side planks. I screwed it all together and again used carriage bolts to hold the vertical posts to the L-girders. This makes a very rigid structure. The other holes you see in the L-girders are left over from their previous life when they held up part of the older versions.


 swing gate 12


I installed cross-bracing that will stiffer the fore and aft movement using 1 X 3s. and then I installed a diagonal brace on the left. This was a weird angle so I used Simpson Strong-tie straps that could be deformed to conform to the angles. It only has to support the short end and it will work.
 

 swing gate 13


Braces on the right side and back were easier since they were in line with parts on their upper and lower regions. With this, the pedestal is secure.


 swing gate 15


Now it was time to build the hinge post structure. It too had to be rigid in both planes. I used a 1 X 3 for the post itself, and then made a box structure with the left end terminating in a 2 X 2 in the left corner, and a 1 x 6 across the bottom. I then ran a diagonal from the lower right to the upper left to stiffen the side to side direction. For the fore and aft direction I made an angle block to give a plane surface to mount to and ran a diagonal from the bottom plank across the space to the front girder.


 swing gate 16


However, when I pushed everything back in place I noticed I have some adjustments to make. The hinge post is not plumb. This picture is supposed to be portrait, and should be rotated 90º CCW, but for some reason, the picture loader turned it to landscape. I will have to remove most of the screws holding the hinge framework in place, pull it into square and then replace the screws in new locations. I if just reinserted them in the same places there's a good chance that it would wrack it again. Once the hinge plane is correct it's time to put the piano hinge on permanently. 


 swing gate 17


It's proof that the hinge assembly is rigid since I couldn't budge it at all to move it. BTW: the wheels work perfectly and the radius is dead on. Clem said I don't need the additional wheel holding the up the back left corner, and I think he's right. For now, I'm going to see if it works as is.


Once the hinge system works, I'll go back to the jam area and makes some improvements so the gate will be guided to the correct position. The I'll mount the joists and risers and lay in the subroadbed that been patiently waiting piled up on the other part of the layout. 

Attachments

Images (5)
  • swing gate 16
  • swing gate 15
  • swing gate 13
  • swing gate 12
  • swing gate 17

Realigned the hinge post and then was able to install the piano hinge. It works! It's rigid and the wheels are in line perfectly.


 swing gate 18


With that out of the way, I was able to lay the curved subroadbed sections over the gate and trim them so they fit exactly in the space when the gate is clamped in the closed position. I then clamped some temporary supports to the fixed portions at both ends and clamped the curved piece to this. I used the outside curved piece for this part. I then installed the joists that would support everything. I wanted the joists to end in line with the curvature of the roadbed piece. I was running out of 1 X 3... AGAIN... so I used whatever was left laying around the shop. I will have to go to Home Depot for more since I'm going to need it for the bridge sections on the other end of the layout, but I didn't want to stop work today since I was on a roll. 


I cut and installed the joists, and then working from the inside to the outside, again laid in the inside curved piece clamped at both ends and added the risers underneath until it was level and flat. BTW: I had to create another 10 risers and cleat assemblies... After the inner curve's risers were all settled in, I did the same for the outside curve. The curves are now ready to be permanently fixed. Once this is done, I'll finish up the engineering on the jamb end and install the latch. Here's a photo sequence showing a working swing gate which easily clears the lally column and gives a nice opening to access the insides of the layout. Sweet!


 swinging gate 1


 swinging gate 2


 swinging gate 3


swinging gate 4


swinging gate 5


One more work session should finish up the swing gate and it will time to move onto the bridges. Rather than wait until I build the bridge kits which will be a significant effort, I think I'll install a temporary "gap filler" so I run trains while I'm building the bridges and it's associated terrain. It could be several months before the bridges are actually complete.

Attachments

Images (6)
  • swing gate 18
  • swinging gate 5
  • swinging gate 4
  • swinging gate 3
  • swinging gate 2
  • swinging gate 1

Most of the dramatic work on the swing gate was posted last session, but I did some important finishing things.


I added the outer loop on the gate and then installed the latch. Before installing I beefed up the mounting point by gluing some plywood blocks under the OSB. There's a lot of stress on this point and it's right at the edge of the sheet. I didn't want to risk any pull-out later on. The screws protruded below the ply so I cut them flush with the Dremel and cut-off wheel. They were in a very dangerous spot which could have easily injured someone. The latch is mounted at an angle. I first installed it square to the face, but the mating end has a tab that was having trouble entering the latch since the door swings in laterally. I remounted it on an angle and the two mate up perfectly. It draws the gate tightly shut.


 swing gate 19


I added some landing blocks on the jamb and hinge ends to add some additional support under the movable parts since, unlike all the other OSB on the layout, the pieces are not firmly screwed together with splice plates. There was some give to them which could allow them to drop a bit when and 11 pound locomotive runs over the junction. The landing blocks prevent that from happening. I sanded a slight taper on the blocks so the mating parts would slide together nicely.


The only problem with this arrangement is the latch location. When you're inside the layout you can't reach the latch. It would take two people if you want to run the trains from the inside using a hand-held controller. One solution would be to add an inside latch in addition the outside. When inside you'd use that latch, and vice versa. I'll think about it.


Jamb End
swing gate 21


Hinge End
swing gate 22


I used the belt sander to level some of the joint areas and ground off some protruding screws that were missed in previous work sessions. I then cleaned off all the tools and material and moved it to the other end of the layout in preparation for building the bridge area. This is the last piece of the puzzle to be built and then it's onto laying track.


 Bridge Area 2


Here's the right end all cleared off ready for track. It's a sea of OSB!

Sea of OSB


It's a great feeling to draw all this stuff out in plan and then have it come out exactly as it was envisioned. Pretty neat.

Attachments

Images (5)
  • Sea of OSB
  • Bridge Area 2
  • swing gate 22
  • swing gate 21
  • swing gate 19

Good Morning Trainman...I see you added the supports under the roadbed on each end of the gate. I did the same only, I used 2x4s that support the whole gate on each end. Thats why i didn't need the small third caster. As I close the gate it is lifted slightly on both ends. I also put stops on the table ends so the gate can't be pushed out of alignment,this way the gate closes the same all the time. Once you get the track down it as to line up horizontally and vertically. You might want to review my photos again. Of course you might not have any problems at all (looks like you do good work).   After I tapered my gate supports I applied a heavy coat of Johnson's paste wax where the wood contacts, that makes a big difference. I can't reach my latch from the inside either, fortunately the gate stays  in alignment even when not latched.~ I'm in the process of an expansion, so have to clear everything out to prevent damage and be able to move the whole display two feet.    

Clem, there's a bit of springyness to the door. You have to put a little pressure on the closing before activating the latch. It doesn't seem to need any downward force, so I'm going to use it as it is before making some additional modifications.


Now onto today's activities... I made a minor adjustment to another OSB panel that wasn't on the same level as an adjacent panel. I tried the belt sander routine to reduce the height of the higher panel, but there was too much stock to remove so I went to my tried and true, Plan B which was to shim the thinner panel's splice plates under the panel to raise the low piece enough to make it flush. I had to put in about 1/16" of cardboard and it worked. It was flush and I didn't need to generate any more sawdust.


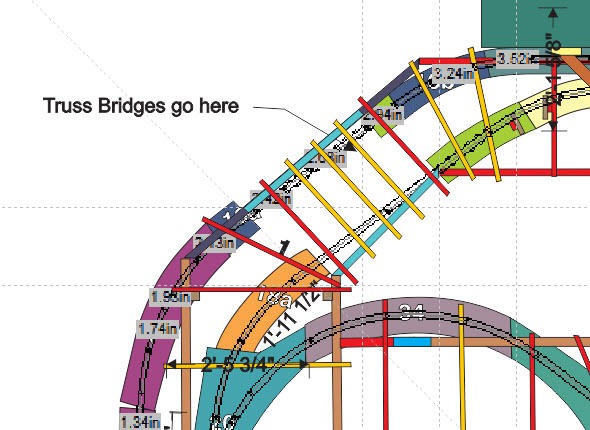
With that, work formally began on the bridge end. Here's two views of what I'm attempting to do here. First is the plan view of the final structure design, based on what I actually installed today. The light blue L-girders are 23" below the main girder level and are 31.5" long. For the inner one, this spanned the entire distance between the adjacent girders, whereas on the outer one, I had to build some connecting girders that tied into the existing structure at approximately a 45º angle. The original OSB pieces for this corner no longer conform to the new design so I'm going to cut some new ones out of the scrap I have left. It's the light green pieces in the plan drawing.


 Bridge end final design


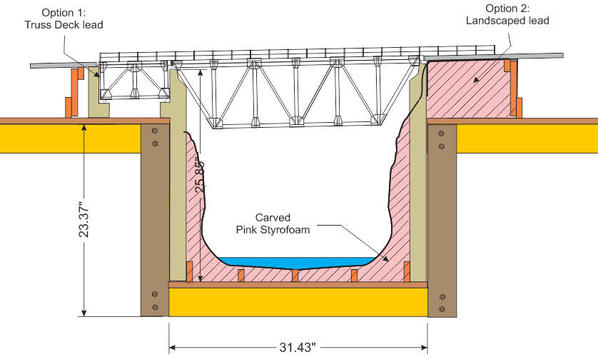
And this is the elevation of what the deck truss bridge will look like. There are two options shown. No. 1 is using additional box trusses are lead-ins to the main span, and No. 2 is using earth works leading to an abutment. All of the earth work will be carved pink Styrofoam. I have a hot-carving unit that eliminates all of the plastic from flying around. The bridge is accurately scaled from the kit that I bought.


 Bridge


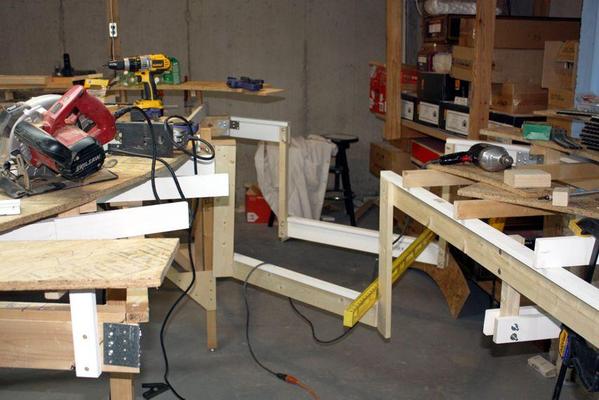
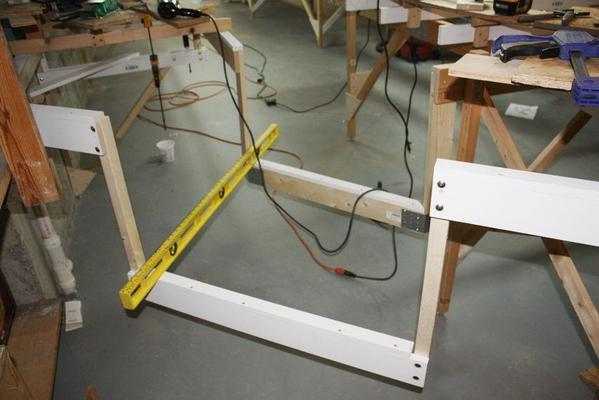
And here's the structure itself. For the inner structure I had to drop 1 X 3s directly from the existing girders and then using Simpson splice plates, join it all together. For the outer, I made some small 16" L-girders to extend to the existing structure, and then used 2 X 2s for the drops. Across the bottom is the other L-girder. In this case I went with the carriage bolt fastening scheme. Tying the L-girders together will be a grouping of 1 X 3 and 1 X 2 joists. The bridge abutments and scenery will be supported with these joists and it will tie everything together as a network.


Looking from the inside to the outside

 bridge end 04


Looking outside in

 bridge end 01


As I was screwing the screws into the Simpson plates, the lumber started splitting so I had to resort drilling pilot holes for all the rest of the screws. This solved the problem.

Attachments

Images (4)
  • Bridge end final design
  • Bridge
  • bridge end 04
  • bridge end 01

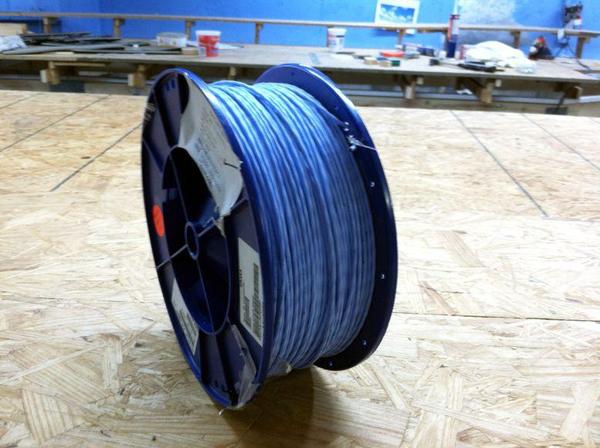
I didn't build today since I was at work, but had a nice experience that will directly support the layout's progress. I may have mentioned that I'm currently working with a new client; a company that buys and sells commercial aircraft parts. The owner is a very nice fellow! They had received an entire pallet piled high with spools of cable that was surplussed by Airbus. I had shown him a picture of my B-17 so he knew that I was a model maker. I was then looking at the pallet and there were large spools of wire that looked pretty good. He asked if I was interested in it due to my RC building, and I told him that I was looking for wire for the new train layout and, since it was going to carry a digital signal, it needed to be twisted pair.


This wire has three twisted conductors, but looked like it would work if the gauge was right. Since all the specs were in French, it said it was 1.39 mm to 1.53 mm. He said I could have a spool for free, but I needed to find out what gauge that would be. The digital control system calls for 14–16 AWG. I went on the web and researched this size and it turns about to be about 15 gauge. Talk about luck!


When I came into the workplace today he had the spool in his hand and asked where I would like him to put it. It quickly went in my trunk. Santa has arrived early...

The spool says for quantity, "739". I think it's listed in meters which would put it at more than 2,000 feet of wire. I'm figuring that I'll need several hundred feet, so this should be way more than I need.


 Wire Gift


With the cable having three conductors, I posted a question on the DCS Forum to see if I can use the 3rd conductor to carry current for other applications such as signal, switch or lighting power. Please feel free to comment here too.


If I can't run additional power on the 3rd conductor, it's not a problem. It will just be along for the ride. So now I have absolutely no excuse about getting the trains up and running as soon as I finish the bench work. I've got the track, the switches, the rubber roadbed, and now I have the wire... lots and lots of wire.

Attachments

Images (1)
  • Wire Gift

Add Reply

Post
The Track Planning and Layout Design Forum is sponsored by

AN OGR FORUM CHARTER SPONSOR

OGR Publishing, Inc., 1310 Eastside Centre Ct, Suite 6, Mountain Home, AR 72653
800-980-OGRR (6477)
www.ogaugerr.com

×
×
×
×
Link copied to your clipboard.
×
×