
As Bob mentioned, it could be the camera.

Does this locomotive have an LED headlight ?     If so ,I see that ' vibrating ' light on a lot of videos Andy.

I think you are on to something Dallas. IIRC the flickering has something to do with the frame rate and the 60 cycles of an AC current sine wave. Kind of similar to using a strobe light to create a stop action effect.

LED's react much faster to the sine wave, but we can't see it with the naked eye. Incandescent lamps do the same thing but the flicker is so fast that the filament can't cool enough to make it perceptible.

I've noticed it just viewing LED's through on my phone with the camera in video mode.

@WesternPacific2217 - The crossings look good Scott. I like the tire track idea.

Bob

Last edited by RSJB18

Materials alert!   Today I made a discovery that I could have used several months ago on various projects.   For those of us looking for 1/16 wide flat copper strips for various projects we usually ended up on the short end.   As I was unpacking a postal delivery, I noted that the copper box staples would have met my needs.   So here is my revelation:  recycle the staples!  They represent a scale 9 foot piece of metal ~3" wide and ~1" thick.  They even take to solder!   Sorry I missed it when I needed it but hopefully it can be useful in the future!  

DSC09120

Cheers, Dave

Attachments

Images (1)
  • DSC09120
@darlander posted:

Materials alert!   Today I made a discovery that I could have used several months ago on various projects.   For those of us looking for 1/16 wide flat copper strips for various projects we usually ended up on the short end.   As I was unpacking a postal delivery, I noted that the copper box staples would have met my needs.   So here is my revelation:  recycle the staples!  They represent a scale 9 foot piece of metal ~3" wide and ~1" thick.  They even take to solder!   Sorry I missed it when I needed it but hopefully it can be useful in the future!  

DSC09120

Cheers, Dave

Great idea Dave.

Now I need to save more junk from around the house........

Purchased the new Woodland Scenics Smith Brothers TV & Appliance store building just the other day.

Since I didn't have any space for it, I had to remove my Lemax Book Store, driveway, and sidewalk (messy). I also had to remove all the grass, using some hot water to melt the white glue and then scrape it up with a spatula. I'm replacing the sidewalk using the Contact Cork cabinet liner, you can see it cut to fit but yet to be painted in the photo below.

I'm using the Contact cork for the paved road leading the the loading dock in back of the TV store.

I'll post and update when I get the sidewalk and pavement installed.

Attachments

Images (6)
  • mceclip0
  • mceclip1
  • mceclip2
  • mceclip3
  • mceclip4
  • mceclip5
Last edited by WesternPacific2217

Purchased the new Woodland Scenics Smith Brothers TV & Appliance store building just the other day.

Since I didn't have any space for it, I had to remove my Lemax Book Store, driveway, and sidewalk (messy).

I'll post and update when I get the sidewalk and pavement installed.

The Smith Bros. building definitely has THE COOL FACTORE  Scott.

Now where does the book store go ? 

Howdy fellow OGR members. Here's an update on the Smith Brother's TV & Appliance store installation on my layout.

Last night I cut the Contac Cork to size and painted them with 3 coats of paint each and let them dry overnight. Today I added the lines on the contact cork sidewalk and used a little glue to help adhere it along the edges. The lines on the sidewalk are nothing more then leaded pencil lines! Then I installed the driveway to the dock in the back of the store and in between Ethyl's Gas Station and Miss Molly's Diner. I used the same installation method to adhere the road as I used for the sidewalk. A dab of CA glue is all that is needed to keep the corners of the cork adhered.

I'm a happy camper, although as with all my installations, stuff will get added as I stare at it and contemplate the scene. LoL I think a delivery or service van is in order!

Attachments

Images (4)
  • mceclip0
  • mceclip1
  • mceclip2
  • mceclip3

7A875D25-03C9-4CCF-97C9-CAF3798A5F70B6E1D811-7505-4A31-AAEE-99AFBE13FB9AI have a couple ROW intermodal cars but not enough containers. Came across a website, krafttrains.com, that has printable 20 foot containers. I’ve tried other sites in the past, wasted paper and ink trying to get the size right.  These came out right on the first try. In the photo, the bottom containers came with the car, the top containers were printed out on card stock.

Attachments

Images (2)
  • 7A875D25-03C9-4CCF-97C9-CAF3798A5F70
  • B6E1D811-7505-4A31-AAEE-99AFBE13FB9A

Really some nice work being done on everyone's layouts. I'm going to have to try the cork for some rail crossings. I have 3 I've been meaning to get back to.

Completed my 3rd house for my future mining town diorama. Next up on the bench will be a coal breaker. Weather is getting nicer so this could take a while.

Stay Safe,

Scott 20220404_01540120220404_015844

20220404_015326

Attachments

Images (4)
  • 20220404_015326
  • 20220404_015344
  • 20220404_015401
  • 20220404_015844

Lot's of great projects going on.

@WesternPacific2217- the appliance and TV store looks great Scott. I like the flickering effect on the TV's too.
@Steamfan77- Great videos Andy. Thanks for sharing. The hidden yard makes sense now.
@HudsonORailRoader- WOW! That brass steamer is a beaut!
@B&O Fan- Nice houses. All very well done and detailed.
@Ross- I love paper printed scenery. I couldn't tell the difference between the plastic and printed containers.
@p51- Makin' the popcorn........

Well-  my weekend went nothing like I had planned. Saturday was Trainstock 13 at the NJHR's and I had intended to run over the rivers and through the woods.......NOT! Sunday wasn't much better but I did steel an hour or so and fabricated the first set of marker lights for my F3 project. I can't install them until I get the cab interior I ordered from Lionel, but I'm not eager to drill out the shell after the mess I made of the other one, so I don't mind waiting.

2022-04-03 17.00.202022-04-03 17.36.582022-04-03 17.37.412022-04-03 17.37.52

Bob

Attachments

Images (4)
  • 2022-04-03 17.00.20
  • 2022-04-03 17.36.58
  • 2022-04-03 17.37.41
  • 2022-04-03 17.37.52
@RSJB18 posted:

Lot's of great projects going on.

@WesternPacific2217- the appliance and TV store looks great Scott. I like the flickering effect on the TV's too.
@Steamfan77- Great videos Andy. Thanks for sharing. The hidden yard makes sense now.
@HudsonORailRoader- WOW! That brass steamer is a beaut!
@B&O Fan- Nice houses. All very well done and detailed.
@Ross- I love paper printed scenery. I couldn't tell the difference between the plastic and printed containers.
@p51- Makin' the popcorn........

Well-  my weekend went nothing like I had planned. Saturday was Trainstock 13 at the NJHR's and I had intended to run over the rivers and through the woods.......NOT! Sunday wasn't much better but I did steel an hour or so and fabricated the first set of marker lights for my F3 project. I can't install them until I get the cab interior I ordered from Lionel, but I'm not eager to drill out the shell after the mess I made of the other one, so I don't mind waiting.


Bob

Bob, I really enjoy seeing your update posts on the locomotive upgrades you do, great work. Suggestion on the holes in your F3 body if you haven't resolved it yet. Go to your local automotive store and buy the smallest amount of automotive body filler. Dries hard a rock, adheres strongly, and is easy to form, sand, and drill out again. If you choose this method, put the body putty on the inside of the F3 body until it comes through the hole and then smooth to the contour of the body on the outside. I apologize if somebody already suggested this method, I lost track of all the posts.

Thanks for the compliment on the TV store! :-)

I've considered Bondo (old brand name) Scott.  I used to use it for all sorts of repairs, not just the occasional smashed fender. It's great stuff, just stinks to high heaven when mixed.

After I get the lead unit done I will see what I have to do with the trailing.

Thanks

I have been working on my layout.  This weekend I finished cleaning all my track.  Over 170 pieces in batches of ten at a time.  I also evaluated about twenty five switches.  Three need attention.  I have started laying track!  This layout will be similar to the last with a few design changes.  I've been handing out likes.  I'm pleased to see progress on my mountain.  APR 2022 _1APR 2O22_2APR 2022_3

Bill

Attachments

Images (3)
  • APR 2022 _1
  • APR 2O22_2
  • APR 2022_3

I don't have anything to report on activities on the layout today but I can report on the arrival of something today that was due to layout activity earlier this year.  During January/February I built and photographed yet another diorama.  This one featured a Williams PRR 4-4-2 and an MTH Aerotrain with the PRR paint job.  Once I had the photograph done to my satisfaction I sent the picture to the editor of the Train Collectors Quarterly.  The April 2022 issue of the Quarterly arrived in the mail today with my picture on the cover.


14b_Cover_April_2022

Attachments

Images (1)
  • 14b_Cover_April_2022
Last edited by Robert S. Butler

I don't have anything to report on activities on the layout today but I can report on the arrival of something today that was due to layout activity earlier this year.  During January/February I built and photographed yet another diorama.  This one featured a Williams PRR 4-4-2 and an MTH Aerotrain with the PRR paint job.  Once I had the photograph done to my satisfaction I sent the picture to the editor of the Train Collectors Quarterly.  The April 2022 issue of the Quarterly arrived in the mail today with my picture on the cover.


14b_Cover_April_2022

Great photo. Well deserved congrats!

😎😎😎

Morning guys, first off for the good news. I am still alive! LOL I also hope to get some train room time today before the next non train related project happens! This is going to be a long one for me as I haven't been on here for 2 weeks and there has been a lot done by all you great folks! I had to go back 3 pages to get up to speed on all your great work, so please bear with me.

@darlander Wow Dave the ballast hoppers are just outstanding and the yellow really pops!

@Papa Dave Dave nice job on the painting project!

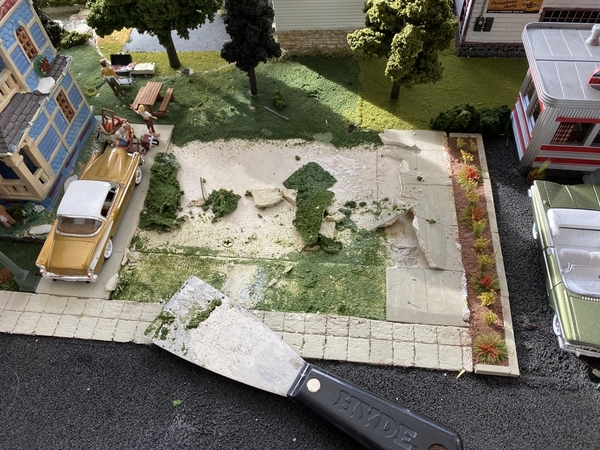
@chris a Chris you keep it up and they will have to hire a landscaping company to come in and take care of everything! LOL Really it looks great! Wonderful job on weathering the cars!

@Ian Y. Ian Great looking farm! Can't wait to see the barn you have planned for it!

@Ross Ross the M109 looks Perfect! Back when I was in the Marines I was with a 155 unit!

@Mark Boyce Mark your progress it looking great! I really like the placement of your building!

@Alex M Alex your layout is really coming along nicely! Great looking steam engines!

@Bill Sherry Jp sounds like a cool project, to bad for me the video would not play for me!

@Putnam Division Peter the windows are looking great! You're getting closer to getting done!

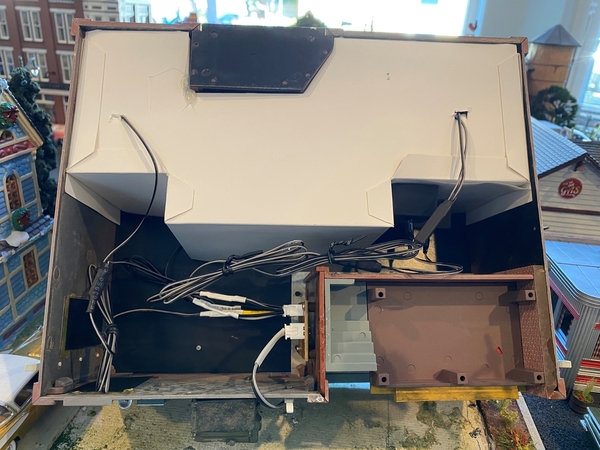
@RSJB18 Bob Outstanding work on the lights, they look great! As for the body filler you can get a small tube already mixed and just put a few coats on, it works great, I used it on my fishing boat!

@Bill Webb Bill thats quite the list you have going there! I am glad your knee is doing better and with your list you will have plenty to do while you let it rehab!

@Steamfan77 Andy, looks like you made a great fix! Your right about what the eye can catch and can't. I find new stuff from photos of my layout that I don't sometimes see when I am in the train room working on it!

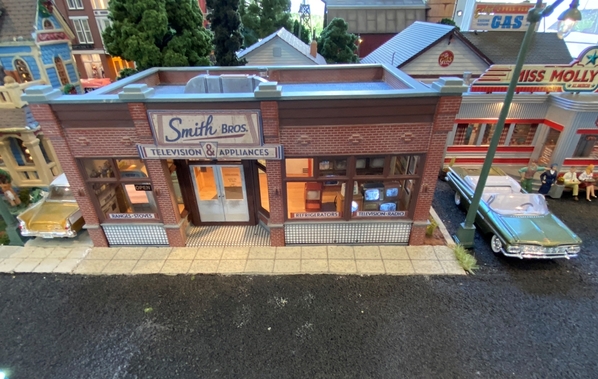
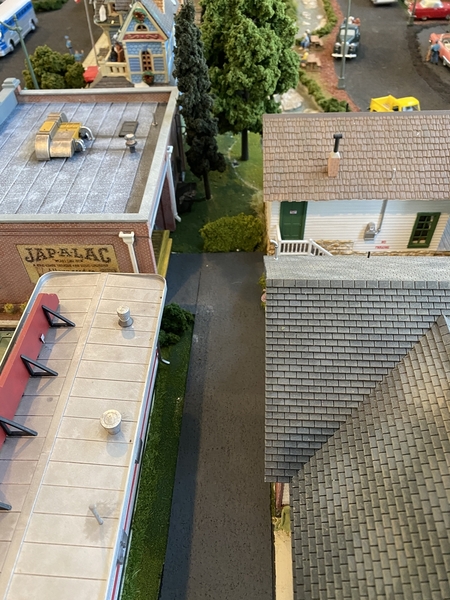
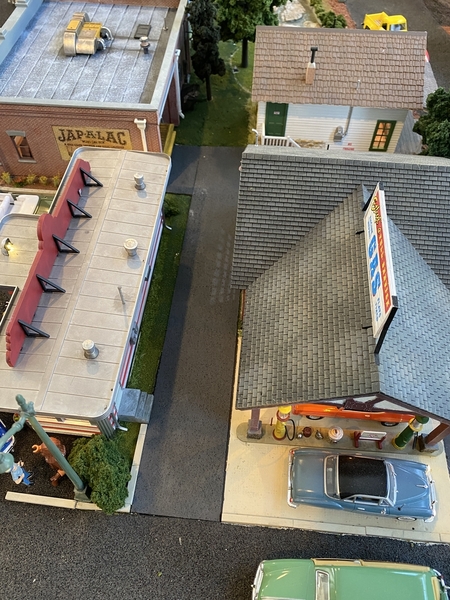
@WesternPacific2217 Scott the crossing looks great I love the many ideas that you can use the cork for! I really like the TV & Appliance store, just one question does the roof come off so you can add people to the inside of the store? Outstanding job on the sidewalk and driveway!

@B&O Fan Scott wonderful job on the house!

@Odenville Bill Bill WOW That sure is a lot of track cleaning! I will be fallowing your new build!

@Robert S. Butler  Robert CONGRATULATION on your magazine cover! What an outstanding photo!

@Bigboyrich Rich that sure is a great scene, but I think too much just for one Corsair! LOL

@samparfitt Sam WOW that is one AMAZING plane! Also great landing and I love the wings folding in!

Ok guy I told you it was going to be long and I am sorry for that, but I think wonderful work should be recognized!

I hope you all have a great day and find time to have fun with your layouts and trains!

Mike, not long winded at all, I like a good read. Plus, you pointed out some posts by members that I must have missed, so I went back and checked 'em out! Thanks!

On the Woodland Scenics Smith Bros's TV & Appliance building, I wouldn't recommend taking the roof off. These WS buildings are all plastic and glued together. The interior is just printed construction paper folded and lightly glued in place and should come out easily. I've removed the construction paper interiors before in WS buildings to modify them, like the Davenport Emporium building I have. Here's a photo of the underside of the WS TV Store.

The quality of these is so-so, I had to adjust the construction paper interior on this one. The floor wasn't flat and the refrigerator looked like the leaning tower of pisa in the front window. LoL

Attachments

Images (1)
  • mceclip0

Mike, not long winded at all, I like a good read. Plus, you pointed out some posts by members that I must have missed, so I went back and checked 'em out! Thanks!

On the Woodland Scenics Smith Bros's TV & Appliance building, I wouldn't recommend taking the roof off. These WS buildings are all plastic and glued together. The interior is just printed construction paper folded and lightly glued in place and should come out easily. I've removed the construction paper interiors before in WS buildings to modify them, like the Davenport Emporium building I have. Here's a photo of the underside of the WS TV Store.

The quality of these is so-so, I had to adjust the construction paper interior on this one. The floor wasn't flat and the refrigerator looked like the leaning tower of pisa in the front window. LoL

Great points! I was just asking as it looks a little empty with no customers. I will have to check WS Website out!

@RSJB18 posted:

@mike g.- thanks for the info Mike. Last time I used body filler it was the two part with the epoxy mix in a separate tube. I will check out the auto parts store. I need more tire weights for my freight cars anyway.

Glad to see you are still moving around. I guess the CEO hasn't driven you into the ground just yet.

Bob

Hi Bob, the stuff I have is called Bondo Plastic Metal. Hardens like a rock!

She won't drive me into the ground till all the projects are done! LOL

@RSJB18 posted:

@mike g.- thanks for the info Mike. Last time I used body filler it was the two part with the epoxy mix in a separate tube. I will check out the auto parts store. I need more tire weights for my freight cars anyway.

Glad to see you are still moving around. I guess the CEO hasn't driven you into the ground just yet.

Bob

A tip Bob,

Put a piece of masking tape on the exterior covering the hole, and then push the filler in from the back. Remove the tape (obviously - LOL) when dry.

The filler will not encroach past the repair on the outside this way. Worked for me.

Add Reply

Post

OGR Publishing, Inc., 1310 Eastside Centre Ct, Suite 6, Mountain Home, AR 72653
800-980-OGRR (6477)
www.ogaugerr.com

×
×
×
×
Link copied to your clipboard.
×
×