Carpet central.

Been last year since the engines have been run and, since they have batteries, I figured I'd better power them up and run a few while doing it     

left to right:

MTH GN W-1 electric B-D-D-B

MTH GN Z-6 4-6-6-4

MTH GN R-2 2-8-8-2

MTH GN Y-1 electric

MTH SF PA's A-B-B-A

3rd rail NP Z-8 4-6-6-4

3rd rail NP Z-5 2-8-8-4

MTH DM&IR 2-8-8-4

3rd rail NP A-4 4-8-4

3rd rail GN M-2 2-6-8-0

MTH Erie E-8 A-B-A

not in picture:

MTH GN S-2 4-8-4

MTH GN F-3 A-B-A

Williams PRR GG-1

lionel carpet central 01


Attachments

Images (1)
  • lionel carpet central 01

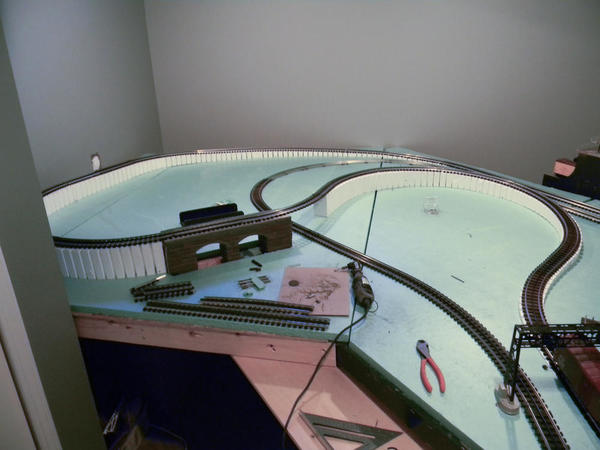
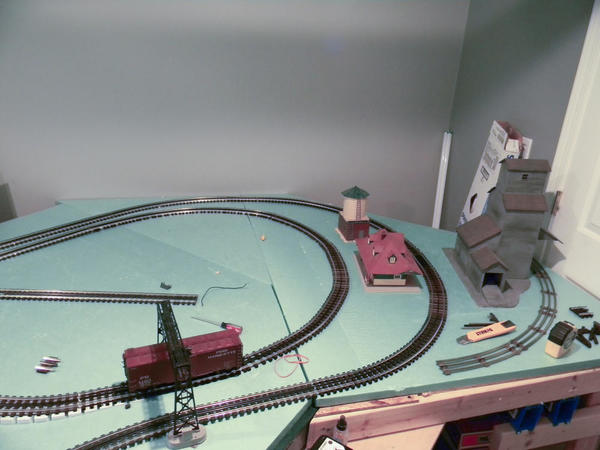
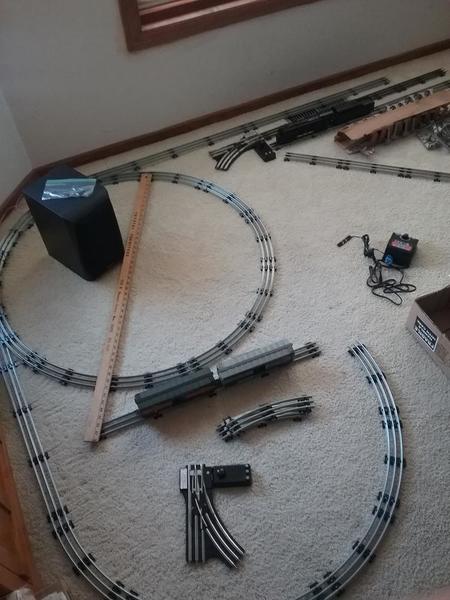
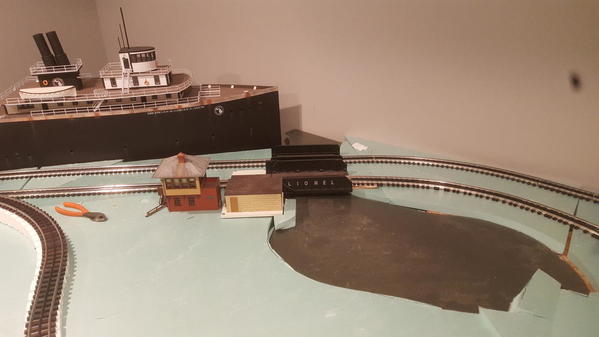
Here are a few photos from yesterdays work.  As you can see I have the track laid about 90%.  What you may also notice is I have some Lionel track in the top which will have to be replaced with Gargraves when it comes in.  

Today I plan on mocking up the tunnel next to the bridge where the one track cross under the other.  Right now a locomotive and scale size box cars can fit under it but it is super tight.  I plan on making the track that goes through the tunnel "dip" about 1/4th of an inch to allow for better clearance. 

I also will start soldering power drops and start wiring everything to the transformer so I can reach my goal of having trains running by next week!


 DSCN1933DSCN1936

Attachments

Images (2)
  • DSCN1933
  • DSCN1936
Jdevleerjr posted:
Today I plan on mocking up the tunnel next to the bridge where the one track cross under the other.  Right now a locomotive and scale size box cars can fit under it but it is super tight.  I plan on making the track that goes through the tunnel "dip" about 1/4th of an inch to allow for better clearance.

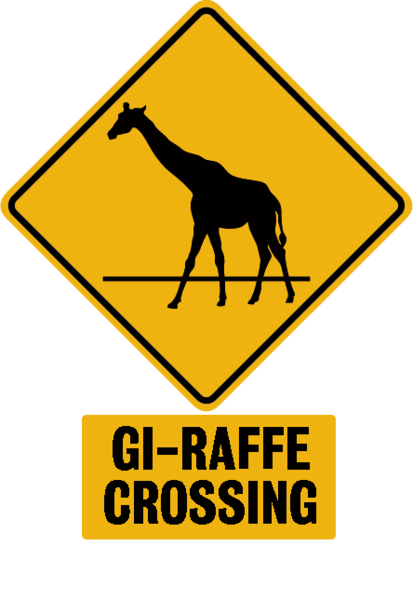
Yanno, that would be a GREAT spot for a gi-raffe actuator... 

Mitch

M. Mitchell Marmel posted:
Jdevleerjr posted:
Today I plan on mocking up the tunnel next to the bridge where the one track cross under the other.  Right now a locomotive and scale size box cars can fit under it but it is super tight.  I plan on making the track that goes through the tunnel "dip" about 1/4th of an inch to allow for better clearance.

Yanno, that would be a GREAT spot for a gi-raffe actuator... 

Mitch

I agree with Mitch!!

Jdevleerjr posted:

Here are a few photos from yesterdays work.  As you can see I have the track laid about 90%.  What you may also notice is I have some Lionel track in the top which will have to be replaced with Gargraves when it comes in.   

 DSCN1933

One week ahead of schedule!  My son is going to be so excited when he gets home from school today!  

Good work. I always like seeing progress from the guy who started this thread!

Let us know how your son reacts to running trains.

Last edited by p51
Serows1 posted:
Jdevleerjr posted:

One week ahead of schedule!  My son is going to be so excited when he gets home from school today!  

Looks good Jim, I really like the track plan it's very cool how it twists back onto itself!

Are you planning on running 2 trains at the same time?

Paul

As of right now no, but maybe.

I have to dig out my legacy system that is buried in a box somewhere.  When command control I could easily run 2 trains at once as long as 2 people have throttles.  

Jdevleerjr posted:


One week ahead of schedule!  My son is going to be so excited when he gets home from school today!  

I like the track plan as well.  Any chance you could sketch it out or take a high-angle photo?  I know you're somewhat free-handing it if I remember correctly, so you don't have a SCARM plan.

Well today was the day to crawl under the layout.  I got all setup.  Today's task was to get the Woodland Scenics wiring modules set up and at least one building wired.  As fate would have it, we lost power just before I was to get on the creeper.  Wind gusts here in NH as high as 60 MPH.  Now that I think about it, I really didn't need power to get under the layout.  I could have just used my headlight as normal.  Ha Ha foiled again!  I've got 6 of the WS buildings in place and have to move each of them and drill a hole to get the wires under the table.

IMG_0631IMG_0632IMG_0633


Attachments

Images (3)
  • IMG_0631
  • IMG_0632
  • IMG_0633
John D. posted:
Jdevleerjr posted:


One week ahead of schedule!  My son is going to be so excited when he gets home from school today!  

I like the track plan as well.  Any chance you could sketch it out or take a high-angle photo?  I know you're somewhat free-handing it if I remember correctly, so you don't have a SCARM plan.

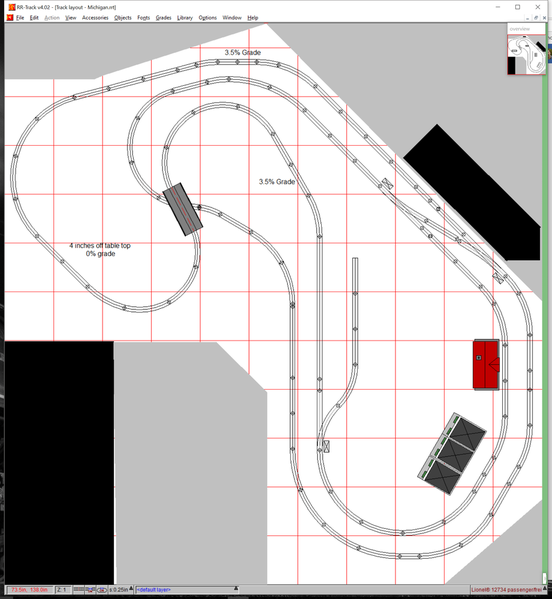
I did kinda pre-plan it with an old version of RR tracks.  Here it is.  It doesn't follow along exactly but it is pretty close.  

Screenshot%202017-02-17%2021.09.11

Attachments

Images (1)
  • Screenshot%202017-02-17%2021.09.11
paul 2 posted:

Got the switches in. Took awhile to do the track in between. I wanted to get the tightest fit. With that done I've got to sit down and figure out what I want to do. More then likely I will have to order some switches from Ross and definitely need more cork. I'm down to my last three pieces...........Pics.......Paul

DSCN0196DSCN0197

Looks great Paul, have you figured out where you are going to put all your Menards rolling stock?

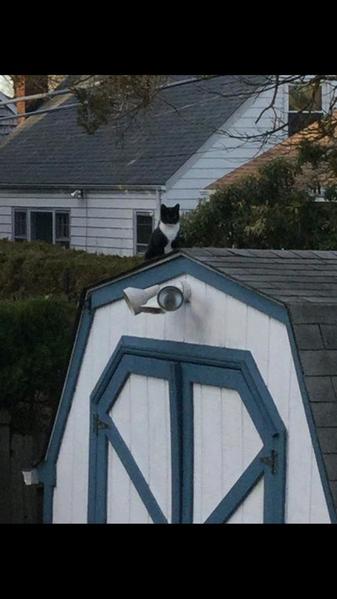
carpet Helix test.... lemme see, "take a measure from center to center rail, divide by 7, multiply by cat and that will be the grade of norma bates Kitteh.

but the track is tourqued. hmm.. back to the giraffe pen and "Bud" wagon to consider... hmmmmm

"..you can't roller skate in a buffalo herd, you cant rollerskate in a buffalo herd... bum ta da dumm dum.." 020170302_140848

Attachments

Images (1)
  • 20170302_140848

Mike, I still have no wall space so I have only have two options. ONE is make sure to put in a lot of sidings to handle the cars or TWO rent wall space from Cabinet Bob. I don't think option two will come to be so it looks like option one for me. Option three was taken off the table when I asked the wife if I could use the dining room for shelves and she said no but so far I have not had to buy any shoes yet........Paul

paul 2 posted:

Mike, I still have no wall space so I have only have two options. ONE is make sure to put in a lot of sidings to handle the cars or TWO rent wall space from Cabinet Bob. I don't think option two will come to be so it looks like option one for me. Option three was taken off the table when I asked the wife if I could use the dining room for shelves and she said no but so far I have not had to buy any shoes yet........Paul

Very cool Paul, and I like the way your layout is coming along! I try to check it everyday!

I've been suffering from some gastric issues the last few days. Insult to injury is the horrible lack of sleep that went with it. Trainwise speaking, yesterday was total loss, with the exception of forum time. In case you missed my monthly update, you can catch it HERE.

I made it downstairs for little while today, and felt that a non-strenuous task was in order. I started the wiring process on those uncoupler magnet relay panels. The purple wire with the daisy chain, will supply power to the magnets when the relays are activated. The other end of the magnet coil is tied to the center rail. Because of the way my track power supplies are wired, the voltage going to the magnet can be any of a number of different values less that track voltage. I just have to pick the lowest one that gets the job done.

IMG_7354

BTW, the 5V wall warts were in the mail today, so when the wiring is done, I'll be able to test these.

Attachments

Images (1)
  • IMG_7354

nice Job.... love the interlocking mats, i want some!

made more static improvements to the Magic Mountain... Hi and low enter/exit. Thinking about timbers to frame the entrance/exits..Then run the track on the outside to view the run. Ledge or wooden bridge? Maybe mining pit operation below? the steady Marx 500 engine pulls itself around the track, gains speed downhill and tips on the turn, Sooo, note to engineer, Jake Brake on the downhill.

Lab has her nose into it all, and barks commands as the train sparks ozone ino the night air, while i am happy that the track has power with no ded spots.

i dont know whats more fun. thinking, buying, getting, trying, retrying, tinkering with old stuff, awaiting for the grandkids to arrive, or my wifes total lack of interest.. Cheers, and thanks Mitch 

https://youtu.be/WYmPmn3q32g

Well so far I'm loving the Woodland Scenics Plug  & Play system.  I went to Hobby Lobby today and picked up the P&P Switch for the Main Expansion Module.  I had to rearrange my original panel setup.  Each Light /Building Module will handle 4 lights + 1 switch if necessary. Each Expansion Module will handle 4 Light/Building Modules + 1 switch.  I still need 1 more Light/Building Module.  I also used 2 warm white LED P&P lights, one in a 3 story building that I bought used and the other in an old Lionel caboose body that I use as a railside  maintenance building.  

Hobby Lobby has a 40% coupon that can be used for one item per visit.  I haven't been in a hurry so I've made a few visits when in the area.

I still have the six Woodland Scenics Buildings to Plug in.  I now have Window Diffusing Film to put in the 3 story used building.  Projects never seem to end thank goodness.

IMG_0634IMG_0635IMG_0636IMG_0637IMG_0638IMG_0639IMG_0640IMG_0641

Attachments

Images (8)
  • IMG_0634
  • IMG_0635
  • IMG_0636
  • IMG_0637
  • IMG_0638
  • IMG_0639
  • IMG_0640
  • IMG_0641

I had plans to start scenery last night.  I wanted to get all the foam carved around the hill side of the layout along with a small stream for where my grist mill will go with its working water wheel.  

Well I put the kids to bed.  Sat on the couch and had the last piece of home made apple pie my mother made me for my birthday earlier in the week.  Must have fallen asleep shortly after because about midnight when the wife got home from work she woke me.   

Oh well!  Tonight Im going to home depot to pick up some plywood for the facade but not much else.  I am off of work Monday and Tuesday and hope to get a lot of work done then.  

Mo985 posted:

The local service provider worked through the weekend to get the juice flowing to the newly installed Cell site. Now the folks of Linglestown won't be dropping calls, and can stream till their heart is content!

All scratch built.

DSC_0302DSC_0303DSC_0304DSC_0305DSC_0306DSC_0307DSC_0308DSC_0309

Great Job Mo ! You sure know how to make things look easy! LOL I know they are not. But you do wonderful work!

MO985,

The cell site is great!  Having worked over 40 years in the power and telecom industries, I am partial to modeling of power stations and substations, and pole lines.  I must say, I can't say I have seen a cell tower facility modeled before, but having spent time in cell stations working for the local telecom provider for cell backhaul, I would say you nailed it!  Thanks for posting!!


Mark Boyce posted:

MO985,

The cell site is great!  Having worked over 40 years in the power and telecom industries, I am partial to modeling of power stations and substations, and pole lines.  I must say, I can't say I have seen a cell tower facility modeled before, but having spent time in cell stations working for the local telecom provider for cell backhaul, I would say you nailed it!  Thanks for posting!!


Thanks Mark. I've wanted to do this since I started my layout. There are a few close by me I was able to get some pictures of, even some of the ones that look like trees, so they blend in to residential areas!! (I'm fascinated with those!!). I wanted to plant some pines around the fence, just haven't been able to find any that meet my standards.

I've already added those to my York list!!

Investigation into recent crash Prompts local officials to examine Water Washout and ensuing avalanche of mud. "On March 3rd, 2017, an Amtrak Northeast Regional train from Washington, D.C. bound for New York City derailed and crashed on the Northeast Corridor in the Port Richmond neighborhood of Philadelphia, Pennsylvania." 

Upon further inspection, the experts from "Gi-Raffe" crash investigation will be looking for the Black Box. No word at this time

Recent observer commented " OUCH"

Miggy posted:

Investigation into recent crash Prompts local officials to examine Water Washout and ensuing avalanche of mud. "On March 3rd, 2017, an Amtrak Northeast Regional train from Washington, D.C. bound for New York City derailed and crashed on the Northeast Corridor in the Port Richmond neighborhood of Philadelphia, Pennsylvania." 

Upon further inspection, the experts from "Gi-Raffe" crash investigation will be looking for the Black Box. No word at this time

Recent observer commented " OUCH"

OH man that has to suck!   But at least you dont have a concrete floor..  And the train didnt have far to fall!  

Jim 

The National Transportation Safety Gi-raffes have released their findings on the March 3rd crash. 

NTSG investigators have determined that equipment failure was the cause of the incident. 

"The problem," they explained, "lies entirely with the loose nut behind the controls."

GEDC2910

NTSG senior official Fortescue J. Gi-raffe further was quoted as saying, "Ah, yes.  Some wreck, eh, folks?"

Mitch

Attachments

Images (1)
  • GEDC2910
Mo985 posted:

The local service provider worked through the weekend to get the juice flowing to the newly installed Cell site. Now the folks of Linglestown won't be dropping calls, and can stream till their heart is content!

All scratch built.

DSC_0302DSC_0303DSC_0304DSC_0305DSC_0306DSC_0307DSC_0308DSC_0309

Great work!  Really like the fence and signage.   What did you use for the barbwire and chain link fence?   Please share details!  Thanks.

Dave

NOTHING

Started renovating our Den. Not going to see the layout for a few weeks I guess. I may have to start a night shift to get the work on the layout done

The National Transportation Safety Gi-raffes have released their findings on the March 3rd crash. 

NTSG investigators have determined that equipment failure was the cause of the incident. 

"The problem," they explained, "lies entirely with the loose nut behind the controls."

Good to see the NTSG is on the job. I don't know how much longer we should let Miggy and Mitch hang around with each other??????

darlander posted:
Mo985 posted:

The local service provider worked through the weekend to get the juice flowing to the newly installed Cell site. Now the folks of Linglestown won't be dropping calls, and can stream till their heart is content!

All scratch built.

DSC_0302DSC_0303DSC_0304DSC_0305DSC_0306DSC_0307DSC_0308DSC_0309

Great work!  Really like the fence and signage.   What did you use for the barbwire and chain link fence?   Please share details!  Thanks.

Dave

Here is a pic of what I used for the fence. The holes are nowhere near scale, but they look really good. I found it at Michaels, for about $4-5. The barbed wire is window screen. It is black fiberglass, I painted silver with a paint marker. The fence posts are made from the metal staple that hold the landscape fabric in the ground, with the top end bent for the barbed witted supports. The gate is wooden down. I used .020 safety wire (I'm a helicopter mechanic) for the wire holding the fence to the posts. Wood, foam, and cardboard for the generator and service box. Some cut plastic from packaging with cardboard spacers for the cooling fins, wire from cat5 for the cables going to the pole, and a piece of 12ga from generator to service box. 

image

Attachments

Images (1)
  • image

My weekend project:  My trolley station had a serious safety issue that was mitigated this weekend.  The retaining wall needed some kind of obstacle to prevent impaired passengers from wandering off in the wrong direction and doing a full or half gainer off the wall.  Solution - build a fence.  I first had to make a profile pattern to determine angles and post spacing.  Next I transferred the spacing to a wood strip and proceeded to construct a fence using 1/16 x.014 Sq brass from Precision Metals.  I had to make three sections and then join them together.  All that is left is to clean up the joints with a file, insert mounting pins, prime & finish coat and install.  This ought to get OSHA off my back!

Unfortunately, I was again able to ignore the Pink and Blue mountain calling me for another weekend.

Dave

DSC09950DSC09951DSC09956DSC09958DSC09946DSC09960DSC09963

Since this piece did not have an end post, I added a temporary wire keeper for support while soldering to the other section.

DSC09966

The keeper was removed after the two sections were joined

DSC09968

DSC09975

Keeper gone!

DSC09977

DSC09976

Finished except for inserting mounting pins (the square tubing has a hollow core).

DSC09978

Test fit.  Tomorrow its clean up some solder joints, add mounting pins, prime, finish coat and install. 

DSC09987

Maybe next week - the mountain!!!!!!!!!


Attachments

Images (15)
  • DSC09950
  • DSC09951
  • DSC09956
  • DSC09958
  • DSC09957
  • DSC09960
  • DSC09946
  • DSC09963
  • DSC09968
  • DSC09966
  • DSC09975
  • DSC09976
  • DSC09977
  • DSC09978
  • DSC09987
Last edited by darlander
Miggy posted:

# Dave  AMAZING, gawd you guys got some real skills. I appreciate the photos of your railing creation. Very nice! can I keep the screen shots for my how to file?

Amazing, "and Gramps said, Ya done good..... I knew he meant it"

Frank, of course you can keep them.   That's why I posted the photos.  It is fun to share construction methods.  I am honored that you want them.

Dave

Mo985 posted:
darlander posted:
Mo985 posted:

The local service provider worked through the weekend to get the juice flowing to the newly installed Cell site. Now the folks of Linglestown won't be dropping calls, and can stream till their heart is content!

All scratch built.

DSC_0302DSC_0303DSC_0304DSC_0305DSC_0306DSC_0307DSC_0308DSC_0309

Great work!  Really like the fence and signage.   What did you use for the barbwire and chain link fence?   Please share details!  Thanks.

Dave

Here is a pic of what I used for the fence. The holes are nowhere near scale, but they look really good. I found it at Michaels, for about $4-5. The barbed wire is window screen. It is black fiberglass, I painted silver with a paint marker. The fence posts are made from the metal staple that hold the landscape fabric in the ground, with the top end bent for the barbed witted supports. The gate is wooden down. I used .020 safety wire (I'm a helicopter mechanic) for the wire holding the fence to the posts. Wood, foam, and cardboard for the generator and service box. Some cut plastic from packaging with cardboard spacers for the cooling fins, wire from cat5 for the cables going to the pole, and a piece of 12ga from generator to service box. 

image

Thanks for the info.  I have a spot for a fence like that but, I have a mountain to finish first - Darn!

Dave

darlander posted:

My weekend project:  My trolley station had a serious safety issue that was mitigated this weekend.  The retaining wall needed some kind of obstacle to prevent impaired passengers from wandering off in the wrong direction and doing a full or half gainer off the wall.  Solution - build a fence.  I first had to make a profile pattern to determine angles and post spacing.  Next I transferred the spacing to a wood strip and proceeded to construct a fence using 1/16 x.014 Sq brass from Precision Metals.  I had to make three sections and then join them together.  All that is left is to clean up the joints with a file, insert mounting pins, prime & finish coat and install.  This ought to get OSHA off my back!

Unfortunately, I was again able to ignore the Pink and Blue mountain calling me for another weekend.

Dave

Since this piece did not have an end post, I added a temporary wire keeper for support while soldering to the other section.

the keeper was removed after the two sections were joined


Keeper gone!


Finished except for inserting mounting pins (the square tubing has a hollow core).


Test fit.  Tomorrow its clean up some solder joints, add mounting pins, prime, finish coat and install. 

DSC09987

Maybe next week - the mountain!!!!!!!!!


I have a similar issue on my layout. Thanks for the inspiration and detailed photos.

Bob

Mark Boyce posted:
Kittytrain1969 posted:

I'm just trying to figure out if I should keep building, or just take it down and start over again , I mean how many foam mountains can you put on a flimsy 6x11 train board without it collapsing? :&gt

If you want it to last, I think you need a solid foundation.

I'm really bad at building anything with wood, I can't even cut a straight line. That's why I use plastic shelving units as a base for my sectional layout. Someday I'd like to buy a good quality saw and at least try to make a sturdy foundation. I also have a tendency to move a lot, so that's an issue as well.

Kittytrain1969 posted:

I'm really bad at building anything with wood, I can't even cut a straight line. That's why I use plastic shelving units as a base for my sectional layout. Someday I'd like to buy a good quality saw and at least try to make a sturdy foundation. I also have a tendency to move a lot, so that's an issue as well.

FWIW, I use plastic folding tables from Wal-Mart as the base for my show layouts.  Four of 'em side by  side gives you a 6 x 10 table space.  Cover that with grass carpet from Lowes, put down FasTrack and away you go... 

Mitch

M. Mitchell Marmel posted:
Kittytrain1969 posted:

I'm really bad at building anything with wood, I can't even cut a straight line. That's why I use plastic shelving units as a base for my sectional layout. Someday I'd like to buy a good quality saw and at least try to make a sturdy foundation. I also have a tendency to move a lot, so that's an issue as well.

FWIW, I use plastic folding tables from Wal-Mart as the base for my show layouts.  Four of 'em side by  side gives you a 6 x 10 table space.  Cover that with grass carpet from Lowes, put down FasTrack and away you go... 

Mitch

I have my 4x8 Christmas layout on a heavy duty folding table.  The kind they use at church and the fire hall.  Solid as a rock!

Jdevleerjr posted:

Not a lot done but I snuck down to the layout for about 45 minutes tonight and added my inner harbor along with a Lionel Drawl Bridge.  

Tomorrow I will finish added the "Railrax" along the front of the layout to store extra rolling stock and locomotives.  


20170305_22220620170305_222216

I will look forward to seeing your railrax completed.  I will want to store extra rolling stock under the layout.  Although I have so little space for it, someone suggested drawers underneath.  I would buy something if I go that route.  Building drawers is beyond my ability and tools.

darlander posted:

My weekend project:  My trolley station had a serious safety issue that was mitigated this weekend.  The retaining wall needed some kind of obstacle to prevent impaired passengers from wandering off in the wrong direction and doing a full or half gainer off the wall.  Solution - build a fence.  I first had to make a profile pattern to determine angles and post spacing.  Next I transferred the spacing to a wood strip and proceeded to construct a fence using 1/16 x.014 Sq brass from Precision Metals.  I had to make three sections and then join them together.  All that is left is to clean up the joints with a file, insert mounting pins, prime & finish coat and install.  This ought to get OSHA off my back!

Unfortunately, I was again able to ignore the Pink and Blue mountain calling me for another weekend.

Dave

Since this piece did not have an end post, I added a temporary wire keeper for support while soldering to the other section.

The keeper was removed after the two sections were joined

Keeper gone!

Finished except for inserting mounting pins (the square tubing has a hollow core).

Test fit.  Tomorrow its clean up some solder joints, add mounting pins, prime, finish coat and install. 

Maybe next week - the mountain!!!!!!!!!


Dave, Great looking work! The finished product sure shows skills and talent! It also show the time you have put into your layout as a whole. Just wonderful!

Mark Boyce posted:
Jdevleerjr posted:

Not a lot done but I snuck down to the layout for about 45 minutes tonight and added my inner harbor along with a Lionel Drawl Bridge.  

Tomorrow I will finish added the "Railrax" along the front of the layout to store extra rolling stock and locomotives. 

I will look forward to seeing your railrax completed.  I will want to store extra rolling stock under the layout.  Although I have so little space for it, someone suggested drawers underneath.  I would buy something if I go that route.  Building drawers is beyond my ability and tools.

Mark

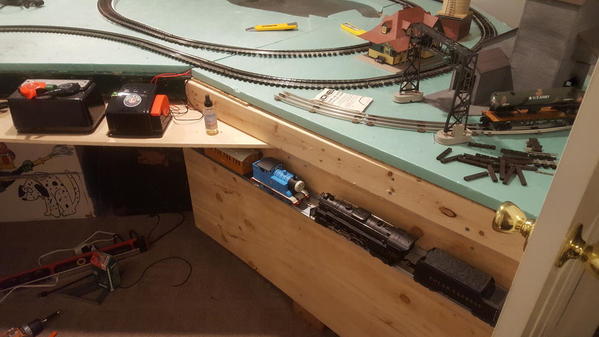
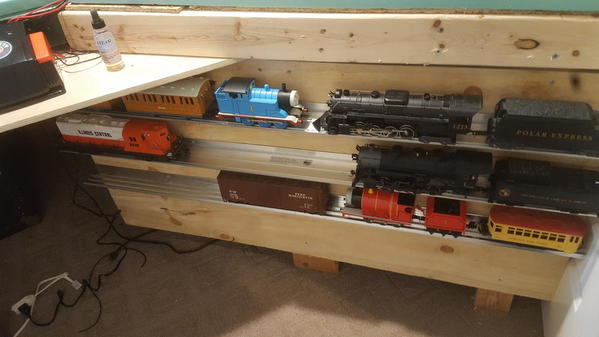
I have all my railrax mocked up and attached.  I will be removing them soon so I can paint the plywood behind them.  

They make a great spot to store locomotives and rolling stock.  


Today I also started working on the harbor scene.  I installed my dock and some bulidings for my "Fishtown"

Tomorrow I hope the baby takes a good long nap so I can start on the scenery on the other side of the layout. 

20170306_15033020170306_150746


Attachments

Images (2)
  • 20170306_150330
  • 20170306_150746

After waiting for Menards to release their next offering today Mr. Brown dropped off a package. Was not sure what was in it. I knew what I had on order but it is always a surprise to open it up and found out what came. This time it was my command control crane with sound shed. I placed the crane on the gantry track to see how it and the shed look in the scrap iron yard. Also a few packages of transformers that I want to add to some flat cars I have after I repaint them. On a side note I just ordered the Lionel train repair building with the idea of making it a transformer plant that I remember seeing in Tonawanda NY by the 290. It was a GE plant. Anyways pics............Paul

DSCN0200DSCN0202DSCN0204

Attachments

Images (3)
  • DSCN0200
  • DSCN0202
  • DSCN0204
Mo985 posted:

The local service provider worked through the weekend to get the juice flowing to the newly installed Cell site. Now the folks of Linglestown won't be dropping calls, and can stream till their heart is content!

All scratch built.

DSC_0302DSC_0303DSC_0304DSC_0305DSC_0306DSC_0307DSC_0308DSC_0309

Mo

Nice build. Saw what you used for fencing in later post. Nice out of the box solution.  The danger high voltage sign is a nice touch.  Its good to know that the little people have cell phone  service now but, more importantly if any of us ever wind up at your house, our cell phones will have a strong signal now.  

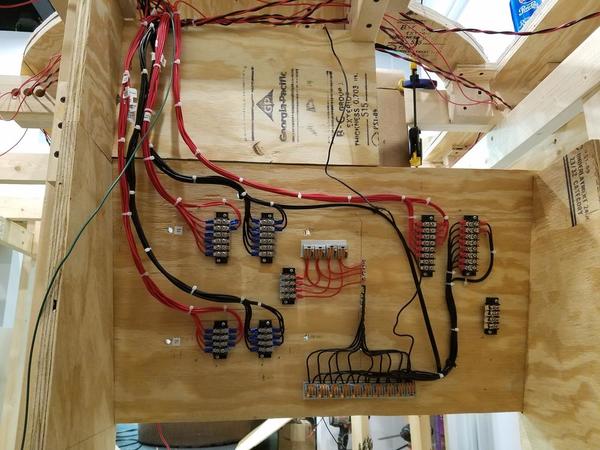
All I can say is a lot of great work being done. Of course My eyes and head started hurting with the wiring stuff especially  what Tom Tee posted with Panel 3 of 6:

On the accident investigation of March 3rd. I am glad the findings were published and confirmed what we all knew as the cause. Those loose nuts will get you every time. 

  The last couple of weeks not much train or layout activity been real busy with family stuff, Managed to get a train show in, Some purchases including a some what rare Atlas GN GP35s that showed up on the bay. the big news to me and my main focus for the last couple of months. My truck(M1028 CUCV) finally is out of the shop and running. Main electrical issue was finally resolved with the total rewiring of the engine harness, Harness under the dash, Fuse box harness, and all other wiring that needed to be replace along with glow plug relays and controllers. Talk about eyes hurting and getting a headache. Also rebuilt was the drive train(front suspension and axle, Rear axle, brake lines, steering box and other parts that needed to be replaced.)  Best part was the unexpected. All weekend long my kids were fighting over who was riding in the truck with me. Even better was when the truck was dropped of Friday night ( We were celebrating my wife's birthday at the time) neighbors kid started getting into the truck when I was going to do a quick test drive. His dad who has a lifted 4wheeler and I both couldn't believe it and my son was ****ed. My son of course got in but was a Kodak moment  when my neighbor's kid to his dad that my truck was cooler then his.  So now its time to finally get back to train stuff.  OK cool for me.

p51 posted:

A photo of mine just appeared in rival Model Railroad Hobbyist magazine (I didn't even submit it, they asked to use it).

With this and my article on the layout in the upcoming On30 Annual, I’m very happy with the reception my photos have gotten.

Congratulations Lee!  Great picture, layout and wonderful story.  I have always been impressed with your tie to history in your modeling.  Thanks for alerting us to the photo article.  

Dave 

Jdevleerjr posted:
Mark Boyce posted:
Jdevleerjr posted:

Not a lot done but I snuck down to the layout for about 45 minutes tonight and added my inner harbor along with a Lionel Drawl Bridge.  

Tomorrow I will finish added the "Railrax" along the front of the layout to store extra rolling stock and locomotives. 

I will look forward to seeing your railrax completed.  I will want to store extra rolling stock under the layout.  Although I have so little space for it, someone suggested drawers underneath.  I would buy something if I go that route.  Building drawers is beyond my ability and tools.

Mark

I have all my railrax mocked up and attached.  I will be removing them soon so I can paint the plywood behind them.  

They make a great spot to store locomotives and rolling stock.  


Today I also started working on the harbor scene.  I installed my dock and some bulidings for my "Fishtown"

Tomorrow I hope the baby takes a good long nap so I can start on the scenery on the other side of the layout. 

20170306_15033020170306_150746


Ah ha!  There's more Railrax!  Looks good!  I have never seen them except for photos.  Will they hold the trains in safely if you bump into them?

The harbor mockup looks very good too!!

Hahaha! Today I spent about two hours modifying an O scale die-cast flat-bed truck, the very long bed of which has bugged me for several years now. So I finally decided to shorten it. After two hours of hack-sawing, riveting, mill filing, finger burning and cursing, I finally got all the pieces together. Because of the way the model is constructed (which put limitations on where I could or could not saw/remove), all that effort and consternation resulted in the bed being only about three #!&%* scale feet shorter. This is one case of where the old motto “If it ain’t broke, don’t fix it” applies in spades. If the end result doesn’t warrant the time/effort spent, it’s kind of a waste of time. I’d show a photo but the truck needs to be repainted and it’s 2:45 a.m. right now and I have other things to get done before getting to bed. Tomorrow I’ll get to more productive model railroading on the Ironbound. Yeh, sure ; )

Add Reply

Post

OGR Publishing, Inc., 1310 Eastside Centre Ct, Suite 6, Mountain Home, AR 72653
800-980-OGRR (6477)
www.ogaugerr.com

×
×
×
×
Link copied to your clipboard.
×
×