


I'm working on the base for a mountain.
I took a major step in the creation of Pennsylvania station on my layout. I met Alex Malliae at Trainstock 5 and delivered the MTH banks so that he could begin construction. Now I’d better get going and build the upper level to receive this masterpiece.
Just finished lubricating all of my locomotives. Next project...clean the track.
Tom
Finished laying down another primed sheet of homasote...More to go! Terry
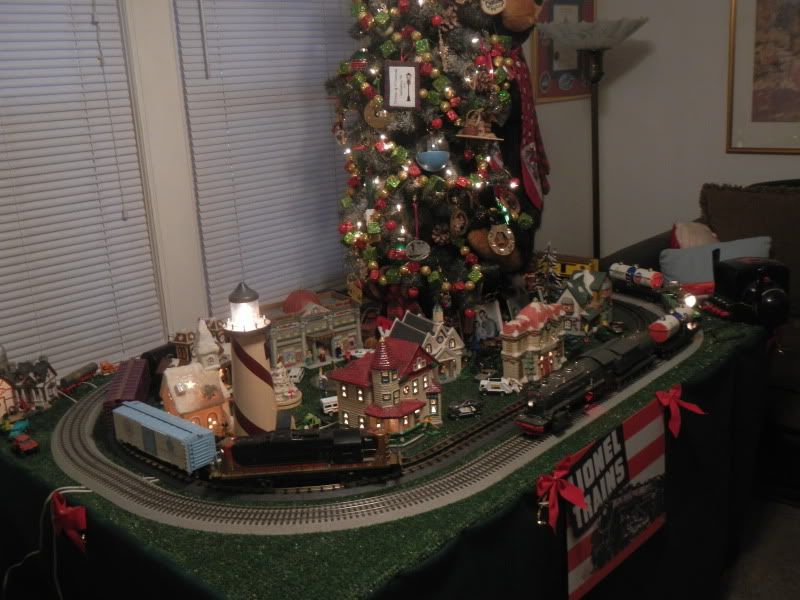
Added an inside 031 RealTrax oval to the Christmas layout.
PCRR/Dave
Built a 26 inch girder for my elevated section... Only another 200 inches to go...bent some ply to do the curves...plastered 90% of my mountain.
Originally Posted by Jdevleerjr:
So what did you do today on your layout?
Finished it.
Harry,
Who are you kidding? They are never finished!!!
Tom
Cleaned the track with denatured alcohol and a cotton tee shirt. Where does the black stuff come from?
Originally Posted by Tom Densel:
Harry,
Who are you kidding? They are never finished!!!
Tom
Finished as far as I'm concerned. I have some details I want to add but for the most part - it's a wrap.
Originally Posted by ARC:
I’m trying to finish my engine service area. This weekend, I hope to add some handrails and ground cover around the water spout. I may not get the whole service area done since I can’t seem to find a suitable product for sand. All part of the fun!

Looks great man.
I added an uncoupling track to one of the industrial spurs and wired in the scrap yard office.
We got to Train Central about noon; ordered "sandmiches" and then being it was a no-school-holiday we had visitors back to back all afternoon.... So we just ran trains and taught 4 or 5 lads how to use the remotes..... we had a couple of engines drive into the caboose in front of them - but no damage..... even when we lost a dozen hopper cars off the track in a tunnel..... One gentleman was an HO guy and he said that it must have cost a fortune to add DCC to all of these engines..... LOL....
These guys grabbed seats on the stairs to the attic for a bird's eye view....

Attachments
Images (1)
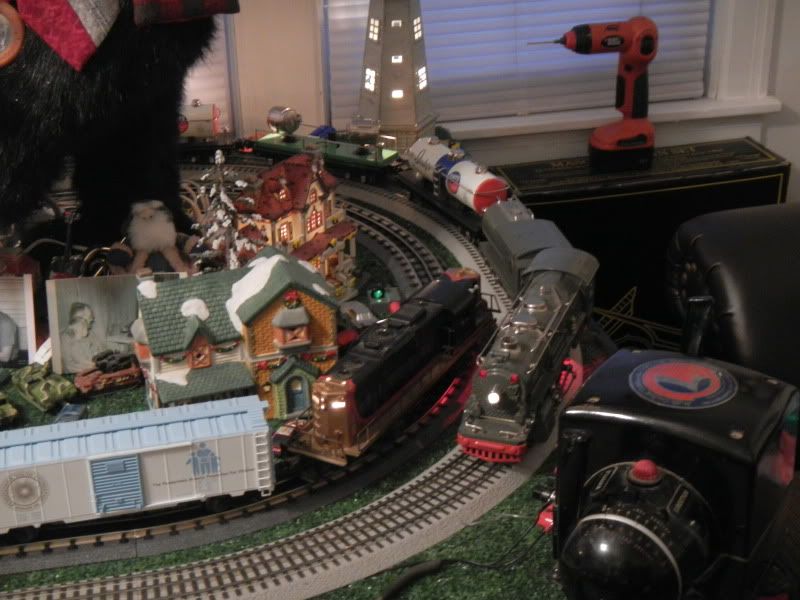
Today I uploaded photos to Shutterfly of work I have been completing since mid December. I have been rather dormant for months and then the “get busy on trains bug” bit me. I have considered making up a train with some coal hoppers and tank cars. Several years ago I purchased nine 2 bay coal hoppers. So in December on a lark I started looking on ebay for tank cars. I like the K-line versions because they are relatively inexpensive, the trucks are tolerably close to the steam era and the tank cars are close to steam era as well. I bought a few here and there on ebay that were in good condition but as inexpensive as I could buy them. I bought 10 at an average cost including shipping for $23.00 each, but one of them was a heavy model that I chose not to use for my project. I disassembled nine of them and painted them flat black. I made up some signage on the computer with a black background and white lettering and glued them on the cars. They are not as good as decals, but it works for me. I have completed other projects that I will post later. Here are a few pics.
http://im1.shutterfly.com/medi...0/rx%3D720/ry%3D480/
http://im1.shutterfly.com/medi...0/rx%3D720/ry%3D480/
http://im1.shutterfly.com/medi...0/rx%3D720/ry%3D480/
http://im1.shutterfly.com/medi...0/rx%3D720/ry%3D480/


Former Member
Started painting the frame for the new control panel. Mounted up the broken control panel so that when I'm done paiting the new one, I can just remove a few screws from the piano hinge, and attach it to the new frame.
My Dad took these curves out and smoothed them out as they were just toooooo much for the 4-12-2. With flanges on the 1st and 5th driver.....this "S" curve just wasn't cutting it!

Attachments
Images (1)
Another project that wanted to get into was making PRR design signals. I did some research on the web and found this sight. http://www.railroadsignals.us/signals/pl/pl.htm
The design specs on the signals were just what I needed to start building. I used , masonite for the bases; 9/16 inch wood dowel for the poles for rigidity (painted nickel to mimic weathered aluminum); ¼ inch grid screen for the ladders; Hobby Lobby wood discs that were just a little less than 1 inch in diameter for the faces. I tried to drill holes in the discs that were properly aligned but even with a template it was quite difficult to do. Then I glued bright yellow paper on the back of the disc. It looked pretty good from a far, but the faces were just a little bit too small and the yellow did not stand very well. Eventually I settled on a different method. I used the drawing feature on the computer and made close to one inch circles, filled black. Then I was able to make very small circles for the lights filled in yellow and dragged them to precise locations on the black circles. I did the same for the lower signal arms and cut them out. The paper was quite thin and was white on the back. I had some 3M spray adhesive that I sprayed on black hobby stiff paper and placed the print out on the black paper. I cut each signal (32 round, 32 arms!!!) then glued the round on the discs for the upper signals and skinny stick pieces painted black for the lower arms. I know that the actual signal displayed are in most cases not appropriate and would result in havoc in the real rail world but I can tolerate the fiction. Here are some pics.


Attachments
Images (5)


Files (2)
I added and ran my new Penn E6 (lindberg) steamer that I picked up this weekend from the Plano TX train show. First steamer since my Dad got me my 736 Berkshire back in 1950 (still have it and it runs)
Chet Klyn
LCCA
Track surgery: been shortening the diverging track on a bunch of over long Atlas #5 switches for 3 7/8" right of way centers and compressing overall lengths for a shorter ladder track. Also, cutting one in half between the frog and points for a lift out.
I finished weathering and installing the stockade fence for my scrapyard. Cleaned the track with ISP alcohol and some old flannel. I also unpacked and ran the caboose and box car I got from a plankowner110 yesterday. Bill it was nice meeting you, they look great on the layout! Then just sat and watched the trains run for an hour.
Kevin
Finished packing everything up a few days ago from the old layout. Ready to tear up some old bench work and making a mess.

Attachments
Images (1)
I removed my TIU from the layout and boxed it up to ship out. I have currently removed everything that is PS2, and will be staying with Legacy/TMCC only.
I looked around the layout half way through spending significant time underneath it rewiring accessory leads and dismissed the thought of continuing today. I looked at the projects on my table and thought "maybe tomorrow" I thought of going to Lowes for more wire. Nah..too cold out today. I ran trains instead. No wonder I have a backlog of half finished projects as I spend too much time playing with trains.

I just finished all the benchwork on my new layout. Tonite is cleaning all the table tops off so they can be painted. And starting to glue some foam down to prepare for roadbed laying.
Originally Posted by Jdevleerjr:
will be staying with Legacy/TMCC only.
Good for you!
Originally Posted by Kenai:
My dog, Layla and I have been building the Kenai Mining Company in honor of my dog Kenai who passed away 18 months ago.
Kenai,
Looks fantastic (talking about the dog)! ![]() More photos of the layout would be greatly appreciated!
More photos of the layout would be greatly appreciated!
Originally Posted by Super O Bob:
I just finished all the benchwork on my new layout. Tonite is cleaning all the table tops off so they can be painted. And starting to glue some foam down to prepare for roadbed laying.
Bob, I loved all your You Tube videos of your previous layout. I'm really looking forward to seeing what you do this time!
I put Woodland Scenics risers under the loop on one side of my layout. The loop is O84 and O72 Fastrack. I raised the upper level on six inch blocks of styrofoam around to the other end of the layout and stuck a few pieces of foam under that loop. I test ran one diesel around the whole setup. I have a spot that I need to extend the benchwork so there is support under the track, and three corners that I need to fill in. I installed another O72 cross over, bringing the total to three, and installed a turnout for the yard lead. Yesterday evening I unpacked the Big Boy and tested the fit on the outsid loop. I needed to make a little clearence adjustments, but everything checked out OK. Now I need to finish the benchwork so I can start on the other side.
Originally Posted by electroliner:
I looked around the layout half way through spending significant time underneath it rewiring accessory leads and dismissed the thought of continuing today. I looked at the projects on my table and thought "maybe tomorrow" I thought of going to Lowes for more wire. Nah..too cold out today. I ran trains instead. No wonder I have a backlog of half finished projects as I spend too much time playing with trains.
You sound like me. ![]()
Art
well let's see...planted about a dozen or so people last night as well as putting on/off switches to several sets of lights etc.
dusted off some of the bldgs and accessories.
also added more lights to some of the bldgs and hopefully will get them wired up later today.
thop......

Former Member
Hi Everyone, Really enjoy this post! I don't have an Iphone yet, so I can't easily post during my daily comute. I hope Jumijo was kidding about putting a flat screen TV where his layout is located!
This is more of a "what i did over my summer vacation" than what i did today. My house was built in the 1960s and for lots of reasons I decided that the popcorn ceilings needed to go, unfortunately, one of the rooms had my layout in it, which needed to be dismantled. So, I am attaching a few pictures of that layout, which I had built on four kitchen cabinets in the bedroom of my oldest son, who finally moved out a few years ago. About 10 years ago, in a basement storage room, I had built a layout that has the look and feel of a Lionel Display Layout. It has Atlas track and the curves are not big enough for my bigger engines, so i will be adding a loop of track with 54 inch curves on extensions added on to this layout. Over the Christmas break, I added more storage, on a shelf in the storage room closet. Take care,Dave


Attachments
Images (8)
Not strictly "on the layout", but built myself 2 rail cleaning cars (thanks Ace!), one for O-gauge out of a Marx tin caboose and one for S out of an American Flyer hopper. They have picked up an amazing amount of black crud.
I always get inspired after attending Trainstock. Have been working on my mountain and cleaning track and wheels.
I spent the morning before the kids got up cleaning out under the layout. I found a bunch of unused items that will go on the buy/sell forum. I also am looking at how I am going to design my pull out shelf for my transformer.
I cleaned up some switches and finished up some problem track for my "OGR Micro Layout Contest" layout.
Wired my Gantry Crane (thanks, Doug!). Relocated the drum loader, to make it more accessible for reloading. Both working fine. Installed some new peripheral terminal strips to ease further accessory wiring.
Went to LHS (Klein's) and spent my gift certificate. All in all a fine day!
Wrapped up a major part of the panel relocation/re-wiring project so I can complete the area for the locomotive service facility and roundhouse.
Started out running a newly acquired post-war 2056; runs and smokes like new! Then did some ballasting and scenery details around the rural station corner.
Add Reply
Sign In To Reply
