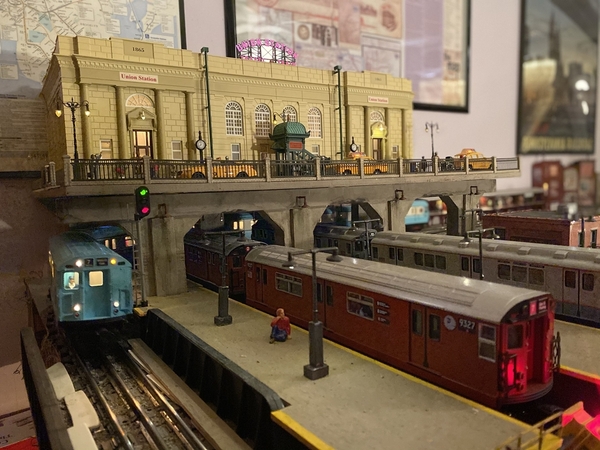
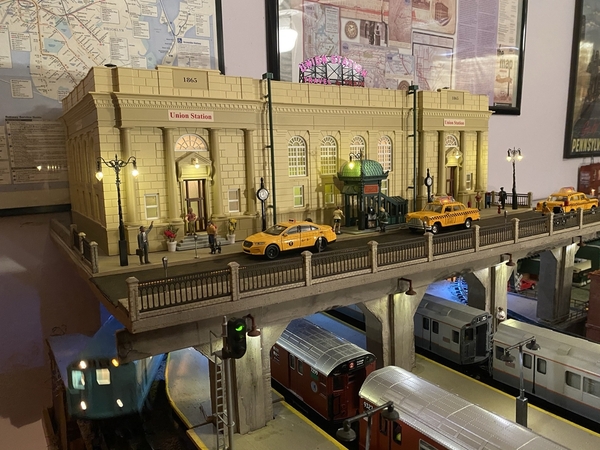
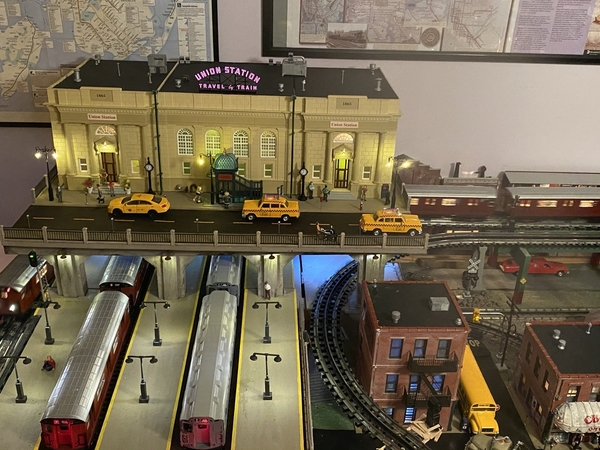
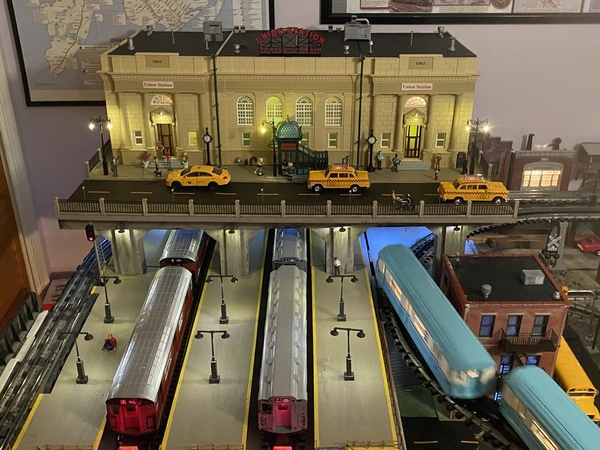
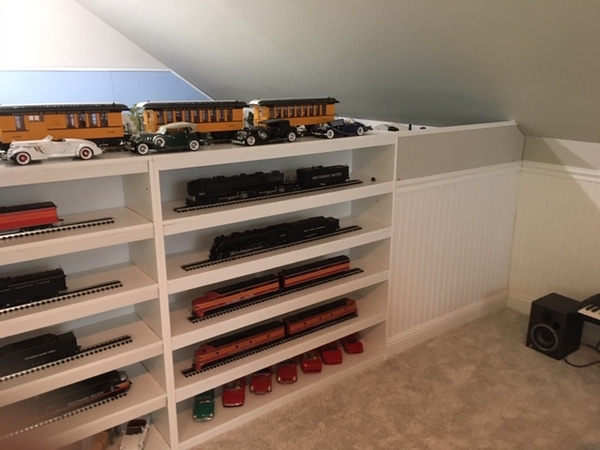
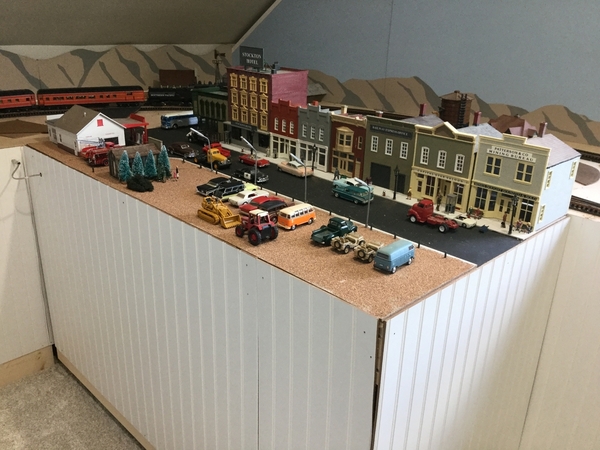
Strap Hanger - nice job on the kit bash. I had not realized the two center tracks were non-operating. I really like the idea of having the passenger ramps extended into the open - nice touch. I may borrow the idea on the next layout.
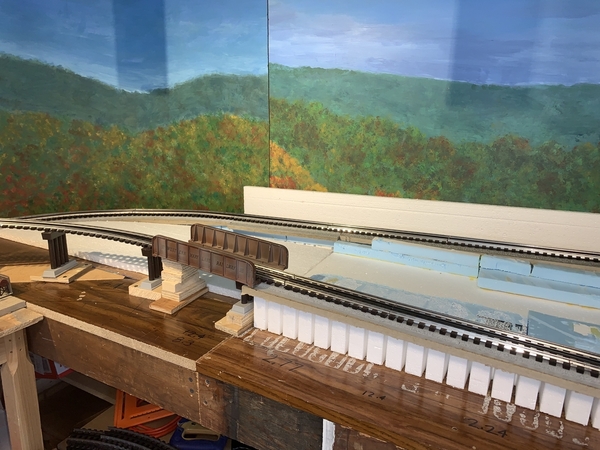
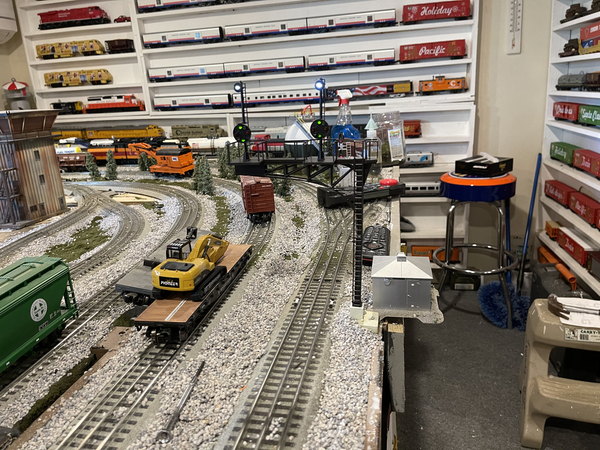
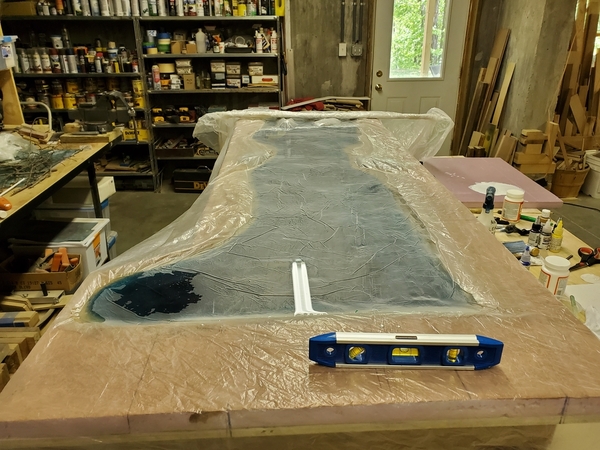
I started forming the foam scenery base for the first part of my scenery.
I also staged a meet of sorts.
Attachments
Thanks guys! I really can’t take too much credit, since most of the ideas came from reading this forum. I highly recommend kitbashing the mth banks into a station. It really isn’t that hard and comes out pretty good. The woodland scenics roof detailing kit is also great, with the many vents and AC systems giving it that added touch.
Bob, hopefully it’s just a loose wire. If not, I’ll need to replace some of the LEDs. A slightly more involved task, as I’ll need to scratch build some more lights.
Scouting Dad, yes, I kept the two interior tracks isolated. I do have two left hand switches that I was going to install off the mainline into them. However, when I realized my space only allowed two car lengths worth of track, I held off on that project, figuring why bother for such a small length. However, I may attach them in a future upgrade.
Sometimes it seems like nothing much is getting done. Last time I was going to use my Kreig pocket jig to add a small section to my upper level so I could add my newly acquired MTH station. Turns out Kreig's do not work so well for joining 1/2 nominal ply together. Got that section in - but I did not like the look of the station there - just not enough room. So the Menards Comradery Bar and 2 new MTH stores got moved to the back of the town and gas station in its current location (that may move).
The station is now where the bar and coffee shop was. It needs some detailing and signage -
"Twin Pines Inn" either on the upper or lower roof. Or may hang a sign from the lower roof. I think I will pick up the dark brown to trim out the "dentil" detail. Any ideas on base roof color is appreciated. Haven't decided if I will detail the brick mortar.
Meanwhile, I did surgery on the 3 new buildings. Replaced the incandescent bulbs with 12vdc LED strips, added 2nd floors and window coverings. Also have the 1st and 2nd floor lighting on separate circuits with dimmers. I prefer to have brighter lighting in the stores but not the living areas. Now I have to get underneath the layout to add the new wiring feeds. I used 1.5mm connectors, but I think the next size up would have been better. The dimmer works well.
Attachments
Mark, every time I see your layout - I see those wood boards and forget they are just coated and not solid wood. Nice job, I think I see where you are going with the elevation. Nice collection of engines.
@Strap Hanger posted:Thanks guys! I really can’t take too much credit, since most of the ideas came from reading this forum. I highly recommend kitbashing the mth banks into a station. It really isn’t that hard and comes out pretty good. The woodland scenics roof detailing kit is also great, with the many vents and AC systems giving it that added touch.
It's not even the station that's spectacular, although that IS cool. It's the way you have it elevated above, and have the tracks below, and what I assume are dummy tracks next to the active ones, and a tunnel underneath. Amazing.
@pdxtrains posted:It's not even the station that's spectacular, although that IS cool. It's the way you have it elevated above, and have the tracks below, and what I assume are dummy tracks next to the active ones, and a tunnel underneath. Amazing.
Thanks PDX. Necessity really is the mother of all invention. In an approx 8x15 room, expansion is either vertical or via a hole through the wall into the next room. The wife won’t stand for the latter, so vertical it is. Counting the floor, I’m now working with four levels (elevated, mainline, subway, and floor).
@Strap Hanger posted:
Wonderful station, Strap Hanger... love the old style kiosk subway entrance in front of the station. And I was a strap hanger on many a 7 train - first the blue World’s Fair trains going to the ‘64 - ‘65 Fair as well as Shea stadium, and later, the red birds to Shea. A lot of great memories. And you mention the Main Street - don’t forget, the 7 line ends at Main Street Flushing ![]()
@ScoutingDad posted:Mark, every time I see your layout - I see those wood boards and forget they are just coated and not solid wood. Nice job, I think I see where you are going with the elevation. Nice collection of engines.
Thank you, Jeff! Yes, that huge bookcase sure made a lot of boards for a sturdy layout top. Thank you about the engines. I got every one of them used, most from forum members.
@ScoutingDad posted:
Your layout is GREAT!!! Where did you get the concrete railing that is visible just above your girder bridge?
Thank you.
Randy - I have a short post on the concrete railing previously and also on the early pages on the TPRR.
https://ogrforum.ogaugerr.com/...4#153463017766640114
Basically its foam insulation routed to produce an I-beam shape and then used a 1/4 inch up-cutting router bit on my drill press for the columns. This bit has sharp sides which will cut out the columns when the work piece is slid up to make the column. Scale wise they are a touch too big but work visually. All coated with grout mix then color washed. I set up a kind of jig and ran a bunch off in a few minutes. Getting the speed right is the only real trick - too slow and the foam tends to tear out. Too fast and the router bit wants to reduce the amount of flesh on your fingers. I would not recommend a high speed router to do this, although if you had a router table and speed control that would work for making the I-beam shape. I suppose you could make this a glued up assembly out of wood. But since I had curves, I though the foam would bend pretty well and it did.
That was a slick idea, Jeff! The railing looks great!!
@Mark Boyce posted:
Beautiful! Love how you recycle your wood and foam. Never throw anything out>
Strap Hanger, Outstanding job on your Union Station! I am sorry about the lighting , but it happens. I really like your idea about the road, and the carne at the other end with the police blocking the road! I think it will look wonderful!
Mark, Nice to see you moving right along! Next thing you know you will have grass and trees!
Jeff, Nice building! I wish I had room for that but I don't. I think you have it in a prime location and as for the roof color and detail you should see if you can find Chris A's post on his. He did an outstanding job on it. Later today if I can get some free time I will try to find it. He did the roof and windows.
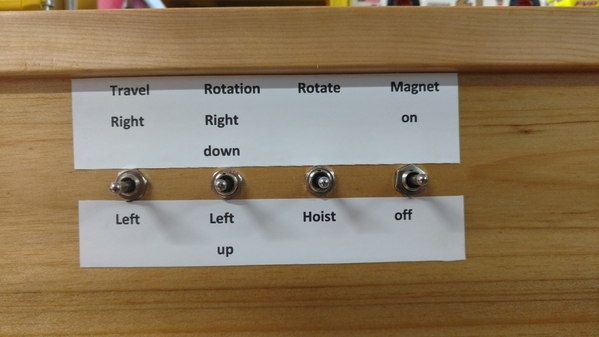
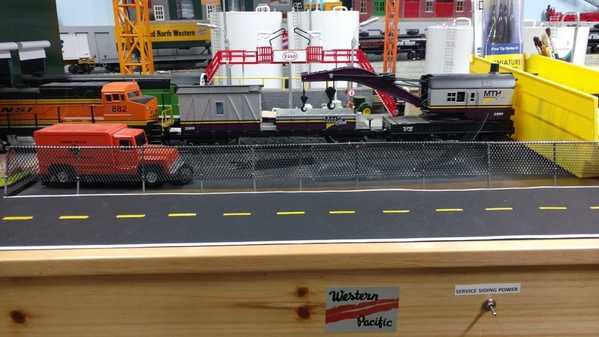
Well for me I have been working on getting my gentry crane wired to toggle switches as I did not like the old style controller. It took me a while and I also added some extra pulling line to move it right and left on the track.
On a change of subject I finally got everything to paint my little people, except the little people form China. Still waiting on them, I guess they got on the slow boat.
I hope you all have a great week and find time to have fun with your layout and trains!
@Jim Van Every posted:Beautiful! Love how you recycle your wood and foam. Never throw anything out>
Jim, Thank you for noticing also. Aside from the 10 linear feet of Mianne benchwork and a couple sticks of 1x2s and 1x3s, all the wood has been recycled from previous layouts and from cleaning out my dad's shop. The foam was used on a couple Christmas layouts, explaining the white paint on some sections. I have some 2x4 sheets of white bead board that my wife picked up at the thrift store. It's not the best for scenery, but I can use it to build up a base for hills that won't bear any weight to speak of.
mike g., thank you!! I have some ground foam that is several years old, and our older daughter gave me some small trees and other items. That sounds good you made improvements to the gantry crane. I hope your little people aren't on the ship that got stuck in the Suez Canal! ![]()
Mike G - After I posted I remembered Chris A's post and other links. For anyone interested in kit bashing the MTH station(s) this link has several re-directs to the topic on other pages in the forum.
@ScoutingDad posted:Mike G - After I posted I remembered Chris A's post and other links. For anyone interested in kit bashing the MTH station(s) this link has several re-directs to the topic on other pages in the forum.
Jeff, Yes I remember that topic where John H and Chris posted their station bash. That building is a wonderful model, and there is so much a modeler can do with it. If I had more room on my Blackwater Canyon Line layout and was including the Cumberland Maryland station that the Western Maryland Scenic Railroad now uses, I would start with the MTH station. (that is at the bottom of the other side of the mountain that my layout represents)
@ScoutingDad posted:Randy - I have a short post on the concrete railing previously and also on the early pages on the TPRR.
https://ogrforum.ogaugerr.com/...4#153463017766640114
Basically its foam insulation routed to produce an I-beam shape and then used a 1/4 inch up-cutting router bit on my drill press for the columns. This bit has sharp sides which will cut out the columns when the work piece is slid up to make the column. Scale wise they are a touch too big but work visually. All coated with grout mix then color washed. I set up a kind of jig and ran a bunch off in a few minutes. Getting the speed right is the only real trick - too slow and the foam tends to tear out. Too fast and the router bit wants to reduce the amount of flesh on your fingers. I would not recommend a high speed router to do this, although if you had a router table and speed control that would work for making the I-beam shape. I suppose you could make this a glued up assembly out of wood. But since I had curves, I though the foam would bend pretty well and it did.
Thanks for the referral to your other post. It has given me an idea.
Paul, I remember those days well. I used to get off on queensborough plaza when coming back from Manhattan to catch the 7 local. I loved watching that train make the turn into the station on that elevated line. You've given me a good idea. I'm going to make station and street signs to attach to the lightposts on each level. The platform level is going to be Roosevelt ave/Jackson heights. The upper level is going to be main Street, Flushing.
Thanks Mike G. I'm looking forward to crafting those scenes. It seemed like the best way to deal with a road to nowhere!
@Strap Hanger posted:Well, I finally had some time today to work on the layout and I was able to install my newly built union station. Very pleased with how it came out -
The sad part is that I need to now remove the station. After running trains for about three hours, two of the LED lights under it seem to have gone out. Hopefully it’s just a loose wire. I’m actually not too upset about it. You really are never done working on the layout. Fortunately, I made the station removable with easily detachable wire hookups for just such circumstances.
Next up is a car ramp leading to the Main Street on the left side. On the right, I’m going to place a scale building crane holding the on ramp for that side. I’m going to place lighted barricades and a police car on that end of the street so traffic is stopped while construction proceeds. Fun stuff!
Gorgeous.....well done!
@Strap Hanger posted:Paul, I remember those days well. I used to get off on queensborough plaza when coming back from Manhattan to catch the 7 local. I loved watching that train make the turn into the station on that elevated line. You've given me a good idea. I'm going to make station and street signs to attach to the lightposts on each level. The platform level is going to be Roosevelt ave/Jackson heights. The upper level is going to be main Street, Flushing.
Thanks Mike G. I'm looking forward to crafting those scenes. It seemed like the best way to deal with a road to nowhere!
If you use Willets Point, you can run an LIRR commuter train ![]()
![]()
@Strap Hanger posted:Paul, I remember those days well. I used to get off on queensborough plaza when coming back from Manhattan to catch the 7 local. I loved watching that train make the turn into the station on that elevated line. You've given me a good idea. I'm going to make station and street signs to attach to the lightposts on each level. The platform level is going to be Roosevelt ave/Jackson heights. The upper level is going to be main Street, Flushing.
Thanks Mike G. I'm looking forward to crafting those scenes. It seemed like the best way to deal with a road to nowhere!
@Apples55 posted:If you use Willets Point, you can run an LIRR commuter train

Don't forget to add Shea Stadium to your platform signs too. ![]()
Bob
@RSJB18 posted:Don't forget to add Shea Stadium to your platform signs too.
Bob
Definitely... none of that Citi Field nonsense ![]()
![]() LGM!!!
LGM!!!
@RSJB18 posted:Don't forget to add Shea Stadium to your platform signs too.
Bob
If you use Willets Point, you can run an LIRR commuter train ![]()
------------------------------------------------------------
Guys, I'm one of those rare beings from Queens that never was an avid met fan. I went to plenty of games at Shea, since most of my friends regularly obtained tickets and it was a quick ride to the stadium. I'd even root for them over any other NL team, but the Yankees were my team. 74thst/Roosevelt Avenue/Jackson Heights also holds a lot of personal significance because it was there that I'd change from the 7 to the E or the F downstairs to visit my parents in Forest hills. That's why the lower platform level is going to carry that name.
Thanks Gandydancer!
Lee, looking good! It must be nice to see the light at the end of the tunnel on this project!
Nothing new for me as the CEO has the summer list out and of course the first one on the list is repaint the house and garage. So I will be busy for a while doing that. I am still going to try and get out to the train room before the sun comes up to work on something, Just not sure yet! LOL
I hope you all have a great day with your layouts and please find time for some fun!
Strap Hanger - great job on the lighted subway trains sitting for visual effect underneath! Very creative use of space!
ScoutingDad - I agree your concrete railings are special; I wouldn't have thought that the foam could be cut smoothly like that. Very nice.
I've been playing with paper and balsa wood this week - trying out paper trucks (free from DAF.com but scaled 150%) and assembling pallets (from Rail-Scale-Models). Trying out piecing together paper "corregated" siding for the battery plant in the background (Clever Models siding for an engine shed, like the one shown). It looks OK but I will need to start like real siding, from the bottom so the overlaps are from the top.
Attachments
Hi Everyone,
I thought I would post a couple of photos of a layout I have been working on with Dave Bennett of Train Installations, forum sponsor and layout builder. Much of the bench work and a lot of track work had been started before I joined in on the fun. Since being part of the crew I have laid out the yard (somewhat visible on the left side of the second photo), installed track in other areas of the layout, and installed some switch motors. The layout will have 3 levels and the third is just about completed. This is a fun project that I was delighted to have been asked to be a part of. More to come...
Dave
Attachments
22 hours without a post. We are slipping! ![]()
Very nice work everyone!!!
I replaced a Ross switch that I bought used and then butchered it myself shortening it and replacing some ties. I got tired of trying to get it right, so yesterday I stopped at my LHS CT McCormick Hardware in Zelienople, Pennsylvania and bought a new switch. Today, I added the jumpers on the bottom, replaced the switch, and added the DZ-1000 that I took off the old switch. I just finished test runs with a Legacy GP40 and two MTH Premier H9s. Wow, is it smooth. Why did I fool with that old one for so long?  www.cttrains.com/
I started on this old Wabash Valley Models kit of a grain elevator...when l opened the box, l thought, "Uh-oh, another seller who doesn't know O from HO. " It was a box of 1/8" sticks, but the windows were O. I measured out the plans, and, surprise! They were O scale. Kit was to be built model airplane style on waxed paper. I enlarged dimensions slightly and, ignoring the 1/8" sticks provided, am building it with 1/4" sqare strips, readily available at home stores, and much sturdier for an O scale structure. It was to be covered with metal corrugated siding, which does look HO, so l will use Evergreen siding. I think l tracked down enough, today
Spent the day pirating my layout for fastrack to build a layout for my grandchildren down in Phx (I live in Vegas), now that I am presumably immune from the Nasty. I had accumulated plenty of engines and rolling stock and even the necessary O36 switches for a figure 8 deal, but ran out of the O36 curves. Fortunately I had enough on the unpowered sidings. Hopefully my daughter-in-law won’t be kicking me out for this even though it’s my first post- plague visit....Not asking permission.
WOW guys, great work done by everyone!
Lee the hoppers turned out wonderful!
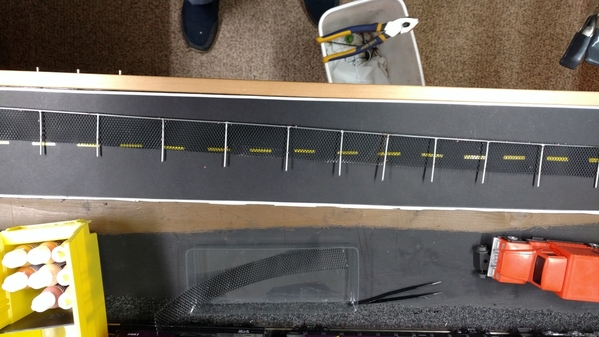
As for me not much and I have been working on getting the house and garage for painting. But I did get out the other morning and cut some old wire baskets up to try and scratch build some chain link fencing to go around my tank farm and service area. I didn't take any photos and its now worthy of any as of yet.
I hope everyone has a great weekend and finds time for there layout and trains. Most of all I hope your all having fun! I hope to get in the train room this week as it is spose to rain all weekend!![]()
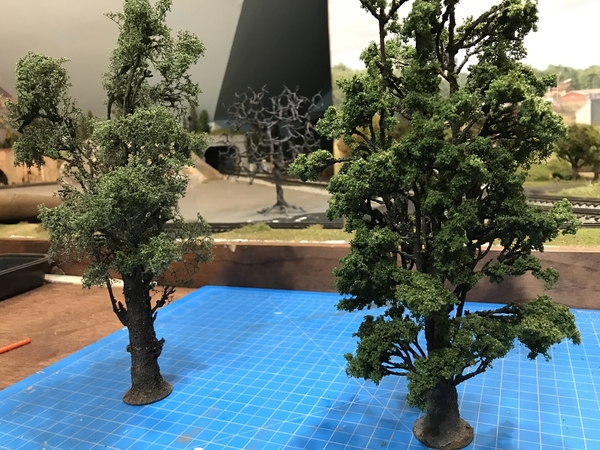
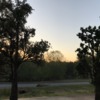
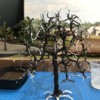
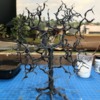
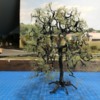
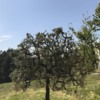
Back at the tree making. Working on more foreground trees. Mixed a couple of techniques I learned and then went for it. The first two trees are pre-fabricated trees that I spruced up...no pun intended. The only thing I did was make the bark texture a bit more believable and changed/added to the foliage.
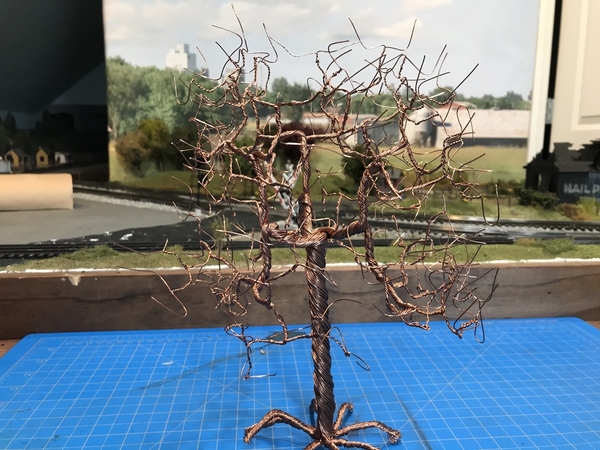
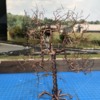
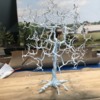
The third one is a wire tree. I have pictured the tree from the "wire" state to finished state. It turned out ok but my next one will be much fuller as far as the foliage goes.
I recently posted a video on my YouTube page on how I did my first four pre-fabricated trees. Take a look.
Dave
Attachments
Fantastic trees. You can really spruce them up.
I could find a place on my layout anytime! Thanks for sharing with us.
Thanks Seth!
Hey Luvin!
I am excited to learn your wire trees can grow on American soil as well as European. Possibly in Brooklyn as well...
As with any great success requirements of talent, time, and initiative. Appears you have them all.
They are wonderful fruits of your labor.
Seth,
You are too kind. I really appreciate it. However, I'm a bit confused about the American-European thing. Please explain, lol.
Dave
Those trees are great, Dave!
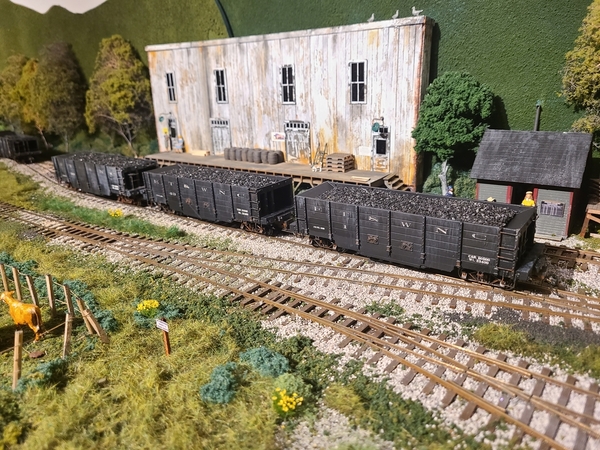
P51 those cars look really good . Wow the whole scene is great. A little dirt on any model makes it look so much more realistic. Good work.
Thanks Mark!
@farmerjohn posted:P51 those cars look really good . Wow the whole scene is great. A little dirt on any model makes it look so much more realistic. Good work.
Thanks, John. You too, Mike!
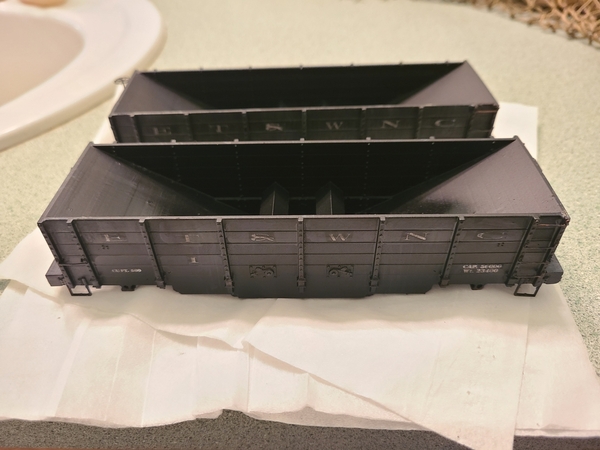
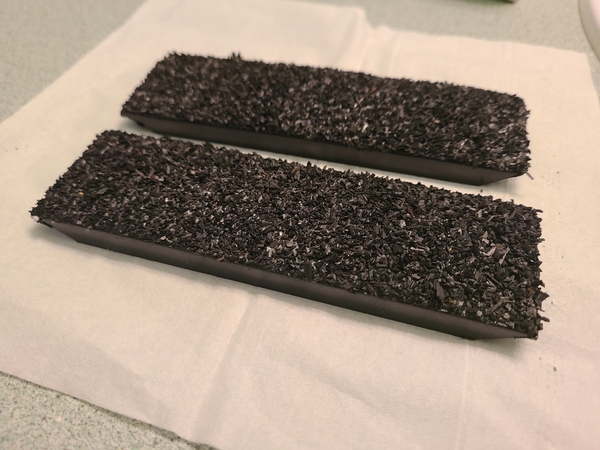
I'm very happy with how they turned out and thankful that I saved those cheesy plastic molded coal loads from those Bachmann gondolas...
Evening Living!
The first wire tree I saw demonstrated on the Forum was one by Sarah. She's from somewhere Austria/Germany. She has talent as well. I believe it was in March this year.
The old and the new- wire frame trees and 3D printed hoppers. You never know what will appear on this forum. Great work @p51 and @luvindemtrains.
Nothing new for me. I'm still waiting for my track order so I can continue on my yard project. Looks like Monday is delivery day finally.
Bob
Morning guys I hope your all doing well!
Dave, Outstanding work on the trees! That is really out of my realm, so as for me any trees I may need I will be buying them! But once again Outstanding work!
Well as for me I was able to get my labels printed for my gentry crane! They are not the greatest, but the grandkids can read them and thats what counts for them to have fun when there here!
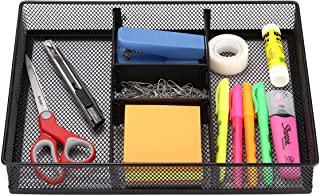
Then I moved on to making a chain link fence using an old wire office box and some wire hangers. I cut the wire boxes into 1.5" strips and soldered the wire hangers together to make the back bone of my fence. I still have more to do then I will move them out the the garage for a new paint job! The first photo is what I started with.
I hope your all having a wonderful weekend and finding to have fun with your layout and trains! I should get more time this weekend as it is spose to rain so no house painting for me!![]()
Attachments
I’m pleased for you RSJB18 and your delivery date!
Sounds like those posts on the BTO engines. The anticipation is the most difficult part of the assembly.
Have a good Saturday.
Thank you RSJB18 and Mike! Mike you know how to make lemonade from lemons. That fence looks good. Only a good modeler can look at things and imagine how they can be used on a layout. Impressive.
Yes Seth, Sarah makes some awesome trees.
Dave
P51 Lee, beautiful job on making/weathering/filling the coal cars, awesome workmanship, Luvindemtrains Jack, unbelievably beautiful job on making those gorgeous trees, you have a gift for art, wow, Mike g., wow, neat labeling fir your 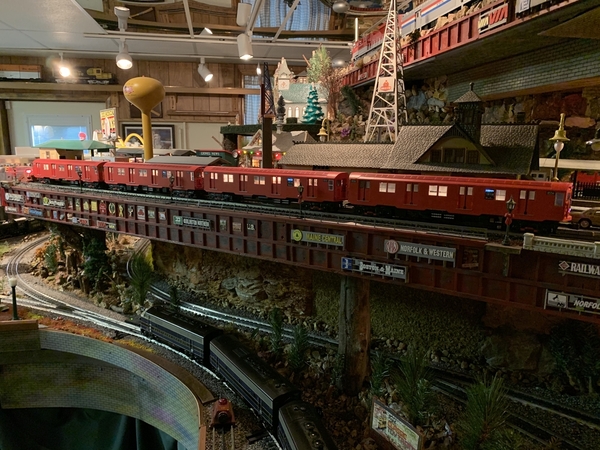
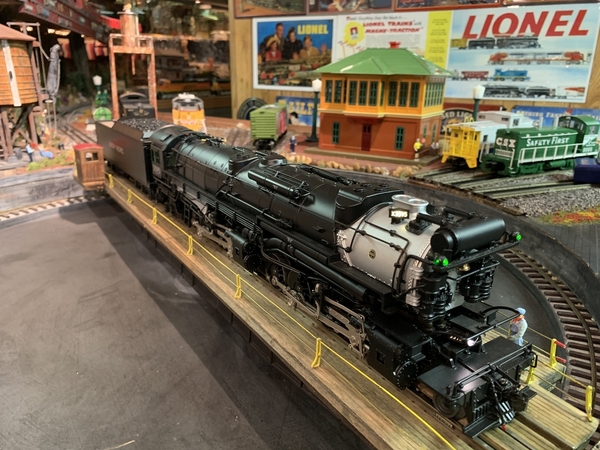
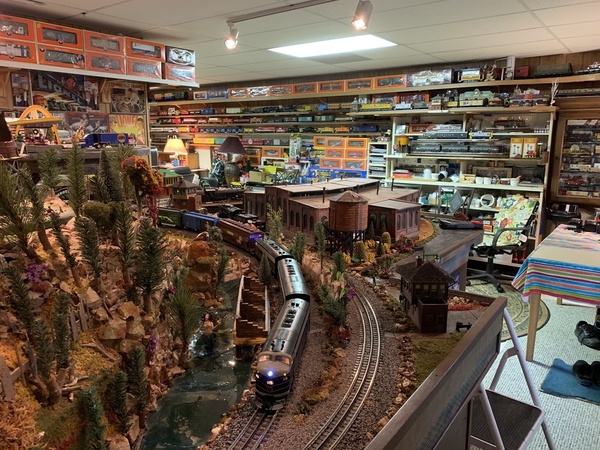
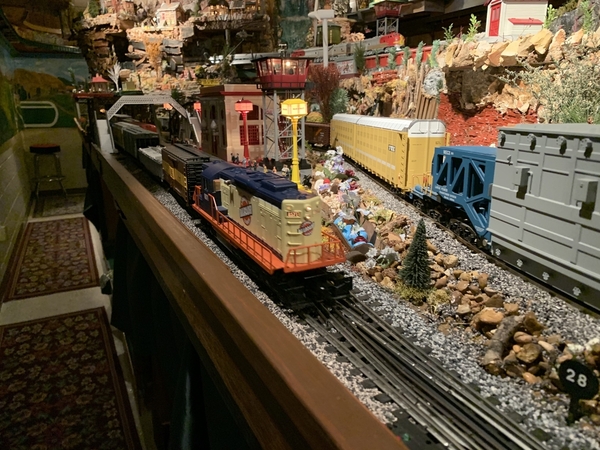
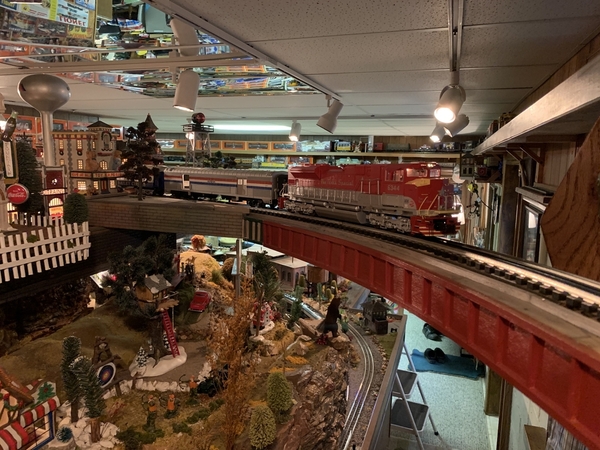 moving gantry Crane, it’s a really cool accessory and your Layout is really coming alive, Awesome work, Seth Thomas, I like your positive comments on the different pictures shown on the different threads of the different topics, many fantastic threads all enjoyable to read, it’s nice of you to give a nod to those folks showing their pictures of the hours of hard work they do, thank you. Last Saturday I went to a train show, it was so good to see people out and about buying trains for fun. A successful day in every way. Happy Railroading Everyone
Attachments
Larry: Beautiful layout and great pictures. Thanks for sharing
Don
Attachments
Dave, thank you sir, I have learned alot from people like you here on the forum, I am always on the look out for something I can try to match what is being sold but dont have the extra cash for. As for me if I get it free its a great deal as my time is free to me also! LOL
Larry thank you it really means alot when you comment on my post with such an Amazing layout that you have!
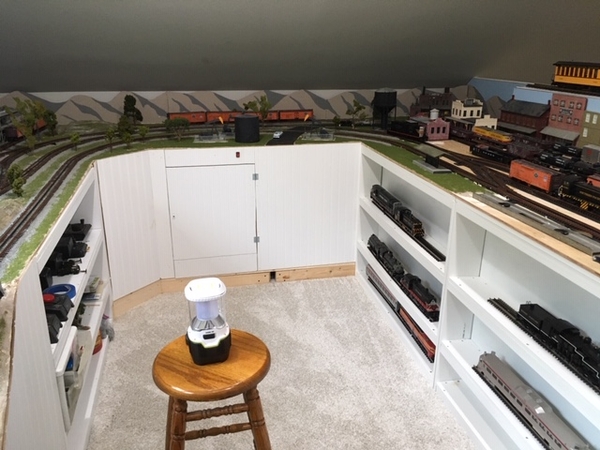
Terry, nice job on the facia, just a quick question does the shelfs that have your trains on them swing out so you can get under the layout?
Everyone keep up the great work and make sure you leave time to have fun!![]()
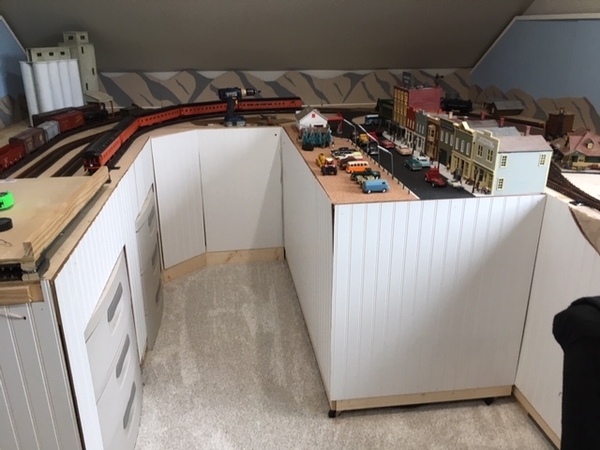
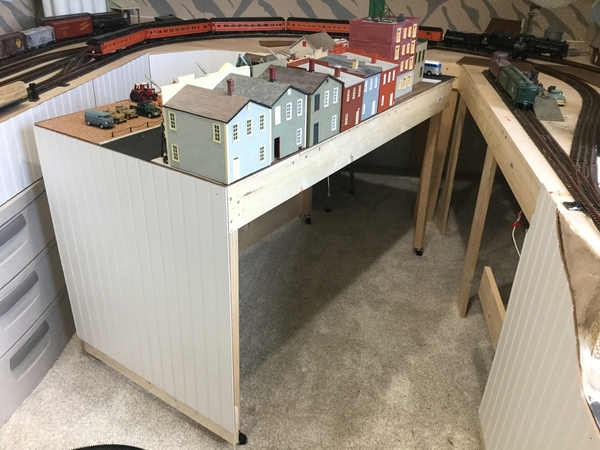
There is a small door on one end and the entire 5 by 3 section that the city is on is on wheels so I can access the layout behind and get underneath
Also the plastic drawers are removable.
F
Leapin Larry. The pictures of you're layout are fantastic. Until anybody sees you're layout in person is really missing something. It's got everything you could ever want and most of all its as close to complete as you can find. Great work Larry. See you guys soon.
Today l have this old Wabash Models grain elevator and attached shed fully framed, without opening and taking anything out of its cellophane bags..neat trick?...naw ..l used 1/4" strips vs. included 1/8", and marked up the plans. If l use other doors and windows, l may be able to resell the kit, unused except for penciled plans. I enlarged tower and warehouse slightly and rearranged their attachment to each other. I will add front and rear warehouse loading docks and a rear warehouse person door.
Now, a day later, l have pictures of this framed, stick-built Wabash Valley grain elevator, using only the plans and opening no bags in kit. Next to clad it with Evergreen siding, and details.
Attachments
Terry, sounds cool if you get a chance can you take a couple photos showing the city on wheels? Maybe even a video, would love to see that!
Colorado Hightailed, what a great idea! It sure looks like your doing a great job, I will be keeping my eyes for this build!
Attachments
Terry, very cool and great idea!
At my age 3 feet is about the extent of my reach. Being able to move the city around is a big advantage..
Continuing with @Former Member 's idea from https://ogrforum.ogaugerr.com/...1#152899749215534931 , I've converted some switch lanterns to all green lenses for indicator purposes...
Naturally, Signals Supervisor Norma Bates Kitteh got in on the action...
Mitch
Attachments
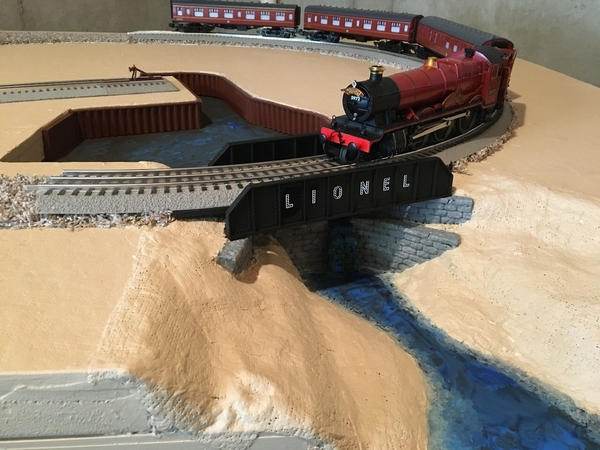
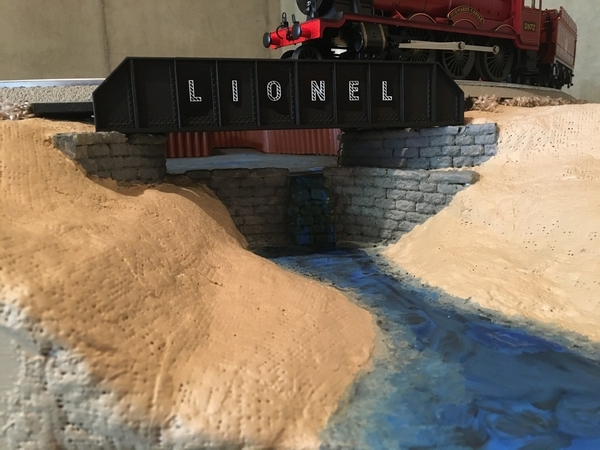
Yesterday's rain gave me an excuse to make progress on the water feature. Improvised painting ![]() starting with black, then working in other colors. Today found out the hard way that it was still wet in some of the thick blob areas, but since it's Sunday I kept quiet. Going to let it dry for several more days before applying some gloss Mod Podge. The curved track runs high on the girder bridge for swing clearance on both sides.
starting with black, then working in other colors. Today found out the hard way that it was still wet in some of the thick blob areas, but since it's Sunday I kept quiet. Going to let it dry for several more days before applying some gloss Mod Podge. The curved track runs high on the girder bridge for swing clearance on both sides.
Attachments
Mick 60. The coloring on you're river looks really good. Please post some pics when done. I have several rivers on my layout and I am always interested in any river project on the forum.
Another day, and l got two walls up on the Wabash Valley kit grain tower. Made large doors and door guides, and hunted down some small parts.
Attachments
Happy day!
Mitch, nice idea, that way the track is always clear! LOL
Mick, the river is looking nice! I to hope you post more photos when your done!
Bob, Looks like some MTH track there, its easy and fun to lay. I have been looking for 30" and its no where to be found so now I have to find something that will match up nicely and do good outside.
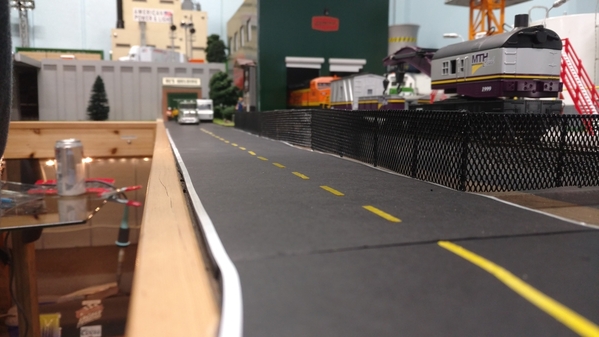
As for me I was able to get my scratch build fence done and installed. don't worry I can take it out to finish scenes behind it. After that I spent the time sanding the mold injection point on all the little people I got. I hope you all had a great weekend!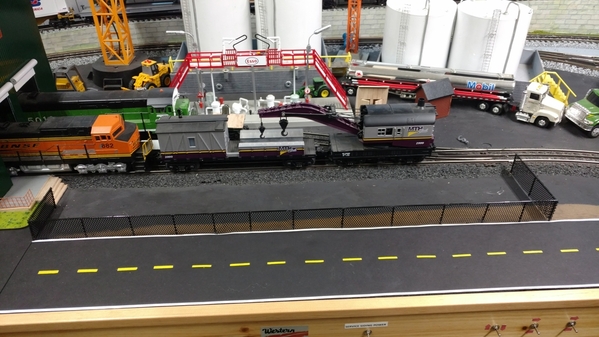

Attachments
Mike
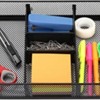
I must say! Your idea of using the file tray as a fencing is ingenious. Looks so real. and your streets are nice too.
That area looks very impressive and realistic Mike. Does the fence need a “No Trespassing, Railroad Property” sign?
Seth, Thank you!
Jay thank you also, I love the idea about the no trespassing Railroad Property! Now I just have to find one! LOL
You may recall a couple of months ago when I repainted an IC Geep into Frisco colors...
As part of that eBay deal, I also got a couple of RailKing Pacific Electric trolleys (one ProtoSound, one DCRU), which the previous owner had wired for direct DC operation by...well. Picture 1 pickup wired to the motor, the other to the lights, and you get some sort of idea.
I didn't take any pictures because I needed both hands to repair the massively "modified" (to be very charitable) wiring harnesses.
After many hours of work with tiny wires and arthritic hands, both patients are now alive, well and working to factory spec. ![]()
I composed a prayer while fixing those fiddly little body light wires, as follows:
Our Father, who art in Heaven:
Deliver us from blithering idiots who go butchering wiring harnesses
And know not what they're doing.
In the name of the Father, the Son and Joshua Lionel Cowen,
Amen.
![]()
Mitch
Attachments
@M. Mitchell Marmel posted:You may recall a couple of months ago when I repainted an IC Geep into Frisco colors...
I composed a prayer while fixing those fiddly little body light wires, as follows:
Our Father, who art in Heaven:
Deliver us from blithering idiots who go butchering wiring harnesses
And know not what they're doing.
In the name of the Father, the Son and Joshua Lionel Cowen,
Amen.
Mitch
Oh Exalted Pooh-Bah... I would like to thank you for your moving prayer offered (I assume) in your role as Archbishop of Titipu...
@Apples55 posted:Oh Exalted Pooh-Bah... I would like to thank you for your moving prayer is offered (I assume) in your role as Archbishop of Titipu...
You may so assume, my son. ![]()
Mitch
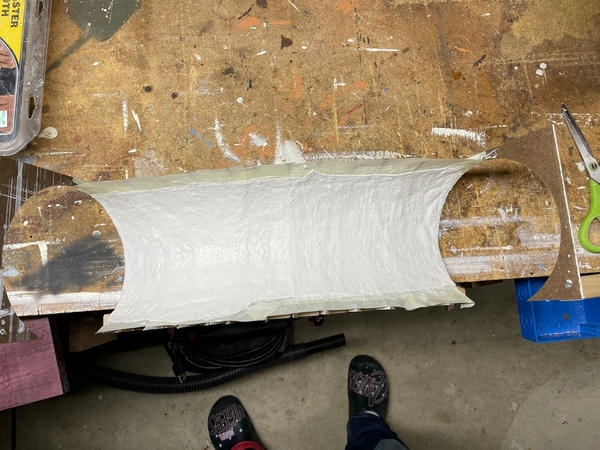
I've been working on the subway level of my layout. When I put the decorative board around my layout i cut out a section and put a picture frame on it. This picture frame created a viewing into curve section of the subway track. The plan is to create a tunnel that is "cut" open to see the subway going through the tunnel.
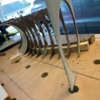
So far, I've made the skeleton of the skeleton of the tunnel. Then used tape for the first layer of tunnel skin/wall. Now I'm working on covering the tape with plastercloth.
The tunnel is made of scraps of material, always enjoyable to use up stuff lying around.
The tunnel is over an O36 curve. Used this piece of track to verify the curve. It will be going over atlas track, fastrack was just what I had lying around.
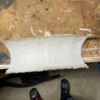
Here you can see the masking tape on the tope and bottom of the tunnel and the plastercloth in the middle. More plastercloth will be added.
Attachments
Jrmertz, that is a really great idea of how to build an opening to see the subway!
Wow, can't wait to see how you install the subway tile !!!
I had though about putting a section in large diameter PVC duct piping and cutting viewing windows as needed.
@ScoutingDad posted:Wow, can't wait to see how you install the subway tile !!!
I had though about putting a section in large diameter PVC duct piping and cutting viewing windows as needed.
no subway tile on this part of the tunnel. it will be gray, some pipes, some lights, possible an service/access door to parellel tunnels. I live in Wisconsin, so this tunnel is based on google images and my own idea of what it should be ![]()
I do plan to do a subway station and that will have tile. I also used large diameter PVC pipe where teh subway platform/station is on either end (the track is straight there).
I haven't/couldn't do anything. On April 11th I suffered a heart attack at 10PM. Had absolutely no previous signs or symptoms. Paramedics Got me to the hospital in 30 minutes and on the operating table in 60. Had a stent placed in my coronary artery and spent 5 days in ICU recovering/waiting for a quadruple bypass on 4/16. 4 more days recovery then went home on the 20th.
Good news is that I'm walking on the green side of the grass. Bad news is I'm on limited activity until cleared by the MD. MY layout is in the basement and I not allowed to do stairs. I'll be out for anywhere between 4 to 12 weeks which kills the summer carpentry season as my power tools are in the garage.
My wife watches over me like a hawk and follows me every time I get up. But she's the best, I wouldn't be here if it wasn't for her fast action that Sunday. I love her dearly.
I'll guess I'll resort to armchair railroading for the present. Maybe get a pad of paper and doodle some ideas.
@third rail posted:I haven't/couldn't do anything. On April 11th I suffered a heart attack at 10PM. Had absolutely no previous signs or symptoms. Paramedics Got me to the hospital in 30 minutes and on the operating table in 60. Had a stent placed in my coronary artery and spent 5 days in ICU recovering/waiting for a quadruple bypass on 4/16. 4 more days recovery then went home on the 20th.
Good news is that I'm walking on the green side of the grass. Bad news is I'm on limited activity until cleared by the MD. MY layout is in the basement and I not allowed to do stairs. I'll be out for anywhere between 4 to 12 weeks which kills the summer carpentry season as my power tools are in the garage.
My wife watches over me like a hawk and follows me every time I get up. But she's the best, I wouldn't be here if it wasn't for her fast action that Sunday. I love her dearly.
I'll guess I'll resort to armchair railroading for the present. Maybe get a pad of paper and doodle some ideas.
Bill;
So glad you’re still with us!!! I had quad bypass 4 years ago- no heart attack, just some very minor discomfort which made me talk to my doctor. I had one bigger issue than you - I was staying with my brother in NY where my surgery was done and my trains were in PA (and my brother would like nothing better that to place my two most expensive engines on the same track facing each other and floor them!!!). After my surgery my cardiologist sent me to 6 weeks of cardiac rehab - if you get offered it, I highly recommend it. Since you can’t do stairs, might I suggest you build a 4x8 in your living room???
@Apples55 posted:Bill;
So glad you’re still with us!!!). After my surgery my cardiologist sent me to 6 weeks of cardiac rehab - if you get offered it, I highly recommend it. Since you can’t do stairs, might I suggest you build a 4x8 in your living room???
Thanks Paul for the well wishes.
I can't lift anything weighing more than a milk gallon so the 4X8 is out. Besides my wife and CEO wouldn't have it. There's enough trains in the basement and the rest of the house is hers.
Yes I'll be going to cardiac rehab after home health nurse discharges me.
I have some ideas I'll be putting on paper for subsequent building, a bash of a burro crane top with a lionel 262(?) Loading platform, a 26 foot electric arc furnace, a 600 ton MESTA forge and a 1000 ton 100X50X100 foot Hulett ore uploader for my dock area. Mighty big projects but I have the time to think them out and get a working blueprint for each.
@third rail posted:Thanks Paul for the well wishes.
I can't lift anything weighing more than a milk gallon so the 4X8 is out. Besides my wife and CEO wouldn't have it. There's enough trains in the basement and the rest of the house is hers.
Yes I'll be going to cardiac rehab after home health nurse discharges me.
I have some ideas I'll be putting on paper for subsequent building, a bash of a burro crane top with a lionel 262(?) Loading platform, a 26 foot electric arc furnace, a 600 ton MESTA forge and a 1000 ton 100X50X100 foot Hulett ore uploader for my dock area. Mighty big projects but I have the time to think them out and get a working blueprint for each.
Bill- glad to see you are on the mend. Rest up and follow the Doc's and CEO's orders. Trains are a hobby, our health is not.
Bob
Jrmetz, What a great idea for a tunnel! I cant wait to see it on your layout!
Fl9turbo2, Those sure are nice, but the wiring can be a pain! LOL
Bill, Thank God your still on the grass side! Take it easy and We sure hope you get well soon! Lucky you have the forum to come to, you dont have to lift anything to get here!
Well Yesterday I painted some skin tone on some little people I got in the mail a couple days ago. Might be it for a day or 2 as I got up late this morning and I have to get out and get started on house painting! Lucky me! LOL
I hope everyone is doing well and finding time to have fun with there layout and trains! Except you Bill, you do what the wife says!
@mike g. posted:!Well Yesterday I painted some skin tone on some little people I got in the mail a couple days ago. Might be it for a day or 2 as I got up late this morning and I have to get out and get started on house painting! Lucky me! LOL
Mike just think of it as full scale layout detailing. Have fun and be safe.
@farmerjohn posted:
Does anybody else see it?
Bob and Mike,
Thank you for the encouragement. Each day gets a little bit better, I'm walking around the house like a little cockroach, going in and out of rooms following the walls.
Keep up the progress on your layouts and I will watch from afar.
Bill: I second Paul's recommendation about cardio rehab. After I got my arteries roto-rootered a decade or so back, the rehab was most helpful. My main gripe was that they ran the Food Network on the monitors in front of the treadmills. Going from looking at gourmet treats to a Healthy Choice frozen meal for lunch was bitter, to say the least. ![]()
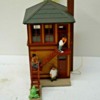
ObTrains: Since the next incarnation of Razorback Traction includes lots of switches and a crossing, I figured a switch tower was in order. This arrived yesterday from the Bay:
The giant frog glued to the stares, er, stairs made this purchase a Cultural Imperative.
I am informed it is an Elfhamian Giant Frog, which goes "RAE-BEET" instead of "Ribbit".
In any event, it is most certainly a Switch Frog. ![]()
Mitch
Attachments
Wow, I sure missed a lot of great projects!
Mitch, I sure didn't see that pun coming!! The switch tower looks great!
Mike, good start on painting people. Too bay you can't get some of them to paint the house.
Bill, I'm so glad you are here to tell us about it. That is certainly had to be frightening!!! My wife is an RN, and will watch me like a hawk as well after upcoming surgery! I'm sure your wife will keep you on the straight and narrow.
John, the water scene is looking great!! I hope you don't have far to carry it to the layout. Postmastermc, I think I see it.
FL9Turbo2, the signals look great!
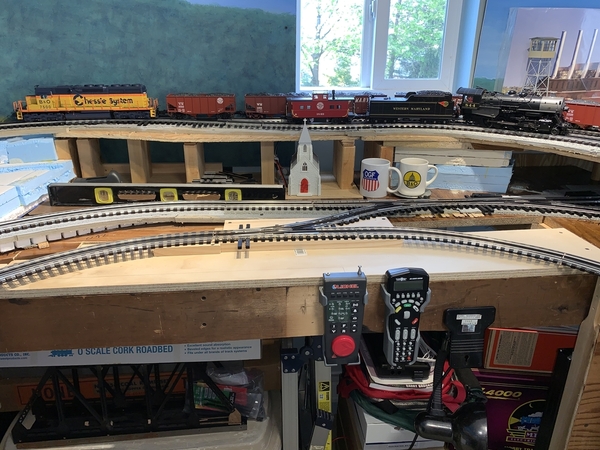
Last week I bought two Ross 042 LH switches, took a hiatus from scenery, and installed them this past weekend. First, I needed to upgrade the table top with some of the last of my 5/8" plywood. The switches are screwed down to the table, but the track is just sitting there for some roadbed to even things up to the two sides. I already wired it and ran an engine through the switches, and it did fine. Running at slow speed, I didn't notice any noise to speak of. I think I will jut lay it all on the wood, since I am almost out of Homasote. Here is one photograph. Please take a look on my Blackwater Canyon Line topic for more detail.
Attachments
@third rail posted:I haven't/couldn't do anything. On April 11th I suffered a heart attack at 10PM. Had absolutely no previous signs or symptoms. Paramedics Got me to the hospital in 30 minutes and on the operating table in 60. Had a stent placed in my coronary artery and spent 5 days in ICU recovering/waiting for a quadruple bypass on 4/16. 4 more days recovery then went home on the 20th.
Good news is that I'm walking on the green side of the grass. Bad news is I'm on limited activity until cleared by the MD. MY layout is in the basement and I not allowed to do stairs. I'll be out for anywhere between 4 to 12 weeks which kills the summer carpentry season as my power tools are in the garage.
My wife watches over me like a hawk and follows me every time I get up. But she's the best, I wouldn't be here if it wasn't for her fast action that Sunday. I love her dearly.
I'll guess I'll resort to armchair railroading for the present. Maybe get a pad of paper and doodle some ideas.
Timing is everything! Praying you have a great resolve!
Cheers, Dave
@Mark Boyce posted:Last week I bought two Ross 042 LH switches, took a hiatus from scenery, and installed them this past weekend. First, I needed to upgrade the table top with some of the last of my 5/8" plywood. The switches are screwed down to the table, but the track is just sitting there for some roadbed to even things up to the two sides. I already wired it and ran an engine through the switches, and it did fine. Running at slow speed, I didn't notice any noise to speak of. I think I will jut lay it all on the wood, since I am almost out of Homasote. Here is one photograph. Please take a look on my Blackwater Canyon Line topic for more detail.
Looking good Mark. 👍
Keep on building!🏗🧱🏭
Thank you, Bill!!
“bought two Ross 042 LH switches, took a hiatus from scenery, and installed them this past weekend. “
Mark,
I actually see a Chessie in your photo. I thought I was the only OGR Forumite who ran a layout full of C&O an Chessie on 042”curves....
This must be significant enough to charter another club like the special “48” insignias. But I’m not into copying anyone’s thunder.
My guess I would need to have some of your “Mary’s” running my rails to make the brotherly love complete 😀
I’ve enjoyed watching your Canyon’s progress.
Seth, thank you very much!! The Chessies are new to me this year. I grew up along the B&O's Pittsburgh & Western mainline watching lots of freight pulled by solid blue F-units. I was a junior in high school when the Chessie System was formed and then started seeing Chessie engines and caboose with B&O, C&O, and WM in small letters. I became enamored with the Western Maryland when I read a couple books and went to the Western Maryland Scenic Railroad. So most of what I have is Western Maryland, but I had an MTH set of F3s painted in B&O solid blue. The guy did a better job than I could have, but not a great job. This past winter, I purchased a Legacy Chessie (B&O) SD40. Then in a couple weeks time, I purchased a Chessie (B&O) bay window caboose and a Chessie (WM) extended vision caboose. The trio is the most modern prototype I have.
My sidings used 042 track I had on hand. My mainline is all 054. I have not tried the SD40 on the 042 yet. So, technically you may still be the only one. ![]()
I'm glad you like following along.
@Mark Boyce posted:I was a junior in high school when the Chessie System was formed and then started seeing Chessie engines and caboose with B&O, C&O, and WM in small letters. I became enamored with the Western Maryland when I read a couple books and went to the Western Maryland Scenic Railroad. So most of what I have is Western Maryland, but I had an MTH set of F3s painted in B&O solid blue. The guy did a better job than I could have, but not a great job. This past winter, I purchased a Legacy Chessie (B&O) SD40. Then in a couple weeks time, I purchased a Chessie (B&O) bay window caboose and a Chessie (WM) extended vision caboose. The trio is the most modern prototype I have.I'm glad you like following along.
Mark,
I'm guessing that you might be only a year or two younger than me. If I remember correctly, I went to Electro Motive's 50th anniversary in 1974, the year after I graduated high school. Fresh out of the paint shop but still inside HUGE building was a Chessie System SD40 in all it's splendor. We were even allowed to climb the steps and do a walk through!!
I always liked the color scheme because it gave some excitement to the head end at a time dark monochrome prevailed.
I model 1950's era so the 1970's is out of my range.
@third rail posted:Mark,
I'm guessing that you might be only a year or two younger than me. If I remember correctly, I went to Electro Motive's 50th anniversary in 1974, the year after I graduated high school. Fresh out of the paint shop but still inside HUGE building was a Chessie System SD40 in all it's splendor. We were even allowed to climb the steps and do a walk through!!
I always liked the color scheme because it gave some excitement to the head end at a time dark monochrome prevailed.
I model 1950's era so the 1970's is out of my range.
Bill,
Sounds like you are right, I graduated in 1974. You are right about the brighter colors than the dark blue. I model 1950s also. That is why I never bought an SD40, but couldn't pass this one up. Of course I needed a caboose or two to go with it. I do have a model of the Western Maryland SD38 that the WMSR runs on passenger runs now. I got it through the Community Model Railroad Club in Frostburg, Maryland as an annual fund raiser. I've been participating for 5 or 6 years now.
So we have established 1973 and 1974 were good years to graduate from high school. As I remember this group of guys never had to go to Nam. I had a number but knew the draft was ending by that time. Funny I thought about going to West Point. Life would surely have been different! Wound up going to Illinois and getting an engineering degree.
For what its worth, I try to model buildings which can apply to the transition era between steam and diesel. What I try not to do is run modern stack trains or diesels with the steam. That means pulling rolling stock off the layout which does not align with the period being run. The scenery and buildings done right can look fine in either era. Of course you could insist the steamer is a merely a modern day excursion as long as it has passenger cars. I can't imagine limiting myself to a specific period or motive power. There is too much fun running the power engineers created to move people and goods across the US.
I have gotten the bug on the electrics following an early interest in the GG1s. The box cabs ran into the 60s. That's incredible to me.
Hoping to be able to take some video of the layout over the weekend. I found out my lighting was not bright enough to take decent video - so have lighting coming in tomorrow. We'll see how that works. Going crazy frustrated rewiring parts of the layout to power the new buildings and LEDs. Found a power feed line which broke off a track pin. The wires soldered to a rail pin have very little strenght and are easily broken. Need to remember never to use those again regardless of how convenient.
Happy Railroading all.


