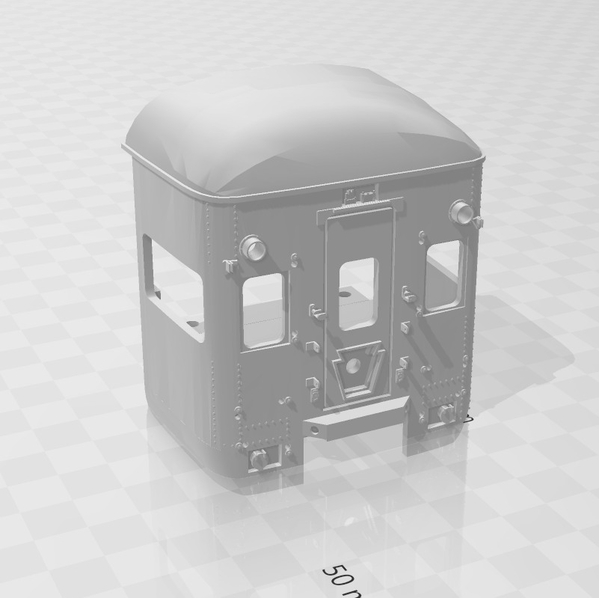
What ISN'T on the workbench at the moment? The one commanding most of my time right now is a replacement end for a K-line 4680-30012 18" business car. Instead of the fanciful open deck it comes with (was there ever a real prototype for this? Not on the PRR), I'm replacing it with the correct end for PRR's postwar observation cars. Printed a test run today, final one tomorrow. Hope to have it painted and installed sometime this weekend...
No longer on the bench but now on the layout - four newly completed Hart hoppers have been added to the consist. Still missing ballast loads for two of them. Time for some travel so the loads will wait for my return.
Cheers, Dave
Attachments
I finished up my Weaver/MTH C628 shell swap tonight. Ended up being more involved than I anticipated. MTH made changes after they acquired the tooling, so the MTH shell didn't just drop right on the Weaver chassis.
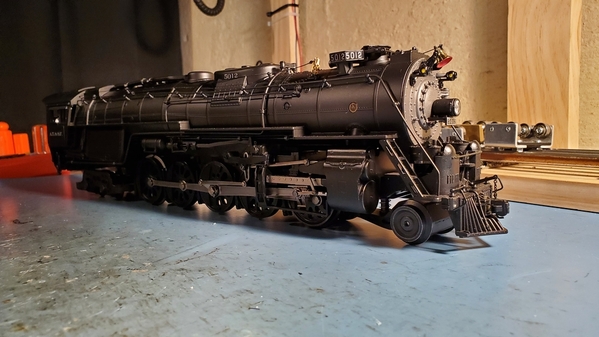
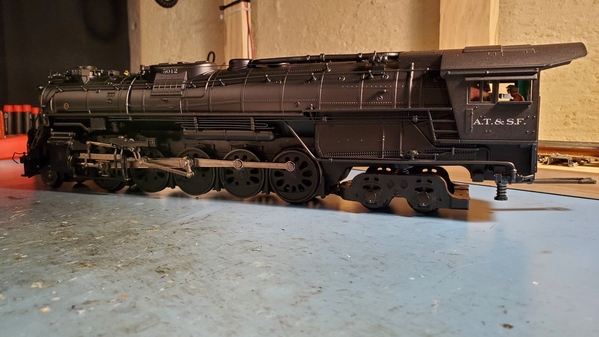
Got the ATSF Texas cosmetically completed (tender was done already). It was unpainted (like the tender) and missing some parts. I had to rummage around in my junk bin to fin the sand dome fill covers, engineer/fireman figures, and a couple of pipes under the boiler. While I was at it I also removed the factory stamped metal bell cradle and added the correct cradle with air ringer. I also added a bell bracket that had a pull arm (late ATSF large steam had an air ringer but the bell could still be rung manually by the fireman if the air ringer failed). I wanted to run cords for the whistle and bell so I drilled some holes in the boiler and added stanchions to use as cord guides. I know 5012 is a factory MTH road number but I used it because the illuminated number boards and number board under the headlight already had that number, so I decided to make my life easier and just use road number 5012. It still needs electronics and lights, but I'll get to those over the winter.
Attachments
@Rob Leese posted:
Why won't you use an RK NW2 for your next attemt Rob.
Lou....Engine and tender look great. I have the paint and matt clear you reccommended on order for My SF 2926 project. Like your engine the firebox door on the rebuild of 2926 appears silver instead of graphite or black. Did you use the same brand of paint we discussed? Which silver did you use?
Richard
Lou and others......My SF 2926 engine is a railking and does lack some details. Runs quite and smooth so I'm sticking with it. The firebox door class lights are not suitable. If any one knows where I can source the "stalk" class lights please let me know.
Richard
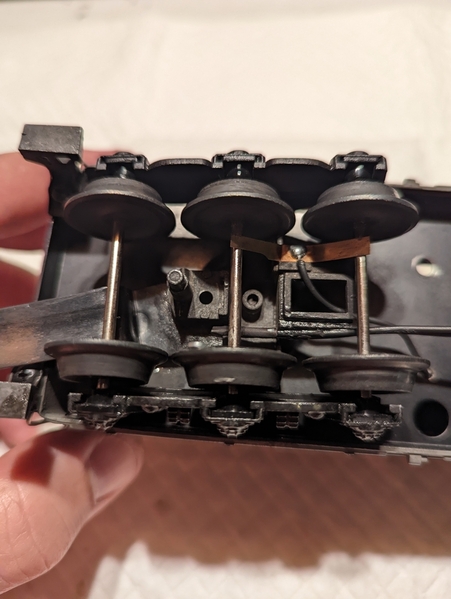
So, I took my tender from the 785 Hudson and upgraded the sound board. Sadly the original sound o steam board with it's tether I couldn't stand went out. Darn. So, I found passenger car 6 wheel trucks with a roller and ground strap. Mounted those, drilled a new hole so the coupler is closer. Mounted the rail sounds board, installed the reed switch, set the volume, and Bob's your uncle! Looks much better and cleaner without the tether! Sounds nice with chuffing, bell, and whistle. At idle it sounds like it's getting maintenance done. Picture of sound board below. I don't want to take the shell back off. 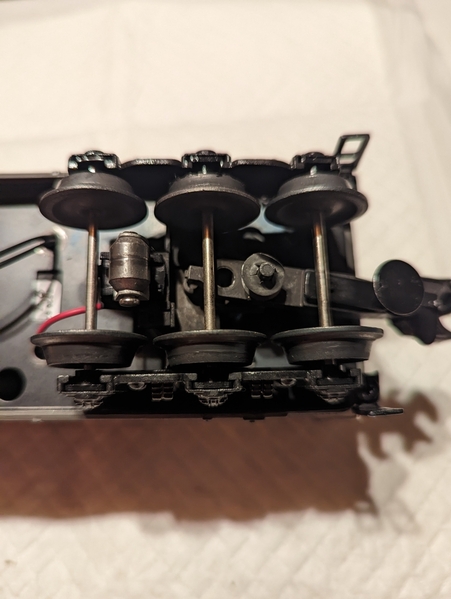


Attachments
@Rppoind posted:Lou....Engine and tender look great. I have the paint and matt clear you reccommended on order for My SF 2926 project. Like your engine the firebox door on the rebuild of 2926 appears silver instead of graphite or black. Did you use the same brand of paint we discussed? Which silver did you use?
Richard
I used this spray paint for the smokebox front:
https://www.rustoleum.com/prod...metallic-spray-paint
It's a close enough match for "tarpon gray" that Santa Fe used on smokebox fronts, at least to my eye.
Lou.....Many thanks again.
Richard
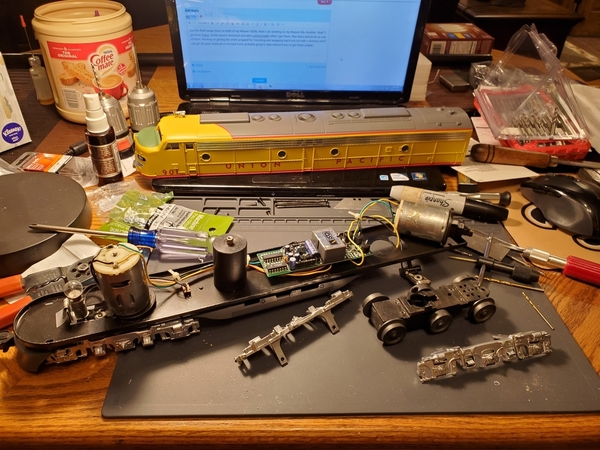
Got the shell swaps done on both of my Weaver C628s. Now I am working on my Weaver E8s. Another "deal" I got from Trainz. Shells weren't mounted and were unmountable when I got them. Also had a bad truck on one of them. Working on getting the shells prepped for mounting and swapping bad truck out with a dummy until I can get the gear replaced on the bad truck. probably going to take several hours to get these usable.
Attachments
My new work bench. Just got it installed. No drawer fronts or cabinets doors yet as I am still finishing those and will install later. My new work bench is 22 feet long so I will be able pile a lot of stuff on it. The only thing on it at the moment is one of my bridges that I have laser cut.
Once I get it piled high with stuff I will post additional pictures so that it will look like a real work bench.
Thanks;
idea-thinker
Attachments
Now, that's a 
Attachments
That’s really great!!
Idea-thinker 22' makes for a nice test track, but I see you really understand the purpose of a work bench, "My new work bench is 22 feet long so I will be able pile a lot of stuff on it.". Well at least for most of us.
@idea-thinker posted:My new work bench. Just got it installed. No drawer fronts or cabinets doors yet as I am still finishing those and will install later. My new work bench is 22 feet long so I will be able pile a lot of stuff on it. The only thing on it at the moment is one of my bridges that I have laser cut.
Once I get it piled high with stuff I will post additional pictures so that it will look like a real work bench.
Thanks;
idea-thinker
What a great work space. Please share more pix once it has settled into it's "natural state" ![]()
Bob
The first of three coaches being redone for the Texas Zephyr. These cars will be “prototype-ish”. The first (1940) TZ equipment had BURLINGTON on the letterboards. When the semi-articulated 1936 Denver Zephyr equipment was bought by C&S and FW&D to makeover the TZ, those letterboards were repainted TEXAS ZEPHYR. So, you can see from where the “-ish” comes.
This is a K-Line 21” Empire State Express coach. New letterboards had to be applied. It had disappointing diaphragms, so they were replaced. The aluminum was too glossy so it was overcoated with a matte silver paint. I printed custom decals for this project only a few days before K4 came out with their own beautiful TZ set.

Attachments
A tunnel/other project for the holiday clockwork display:
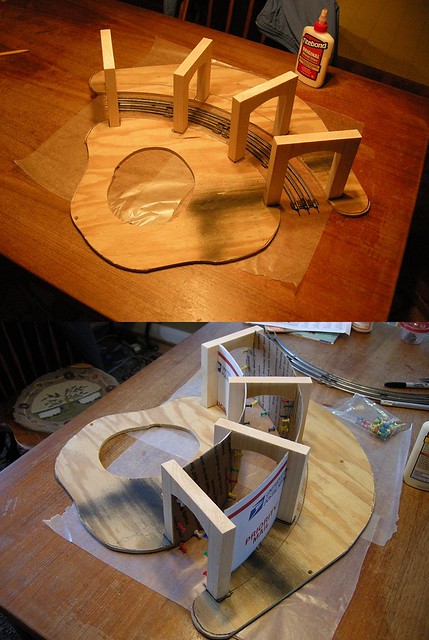

Starting the scenic work shortly.
PD
PD
Did you check clearances? looks awfully close!
Are you planning on mailing that? ![]()
![]()

Attachments
Yup, all the windups pass through easily. Also checked a few 6-inch prewar Flyer freights and they were fine as well. The only 3-rail loco I contemplated using here was a prewar Flyer 3192 loco/tender combination, and that made it through fine as well.
PD
LOL, nope, not mailing it GRJ. Over the years I have found USPS corrugated stock to be great for model-making...very strong while very flexible. Whenever I receive packages through USPS, I save the boxes for projects. One can also pick up a new box or two from the post office.
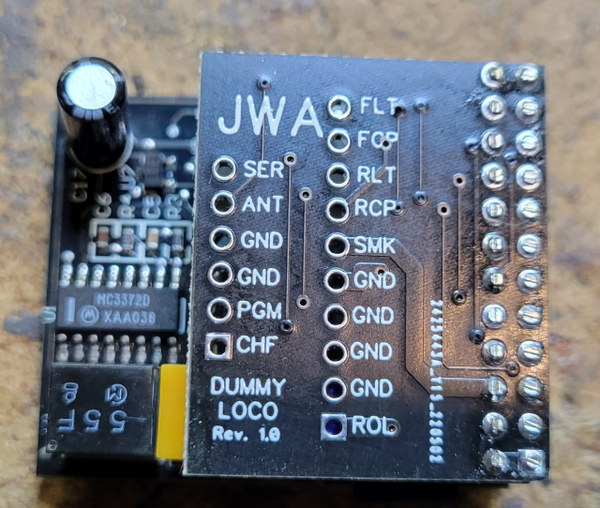
Got a Doodlebug pair in for a TMCC upgrade. The dummy is featured here, I used my previously designed little R2LC dummy locomotive board to add couplers, headlight control, and command control of the interior lights.
Conveniently, all the lighting is done with spring pads, so the only shell work was changing out the headlight bulb from the 1.5V bulb used for PS/1.
Here's the dummy locomotive motherboard plugged into the R2LC.
Once the board was wired, I just used Velcro to stick the assembly to the bulkhead that's hidden when the shell is on, perfect spot for it. You could, if you desired, simply add a second sound board to the dummy for better sounds, I didn't do that for this build.
Attachments
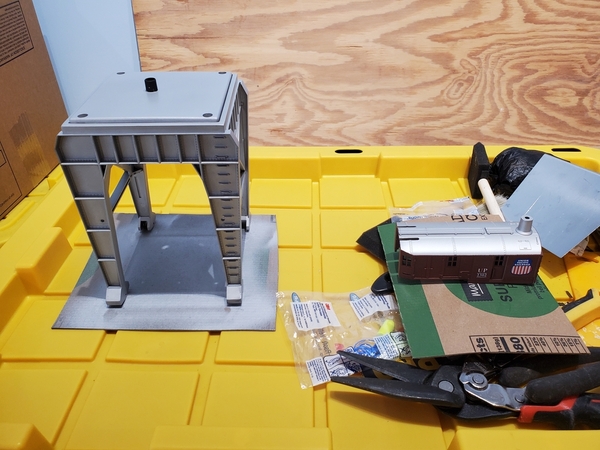
Next up is my MPC gantry crane. It's going to get new metal wheels to replace the factory plastic wheels, then I am going to clean up the gantry castings and repaint in a silver color that is a little more prototypical for U.P. equipment. Probably going to add a magnet assy as well. Just a dummy for the look of a magnet since it's home will be a scrap yard. I probably won't get a chance to paint until next week depending on the weather.
Attachments
Don't know if this might help someone with a similar issue.........
This MTH Premier Gp38 ps3 sat on the shelf for a year and would only start running forward with no lights or sound on my test track.
Out of frustration with no improvement running it on the track , I turned it on its back and hooked up a couple of power clips and continued to run it that way.
After quite awhile of running it this way, I must have started to wake up something inside . I placed it back on the test track and had good results and now it performes flawlessly on the DCS / TIU / REMOTE layout.
(Glad no bad board ![]() )
)
Attachments
The old Carpet & Southern RR encountered a problem when some new double stack container cars arrived. Seems the old Atlas bridges didn't quite have the clearance necessary so some modifications were in order. 
So the construction crew (me) carefully removed and modified the offending bridge parts.
After cutting a small piece of styrene was added to the cut, pieces were glued back in place and success. Then end pieces were a bit more difficult but after the first bridge was completed the second one took about 1/4 the time. Still have to repaint and weather the bridges but for now this double stack is my maximum clearance car.
Of course, the follow thru on any project is very important,.. hence,
Attachments
Mike, I like the Buffalo Trace option, but curious as to why you cut the crossmembers rather than raising the entire bridge above the base? In my case I sold off my MTH premier double stacks in favor of Lionel and K-Line. These latter two are optically close in size to each other, the MTH was a beast "towering" over the other two brands. Regardless I still had to do bridge surgery on my Lionel truss bridges, the MTH Truss was fine - imagine that!
https://ogrforum.ogaugerr.com/...3#165010489493444243
Scouting Dad,
I originally thought about raising the bridge off the base but I just didn't like the look of it since it really disturbed the proportions. Next step on these particular bridges is to replace the sheet metal deck with an open grid similar to what is on those MTH Truss bridges (I have three), but that is the subject of another modification I'm still working on. On another note the Fastrack being used at the moment is just temporary and will be replaced with either Atlas or Gargraves at some point, something that looks more like bridge trackage.
-Mike in NC,
@Mike in NC posted:
Of course, the follow thru on any project is very important,.. hence,
Nice solution and good looking end result Mike.![]()
@idea-thinker posted:My new work bench. Just got it installed. No drawer fronts or cabinets doors yet as I am still finishing those and will install later. My new work bench is 22 feet long so I will be able pile a lot of stuff on it. The only thing on it at the moment is one of my bridges that I have laser cut.
Once I get it piled high with stuff I will post additional pictures so that it will look like a real work bench.
Thanks;
idea-thinker
That work bench is longer than the two longest walls in my bedroom train room. My "L" workbench is in the back room, approx 3'x5', 2' deep on both sides. Fits in corner between two doors. That workbench is great!
@idea-thinker posted:My new work bench. Just got it installed. No drawer fronts or cabinets doors yet as I am still finishing those and will install later. My new work bench is 22 feet long so I will be able pile a lot of stuff on it. The only thing on it at the moment is one of my bridges that I have laser cut.
Once I get it piled high with stuff I will post additional pictures so that it will look like a real work bench.
Thanks;
idea-thinker
That's gonna make for a long chair pad. You may need to upgrade your chair wheels to ball bearings ! ![]()
@Richie C. posted:That's gonna make for a long chair pad. You may need to upgrade your chair wheels to ball bearings !
Richie;
I was thinking about having multiple chairs that stay in place to avoid rolling them around since the room is carpeted. I suspect once I am able to do work on the work bench I will see what works best.
Thanks;
idea-thinker
@idea-thinker posted:Richie;
I was thinking about having multiple chairs that stay in place to avoid rolling them around since the room is carpeted. I suspect once I am able to do work on the work bench I will see what works best.
Thanks;
idea-thinker
Get you some of those new fang dangled glass office chair mats …..supposed to be indestructible, and lifetime warranty,…….then you can roll around to your hearts delight……I’d be tired getting up and down from the sheer number of work stations you have possibilities for ……..that’s an incredible work bench!!…..curious, …..what’s the type of projects/work we’re doing on that mammoth bench?……I don’t think Lionel’s bench in Concord is that big!!…☺️
Pat
@harmonyards posted:Get you some of those new fang dangled glass office chair mats …..supposed to be indestructible, and lifetime warranty,…….then you can roll around to your hearts delight……I’d be tired getting up and down from the sheer number of work stations you have possibilities for ……..that’s an incredible work bench!!…..curious, …..what’s the type of projects/work we’re doing on that mammoth bench?……I don’t think Lionel’s bench in Concord is that big!!…☺️
Pat
Harmonyards;
I am going to setup a bench testing area to repair engines and accessories for one. But I am also going to be testing electronic circuits that I have designed to control my trains. I have a number of different circuits that control track power, control accessories, sensor circuits, control switches and several other circuits that manage these other functions. My plan is to run 50 to 75 trains at one time so this will require automation. My new work bench will be the platform on which I test my circuits. If you notice I have a shelf at the back of the work bench to set test equipment on and or computer monitors. All of my circuits are software driven.
Thanks;
idea-thinker
Installed partitions for old-school Papier-mâché covering:

A bit of webbing next.
PD
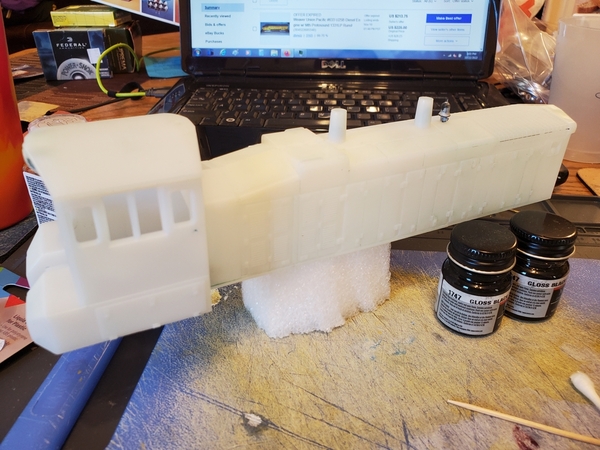
My crane project is coming along nicely. While I have the airbrush out I figure I'll go ahead and get the base coat down on my K-Line MP15 shell. It'll be similar to the KL NYC MP15 when I get it done, but I am going to have a different road number on it.


