If you run command and have track voltage all the time, these will do it one stop.


|
|
If you run command and have track voltage all the time, these will do it one stop.

@gunrunnerjohn posted:If you run command and have track voltage all the time, these will do it one stop.
Thanks John, I run DC variable track voltage.
Tom Stoltz
in Maine
Well, you can actually still use the regulator, but you would use the 5V LED strips instead of the 12V LED strips. Unless you truly have a buck/boost regulator, you would not be able to use the 12V LED strips if you run conventional with variable voltage.
Hi Tom, I'll post the values once I get home from work. I also found inexpensive buck-boost converters, and I'll post a link to that Amazon site, too.
Terry
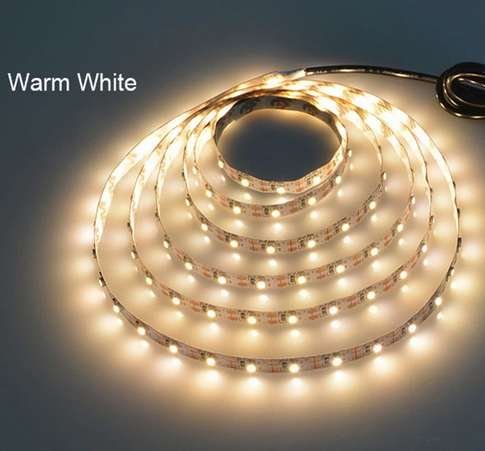
I used 12-volt warm white LED strips because they were the least exspensive and most readily available at the time. That color value looked best in heavyweight coaches anyway. Amtrak coaches might look better with a cool white to represent bright fluorescent lights. The choke is an Epcos/TDK with a value of 22 millihenries that I bought from Mouser for $0.35 each. I don't see that choke on the Mouser website any longer, but there are some that are close to those in terms of price and below half an amp in maximum current.
The bridge rectifier is also from Mouser, an RB153:
https://www.mouser.com/c/?q=RB153
The capacitor is a 35-volt 1000 microfarad piece that didn't perform much better than a 470 mF capacitor. I have found that clean track and wheels make a much better contribution to reducing flickering than the capacitors have.
One source for inexpensive buck-boost converters is:
https://www.amazon.com/XL6009-...B07XG323G8&psc=1
I can't comment on their quality because I have not used them, but I suspect that if they work, it is a good idea to check their output because all the ones I tested with a voltmeter had to be turned down to 7-8 volts to prevent burning out the LED strips before use.
Terry
@TOKELLY posted:One source for inexpensive buck-boost converters is:https://www.amazon.com/XL6009-...B07XG323G8&psc=1
I can't comment on their quality because I have not used them, but I suspect that if they work, it is a good idea to check their output because all the ones I tested with a voltmeter had to be turned down to 7-8 volts to prevent burning out the LED strips before use.
These are only BOOST converters, so if your track voltage goes over the max rating for your LED strips, you have a problem.
Below is a link to a buck/boost supply, note the two inductors. This will keep the output voltage over the entire rated input voltage.
XL6009 DC-DC Step Up Step Down Boost Buck Power Supply
Note the one you specified says: Output Voltage Adjustable Step-up Converter Board Module
Sorry about that! I quickly searched for "buck-boost converter" without reading through the information. The other information is valid. In my own records I had links to all the devices I purchased, but not one link worked today; so I didn't copy any of them. I apologize.
Terry
@TOKELLY posted:Sorry about that! I quickly searched for "buck-boost converter" without reading through the information. The other information is valid. In my own records I had links to all the devices I purchased, but not one link worked today; so I didn't copy any of them. I apologize.
Terry
Thank you Terry & John,
I will look closer at the pricing tomorrow, but it looks like about $7.00 per car… I guess that’s not too bad… though it might be hard to slip by the accountant. Terry, I had no trouble with the LED link to Amazon, 32.8 ft for $17.00 – looks like a good price.
I do have two questions: in the diagram there is something I interpret as a resistor (maybe the red rectangle is the choke?). What should the value be? And is the choke necessary, I don’t recall seeing them in other circuits, plus the Mouser is $3.11 if you buy 10. That’s about half the cost per car.
If the capacitor really doesn’t reduce the flickering, why add it?
As you can tell, I have no idea what each item contributes to the whole system.
Thank you for taking the time to look up the values,
Tom Stoltz
in Maine
Tom,
The cap will reduce the flickering, and if I remember correctly you run conventional rather than command. You might consider using the 5v LED strips, you would need a higher value resistor to protect the strips or use one of the tiny DC regulators, which is my preference, found on the auction sight. Those regulators are what I have used, one per car, at under a buck each,
Ray
@Rayin"S" posted:Tom,
The cap will reduce the flickering, and if I remember correctly you run conventional rather than command. You might consider using the 5v LED strips, you would need a higher value resistor to protect the strips or use one of the tiny DC regulators, which is my preference, found on the auction sight. Those regulators are what I have used, one per car, at under a buck each,
Ray
That’s what I assumed the capacitor would do. On a H0 YouTube, the DCC Guy demonstrates that the cap actually eliminates the flickering. That’s why I was surprised a Terry’s statement about flickering.
I do run filtered, regulated, DC from a 13.8 VDC power supply. GRJ had a link to 5Vstrips in one of his post, however the link went to 12V strips. The ones I’ve been able to find are cool white rather than warm white, I would be concerned the cool white would be too bright. But I am in uncharted territory here so I really have no idea.
And while in uncharted territory, changing the design to use DC regulators with a bigger resistor is beyond my pay scale… I would have no idea. Are you using the 5V LED strips with youir DC regulators?
Still lost,
Tom Stoltz
in Maine
5 meter 5V Warm White LED strip, $6 shipped.
DC 5V USB LED Strips 2835 White Warm White Tira LED Strip

@gunrunnerjohn posted:5 meter 5V Warm White LED strip, $6 shipped.
DC 5V USB LED Strips 2835 White Warm White Tira LED Strip
Interesting, thanks John. Looks like this strip can be cut in one LED increments. Six bucks for 5 ft.
Tom Stoltz
in Maine
@Tom Stoltz posted:And while in uncharted territory, changing the design to use DC regulators with a bigger resistor is beyond my pay scale… I would have no idea. Are you using the 5V LED strips with youir DC regulators?
My regulator boards are a constant current design, so they regulate current and not voltage. This works out to be more controllable as far as intensity for LED use as LED current vs light is a linear function. However, LED voltage vs light is most certainly not a linear function, it's a very sharp knee from dim to cooked.
In an earlier post I explained each of the elements in the circuit, but I will repeat most of the explanations here. The direct answers to your questions are in bold. I used the circuit boards provided by American Models because they did contain usable parts and spanned the two trucks from which to draw current. I started by disassembling the car, removing the circuit board, and de-soldering and removing the incandescent light bulbs.
I drilled a small hole through the printed circuit line to break the connection as described on the left of the picture below. I did this so that I could insert a 22mH choke to bridge the connection. The choke was a recommendation for anyone who wanted to use the MTH DCS system and prevent interference with its signal to DCS-controlled locomotives. The choke is the black rectangle with the red outline. The break is represented by the disconnected yellow line below the choke image. If the car will never be used on a DCS system, the choke is not necessary.
The next element is the bridge rectifier, the gray circle in the diagram. The rectifier's job is to take in either DC current or alternating current and send out only the DC current required by the LEDs and the buck-boost module. The two yellow lines represent the current from the two trucks and connect to the proper legs of the rectifier. The rectifier cannot span the PCB board lines that are parallel on the board because those two lines are to be reserved for the "rectified" or "corrected" DC current out from the rectifier.
The rectified current out from the rectifier is represented by the black ( -) and the red ( + ) lines that can connect to the parallel printed circuit board lines on the PCB board. Be sure to note which line is going to be positive and which is negative because the buck boost converter has to connect to the right one. The capacitor, the blue cylinder in the diagram, also has to connect to the correct lines because it has a positive leg and a negative leg (represented by the white marking down the side of the capacitor. Capacitors have markings on them to show which leg is negative.) The idea behind the capacitor is that it acts as a "battery" to temporarily store a charge on it so that lights don't flicker when current from the wheels on the trucks sees slight interruptions due to dirty track or crossing switches. Capacitors DO reduce flicker; but unless track and wheels are clean in the first place, I found that they don't eliminate it.
The buck-boost converter has pads on each of the four corners for connections. Each is marked--two on one end for input and two on the other end for output. The red and black lines on the diagram represent the positive and negative current from the capacitor or, more easily, the correct parallel printed line on the PCB board. I just used the holes from a removed incandescent light bulb to solder a connection from the positive or negative line to the correct positive or negative input pad on the buck-boost module.
The buck-boost converters I used had voltage output settings too high for the LEDs when I removed them from their packages. To make initial adjustments, I hooked each one up to wires with alligator clips on both ends of the wire. I attached one end of each wire to the input ends of the modules and the other ends to the track. I applied 10 volts from the track and tested the voltage at the output pads of each converter module. The initial voltage was between 25 and 30 volts, so I turned the brass rheostat screw on each module counterclockwise so that the measured output was about 7-8 volts. If the track voltage was 5 volts, the module put out 7-8 volts. If the track voltage were 12 volts, the output would still be 7-8 volts; and that is how the lights stay "constant" even when the passenger train is moving fast or slowly. (It's easiest to adjust all the buck-boost converter modules in a batch rather than adjust each one to complete one car, then go to complete another car, and so forth.) I set all the readjusted modules aside. When I need one for the PCB board, I glued it to the underside of the PCB board, away from any windows so that it would not be visible. Then it was easy to solder connections to the module's pads to the old holes in the PCB board using small wires.
The LED light strips have adhesive on the the reverse side. Before I attached them to the PCB board, though, I soldered wires from the converter's output pads to the correct positive (red) and negative (black) inputs on the LED strips. The strips are marked as to + or - connections, and they have small solder spots on them to make the connection easier. (Getting a good connection at this point , however, was the most difficult part of the assembly and required testing multiple times to make sure the LEDs lit up.) Once I was convinced the connections were good and the LEDs lit up, I stripped off the waxy paper over the adhesive and glued the strips to the bottom of the PCB boards. Most, if not all, LED strips already have resistors attached to them to control current. The buck-boost converter alters the voltage to alter the light output from the LED strips. I used 12-volt strips because I already had some, and this type was the easiest to find.
I reattached the PCB boards to the under frames of each car but left the upper body off for further testing. Once I had finished all the cars--a long process because I included heavyweights, streamliners, Amtrak cars, and cabooses--I lined up all the cars of the same type on the same stretch of track and applied current to the track. The lighting varied a bit from car to car, but adjusting the brass rheostat on each converter allowed me to make the lighting entirely uniform for each car. As gunrunnerjohn points out, adjusting current is more controllable than adjusting voltage; but if the voltage from the buck-boost converter stays well below 12 volts for 12-volt LED strips, there is little danger from burning them out. Each car now had the same amount of illumination no matter if the track voltage was varied from 4.5 volts (for American Models DC locomotives pulling cars) up to 15 volts (for American Flyer Legacy AC locomotives). I moved each car along the track to check whether the connections were sound. After each car passed, I reattached the bodies to the frames.
The benefits outweigh the work involved: uniform lighting from car to car, uniform lighting at any speed above that requiring more than about 4 volts, low current draw, and minimum heat generated in each car. There are other ways to illuminate cars, but this worked for me.
Terry


Interesting, thanks John. Looks like this strip can be cut in one LED increments. Six bucks for 5 ft.
Tom, That is $6.00 for 5 meters, somewhere over 15 ft, excellent price, and to be able to use individual LEDs is a bonus.
Ray
Perhaps a picture will also help. There are three versions of the AM passenger car lighting boards. The earliest, at the bottom of the picture just has the three incandescent bulbs. This came out of one of the long out of production lightweight 80’ scale cars when I replaced them with LED’s.
The one in the middle is likely the one Terry used and is out of a current production 70’ heavyweight coach. The board at the top is the newest AM LED version that is in some of the new heavyweights and is available for replacement use. The black LED boards have enough capacitance for 1/4 to 1/2 second power interruption.
These lighting boards are not designed to fit the Budd cars with their full interiors. It may be possible to adapt them for ceiling mounting, I have not tried that yet.
The second picture shows the LED board mounted in an AM 80’ sleeper. The outboard round holes are for 80’ cars and the inboard slotted holes are for the 70’ cars. They provide constant lighting with AC or DC conventional and with command control.


Tom,
I would ad one more piece of info, I put my strips on the roof of my cars and did find a few came loose with the adhesive that is on them. When I do the installations now I use a little contact cement to hold the strips to the roof. I prefer when the room is dark that the light shines down towards the ground on the layout. If you do need to change the strip or as I have add a tail light to the observation car, I was still able to remove the strip and solder to it and re-install with some more contact cement.
Ray
I use a few spots of CA adhesive or hot glue to insure the strips don't come loose. As for low voltage operation, my regulator board will operate at any reasonable track voltage if you're using 5V LED strips, typically a train transformer starts out at 5-6 VAC, that works fine for the 5V strips.
Thanks again to everyone for your explanations and patience. John, your board sounds perfect, but at $20 a car, I couldn’t afford that even if was the installed, ready-to-run, price.
So Terry, I don’t need a choke with straight DC track power – okay, but what if I upgrade to DCC? When I Google 22mH chokes I see $3.00+ ones from Mouser while the 22R226C from Digi-Key is like 84¢. With that kind of difference, I assume I am looking at two different things and doing something wrong… my head is spinning.
Still overall, I think I starting to understand what needs to be done and more importantly, what parts to order – except for the LED strips. 5V or 12V, do I care other than perhaps price?
Probably thinking too much,
Tom Stoltz
in Maine
@Tom Stoltz posted:Thanks again to everyone for your explanations and patience. John, your board sounds perfect, but at $20 a car, I couldn’t afford that even if was the installed, ready-to-run, price.
I guess you didn't notice that was the price for two boards that would do two cars. ![]()
Access to this requires an OGR Forum Supporting Membership
