I read with great interest the thread about which type of benchwork is best. IMHO, I think it depends on the particular layout that the enthusiast is building. Anyway, because of the many folks who said L-Girder is the best I have been giving it a serious look. I have the books "How to build Model Railroad Benchwork" by Linn Westcott (2nd Edition) and "Basic Model Railroad Benchwork" by Jeff Wilson (2nd Edition). Although Linn's book is very good I've found that Jeff explains things in a way that is easier for me to understand. Jeff says that if you make the 'L-Girder' using a 1x2 and a 1x4 you can have a span of up to 22'? (Linn says 21' 8") My question is:Is this correct? I'm not an engineer and it just seems like an awful long span. I assume that each leg would be placed 1/5 in of the total 22' so that would be 4.4' on each side of the leg leaving a span of 13.2'. Or does he mean one could have a total of 22' between legs? I could see this long span working for the smaller scales but will it be OK for O scale? I was thinking that if I could build l-Girder tables 16' long that would save me a lot of time building the benchwork as compared if I had to build 8' long tables.
Replies sorted oldest to newest
Hudson,
Yea, if your new to this type of benchwork it is common to say "what, 21feet, are you kidding me"
Page 35 of Linns Book pretty much spells it out. Using 1x4's,
21' 8" Maximum span w/ four legs
4' 4" overhang max
13' between the legs (13'+8' 8"=21' 8")
If you've never used L girder before, follow Linn's guidelines and you'll be a happier railroader!
You'll be surprised at the lightweight and the strength.
L-Girder, one of Model railroading's best kept secret, trying to get the word out.
Keep us posted
It's been a long time since I've read Linn's book, but I must have missed the correlation about the 4' overhang and 13' between legs. This sounds like I could have a 22' span with only 2 legs in the middle 13' apart. Is that true? My room is 12'x13' and planned for an around the room design with a lift-up. This makes it sound like I could easily get away with only 10 legs under the whole layout using L-girder. I had been planning 5 modules with 4 legs each, so maybe I need to rethink my benchwork plan.
David Neuzil, thank you very much for answering my question. I am thinking along the lines of Dave (DoubleDAZ) because now I won't have to make as many legs. If I can make a 16' table instead of an 8' table than this will almost cut my benchwork labor in half. I think I am going to give L-Girder a 2nd try. I tried it once before and let's just say I wasn't entirely successful.
Perhaps, you could help me with one more question I have. On page 28 of Linn's book he shows how to use a T-nut and a bolt to level the legs. I use these:
They are 4" long. The problem I am having is that I can't drill the hole in the leg for these leg levelers straight. So if one of them has to have most of it's thread inside the leg to level the table they usually force the T-nut out of the leg because the leveler is hitting the inside of the leg. I don't have a drill press at home but I do have access to one at work. I was thinking maybe I could try to hold the leg straight while I drill the hole? Can you think of any other way to get the hole drilled straight?
Dave (DoubleDAZ), the 4' overhang is a number you have to calculate. According to both books on benchwork that I have you divide the total length of the table or L-Girder by 5 and then you put the legs at 1/5th in on the girder. This way 1/5th will overhang past the leg. For example on your 13' length you would place the legs 2.6' from the end. With a 12'x13' room I would think you will only need 8 legs. Two on each side of the room unless you want to add two more where you will have the lift-up. You probably knew this already but I just wanted to make sure.
Attachments
They are 4" long. The problem I am having is that I can't drill the hole in the leg for these leg levelers straight. So if one of them has to have most of it's thread inside the leg to level the table they usually force the T-nut out of the leg because the leveler is hitting the inside of the leg. I don't have a drill press at home but I do have access to one at work. I was thinking maybe I could try to hold the leg straight while I drill the hole? Can you think of any other way to get the hole drilled straight?
One thing you might try is to lay your drill on a table/workbench/jig and clamp it in place. Also clamp some 2x4's in place to make a "channel" and shim the leg so the drill bit is lined up. Then push the leg into the drill bit to the desired depth. Alternately, you could make the jig so the leg is clamped in place and the drill is clamped to a moving platform. One type of clamp I've see used in this fashion in my woodworking magazines is the large automotive hose clamps. This is similar to the way my Shop Smith works for long items.
EDIT: I forgot to mention that some people use long eye-hooks rather than the ones in your photos. They are easier to adjust because you just use a screwdriver to turn the "eye".
Dave (DoubleDAZ), the 4' overhang is a number you have to calculate. According to both books on benchwork that I have you divide the total length of the table or L-Girder by 5 and then you put the legs at 1/5th in on the girder. This way 1/5th will overhang past the leg. For example on your 13' length you would place the legs 2.6' from the end. With a 12'x13' room I would think you will only need 8 legs. Two on each side of the room unless you want to add two more where you will have the lift-up. You probably knew this already but I just wanted to make sure.
Now that you mention it, I do remember reading that part many years ago. I just said 10 off the top of my head without working it out on my benchwork design. My lift-up is going to be pretty short, but I'll think about added support in that area just the same. I wasn't going to use L-girder, but the more we discuss it here, the more I'm convinced it's the way to go if I do go with my original modular approach. Even then I'll be using L-girder, just not every aspect of it because I'd want each module to stand on it's own. First though I need to nail down the design and then take a hard look at the benchwork. FWIW, just putting platforms on top of cabinets would probably work. ![]()
One thing you might try is to lay your drill on a table/workbench/jig and clamp it in place. Also clamp some 2x4's in place to make a "channel" and shim the leg so the drill bit is lined up. Then push the leg into the drill bit to the desired depth. Alternately, you could make the jig so the leg is clamped in place and the drill is clamped to a moving platform. One type of clamp I've see used in this fashion in my woodworking magazines is the large automotive hose clamps. This is similar to the way my Shop Smith works for long items.
EDIT: I forgot to mention that some people use long eye-hooks rather than the ones in your photos. They are easier to adjust because you just use a screwdriver to turn the "eye".
Thanks a lot Dave. That is a good idea. I'm goingto see if I can come up with some type of jig that will either hold the drill or hold the wood. If I can make something that will hold the wood I'll use the drill press at work but if I can come up with something to hold the drill then I won't have to bring all the legs to work.
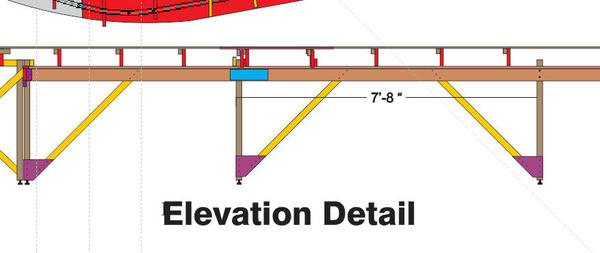
I generally keep the open span around 8'. With this I get no springyness and can crawl all over the layout using 1/2" ply OSB sheathing for the surface. I've been using L-girder for the last 15 years and find it very easy for one person to erect. I use quick clamps to hold legs to one end while I raise the girders to attach legs on the other end. I then clamp that end with C-Clamps, go back to the first end and re-level before drilling through the girder and leg to add 5/16" lag bolts, washers and hex nuts. After the first bolt is in, I plumb the leg and drill and install the second bolt. I go back to the C-clamped end and do the same thing. That creates one girder/leg set. I splice one girder to another using Simpson Strong-tie splice plates.
The real strength of this construction lies in the depth of the diagonal bracing. I use Masonite gusset plates at the leg bottoms. The hardest thing about this process is making the risers and cleats. I had to produce over 100 of them for my 39 X 15' RR. This represents a true mass production project.
For more details about this construction you can look at the build thread I wrote in this forum.
Attachments
Trainman, thank you very much. What you wrote here is extremely helpful. So if I understand you correctly you keep the spans shorter so you can climb on the benchwork? If I don't have need to climb on my benchwork I assume keeping the spans in with what Linn described would be OK.
What are Simpson Strong-tie splice plates?
I have read some of the thread you mentioned but I guess I missed the part on L-Girder. I will go back re-read it from the beginning. Thanks again for the help.
Phil. Lee Valley Woodworking has these legs. They're meant for cabinets, but could be mounted to the layout's legs. Type "C" looks like the one that will work for you. Here's the link:
I suppose... I just didn't want any spongyness in the structure. Besides, legs are not difficult to make. The other nice thing about L-girder is you don't have any screws going into end grain, and nothing has to be cut to a specific length to fit between two other boards like you do with egg-crate construction.
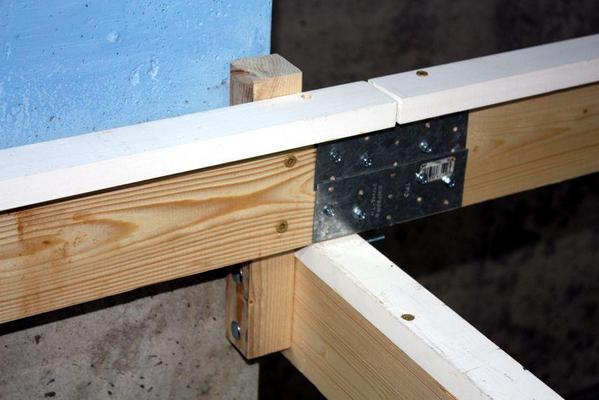
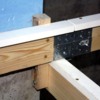
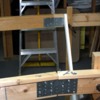
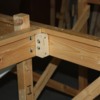
Here's a picture of the splice plates.
The picture shows two being used. Finding the right screws is difficult since the Simpson screws are too long, being designed for use with 2 X construction lumber. I generally cut off any screw points sticking out of the other side with a Dremel and cutoff wheel. The last thing you need is to grab the girder and end up putting one through the palm of your hand (experience...)
In this instance I bent the plate to build an angular girder. When plates are on both sides it's very strong.
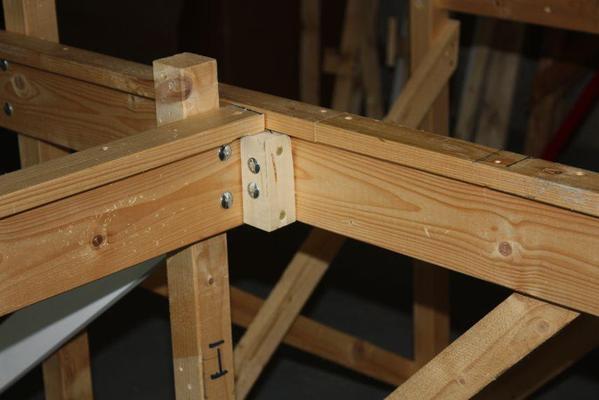
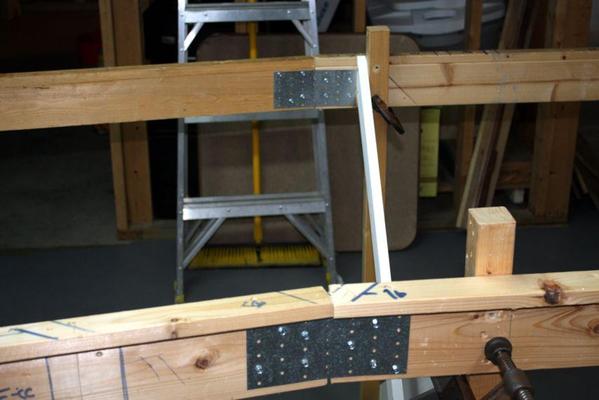 Lastly, here's how I join girders at right angles. I use 2 X 2 blocks with carriage bolts and heavy deck screws. Again, very strong once the decking is installed on the cleats.
You can build almost any configuration you want with this technology. You just have to think about it. If you have any more questions, keep them coming.
Attachments
The other nice thing about L-girder is you don't have any screws going into end grain, and nothing has to be cut to a specific length to fit between two other boards like you do with egg-crate construction.
I believe there is at least one member here who used plywood sheets cut into strips instead of 1x boards to save on cost. I meant to ask how he dealt with screwing into the end grain of the plywood, but forgot. I thought about doing that too, but I've since reconsidered. I don't think the savings will be enough on my 12x13 horseshoe to offset the long-term sturdiness.
One reason I love L girder is that it has saved my bacon when I need to add wiring or feature and a upright was in way, so I just move it over or add another for added support. I do not screw the uprights to L girders as the platform weight pressing down keeps them standing upright.
All the new lumber I bought was either OSB (cheap) or finger-jointed primed finished stock. The finger-jointed stock was very nice to work with, quite strong, and very tight grained. I don't have a table saw and the thought of slicing ply wood into 1X4s, 3s and 2s using a Skil saw just didn't sit well. You'd have to put up a fence for each cut. Even with the laser thingy, cutting on an 8 foot pencil line would give me not-so-good results. As it is, my railroad's big and even with all the structural lumber from the first 2 versions, it still cost a bundle to enlarge it 50%.
And I agree. L-girder lends itself to changing designs. I do put one screw on each end of the joists just to stabilize them.
BTW: don't use furring strips for joists, they're usually very warped and the edges are not square. Use milled lumber.
I remember reading in Model Railroader that someone used wood I beams to build their RR. It required very few legs and was very strong.
Regards,
Ed
Jim,
I don't think it was you I was talking about, but I guess the glue helps hold things together. I'd be afraid the screws would loosen over time without the glue and the glue makes changing things a little more difficult, doesn't it?
Dave, nothing a saw won't accomplish. I planned to use as much space as I could and still be able to get around. The cross pieces are just screwed together. The long L-girders are the only pieces with glue.
Dave, nothing a saw won't accomplish. I planned to use as much space as I could and still be able to get around. The cross pieces are just screwed together. The long L-girders are the only pieces with glue.
I kind of figured that and I guess that would work okay for mine too. I have the table saw, so I might give it a try. Given my space though, I'm sure just about any system would work just fine. I tried 2 "egg crate" methods, cutting pieces to length to form a grid and cutting groves to mate pieces in a grid, and didn't like either. I tried them because I figured I could save money on wood, etc., but now I plan to do it the "right" way, even though I've argued that L-girder isn't the only or best way for everyone. ![]()
Dave, I tried the egg crate method once. I had trouble getting everything level. That's why I went with the L-girder. I also did all the work by myself with the help of cribbing and clamps.
Now I'll admit I went a little overboard with the cross pieces spaced every 12 inches. Same with the 3/4 plywood, but it was half the cost of a sheet of 1/2" OSB. For my elevated section I used 6" foam blocks that I had custom cut from a company that makes the stuff. They were semi local and the owner was willing to cut the blocks to order. I even had a few 48" X 24" pieces tapered 6" to 4", 4" to 2" and 2" to 0 to use as risers. I have O84 and O72 loops and going up six inches was about the steepest grade I could get by with in the cross over area. I found out the hard way that a double stack wont clear the underpass unless I raise it about one inch higher. I'll just have to do what they do on the CSX line that runs through Havre de Grace and make it a single stack car.
Jim
Now that I'm closer to doing a more permanent layout, I'm taking a hard look at the tried and true L-girder system. On my (still small) 12x13 layout, I could slap 5 table modules together and they'd would work just fine. However, I'm leaning toward L-girder because I'm already anticipating modifications down the road, or even as I build, things like a 2nd level and/or a hidden yard. I'll have a design to start with, but I'm stubborn there too and may be trying some things that won't work once I go from RR-Track to real wood. ![]()
IME, L-girder construction is as good as the quality of materials used. Definitely glue the lip. Personally I would never plan to use solid lumber for anything beyond legs and glue blocks. As far as fasteners go, I like their use in connecting module style sub assemblies.
For the basic module component construction I only use adhesives. No screws. Years ago a friend received a sponsorship from an adhesive manufacture for his 1/4" plywood skinned 160 m.p.h. hydroplane. The only condition they specified was that there were to be no metal fasteners used in assembling the wooden hull.
In all his accidents it never came apart at a wood joint.
In my benchwork construction, end grain/face grain joints do not show failure, even with accidents.
As far as cross members go I would suggest two things: consider predrilling wire management holes before construction and 16" spacing with 3/4" decking or subroadbed.
The 2 rail 0 scale club at the San Diego museum used wood I beam girders for their 100' long layout. Extreamly sturdy. I used them for a unique structure holding a first level and third level passenger yard protruding to a concrete piling in the back yard and they were easy to work with.
As far as the concern of taking apart a glued together whatever, just saw it apart, get a clean, fresh square face/edge fashion some guessets and glue it back together in what ever configuration you want it. My latest personal layout is an assembly of an assortment of many years of leftover pieces, mid stream change orders, spare sample modules, modified mistakes, whatever. AKA, firewood.
Also, Trainman 2001's comment on OSB, I test built a few layouts using it several years ago and was surpisedly pleased with the continued suitability.
However I believe the best sheeting is by Huber Engineering. AdvanTech. This is the most flat, most moisture resistant, most square and most consistant panel in the sheathing marketplace. Far surpassing any plywood or OSB product. I have been testing this on a layout built with cross members on 24" centers. No measurable deflection in three years use with no lateral stringers. Limited availability.
I will be replacing my work tables with this product. It is like a surface plate.
On the 4" adjustable legs. I would not use them. If you need to screw them out that far to acquire the needed level they become very unsteady. Just substitute a longer leg./ I only use 2 1/2" or 3" thread. Even with that I use a 1/2" clearance hole.
Attachments
For screws I would totally recommend SPAX torx head wood screws. I originally started using them on my German layout since they were made there. They're now produced here and in Germany. They have a unique self threading thread design that's very forgiving although I usually drill pilot holes anyway. Torx heads don't cam out and that's especially useful when you're screwing things over your head like the long screws that go from the cleats into the subroadbed. I use a flexible extension on the big DeWalt so I'm not holding that monster over my head. This way I hold the drill down low and just hold the flexible extension over my head.
Thanks everyone for the replies, especially Trainman2001. You've all really helped me a out a lot. TM2001,I really like how you used those splice plates. No way I could make angles with wooden splice plates. The splice plates opens up a whole new way of making angled L-girder.
Tom, you're right I should have went with shorter bolts (levelers) but I have a bunch of these 4" levelers now so I have to use them. I can't afford to be throwing things away. In the future though, I will take your advice and get shorter levelers.
Matt, thanks for the link. That's not where I got my levelers from but they are exactly the same as what I have.


