


Major change on my train running !! Instead of running all 4 loops of tubular track counter clockwise ,I am now running alternately, one loop clockwise, then counter then clockwise. Signals will have to be turned but that won't be a big deal.
I installed a new Miller Engineering power converter for my signs I've found the sign control inverter isn't working for one sign, I'm afraid to check the others.....
Paul
Still working on getting things repacked and cleaned up, I was able to get two trains out of 8 running on the layout, fellows, take my word on this, don't let your stuff lay still for a year or so, it's very disheartening when you walk into the train room and everything is filthy and nothing works..... I must admit, this thread has kept up my want to get the trains rolling again, and to get back to enjoying working on the layout!
Uncle Al
Nothing in the past couple of days. Working on automobiles again. Strange how they all develop problems at the same time. But, going to try to get back on laying down some more garden tracks around the turntable. Have to solder up some more first. Getting that guilty feeling not spending time on it.
Over the past few days I have been working on putting some switches and a 4 way into the yard. It is taking longer to do this then I thought because the track that was there originally was connected with gar graves switches and they had a different footprint then the Ross. Along with that I connected track to a switch at the beginning of the yard that will be going under the grade to the upper level. I had track in place under the grade for years to do a small short line to some industries but finally got it connected to the yard. Maybe later I'll position the 4 way and start cutting track to tie it in...........Paul
I have been processing pictures and videos taken last weekend. Had a great weekend with Matt Makens and his dad, Pat, joining us at three different layouts and at the monthly DuPage show. Got to see two friend's new Lionel BB run.
I also have another front panel on my curved stone arch bridge carved, and the second coat of paint is dry. Now down to glue it in place and take a picture for the forum.
Art
I planted some grass and trees. Then had a bunch o cars roll in then a population explosion....
Not a bit of work this past week. Totally into cleaning and testing track, trains and power for my Grandsons visit from Alabama this weekend. ![]()
We will start with CSX RR and see how far back to the Clinchfield RR we can get.
I think you call that PLAYING WITH TRAINS![]()


Attachments
Images (2)
Originally Posted by Larry Sr.:
Not a bit of work this past week. Totally into cleaning and testing track, trains and power for my Grandsons visit from Alabama this weekend. ![]()
We will start with CSX RR and see how far back to the Clinchfield RR we can get.
I think you call that PLAYING WITH TRAINS![]()
Larry: Your layout looks GREAT! Have fun with your grandchildren.
V-e-r-r-r-y slowly making progress on this grain elevator kitbash...today finished
painting it, not red, white, and blue, but red, white, and gray, for the store, elevator,
and warehouse, all attached. Have almost finished gluing glass into the many windows...most elevators have few..the store and warehouse have many. Fabricated
a new, longer chute from elevator into roof of warehouse.
Well I cut it open. Made a big dusty mess. Now I can make some scenery progress after I frame out the opening and reinforce the structure and remove the L-girders underneath.


Attachments
Images (2)
I finished a second section or panel on the front of my curved stone arch bridge project. I also have the under arches done.


I have more pictures added to the thread on this subject under Scenery & Structures topic.
Now it's "time to make the donuts" or in my case more bridge panels.
Art
Attachments
Images (6)
What did I do on my layout? I put my new Lionel #3000 Mohawk on it.
Former Member
Added the pin striping for the additional whisker tracks, storage tracks, and labels so we can remember what the heck is what!


Attachments
Images (1)

Art: that is one fine looking bridge! Very impressive. What is the radius (or diameter) of the curve you're using? I suspect that as you enter the layout area, this bridge will be a predominant "first look" to visitors; Am I right?
What is the stone facing made of? Is it commercially available or did you do all the art work on it yourself?
Paul Fischer
After watching the forum for years and reading all the negative posts on duckunders I figured they could not be that bad WRONG!!!!!!! I started laying track and every thing I needed was always on the other side. One day of crawling back and forth tha duck under is now history. A hinged lift bridge is now in place. Pays to heed good advice. Thanks. Tstark
Originally Posted by tstark:
After watching the forum for years and reading all the negative posts on duckunders I figured they could not be that bad WRONG!!!!!!! I started laying track and every thing I needed was always on the other side. One day of crawling back and forth tha duck under is now history. A hinged lift bridge is now in place. Pays to heed good advice. Thanks. Tstark
Tstark,
I agree wholeheartedly with that! I will do the same when our last daughter leaves home, and I finally get to build a layout in her room.
Originally Posted by fisch330:
Art: that is one fine looking bridge! Very impressive. What is the radius (or diameter) of the curve you're using? I suspect that as you enter the layout area, this bridge will be a predominant "first look" to visitors; Am I right?
What is the stone facing made of? Is it commercially available or did you do all the art work on it yourself?
Paul Fischer
Art,
I agree with Paul. The bridge is looking fantastic!
Originally Posted by tstark:
After watching the forum for years and reading all the negative posts on duckunders I figured they could not be that bad WRONG!!!!!!! I started laying track and every thing I needed was always on the other side. One day of crawling back and forth tha duck under is now history. A hinged lift bridge is now in place. Pays to heed good advice. Thanks. Tstark
That's what the forum is here for. I have just one duckunder, but it's more than 5' tall, so it isn't that bad. That said, I whacked my head pretty good last week.![]()
Originally Posted by fisch330:
Art: that is one fine looking bridge! Very impressive. What is the radius (or diameter) of the curve you're using? I suspect that as you enter the layout area, this bridge will be a predominant "first look" to visitors; Am I right?
What is the stone facing made of? Is it commercially available or did you do all the art work on it yourself?
Paul Fischer
Thanks, Paul. I am using 1/8" pink foam that is used to insulate under metal siding. I carve the stone patterns on it and then am gluing it to a Masonite form. There are more pictures of the construction process on the thread on the Scenery & Buildings topic.
The curves are O90 and O81 and are 4 1/2" apart. I was wanting to make a bridge at this end of the layout that would create a "wow effect" and I think it will do that.
Thanks again, Art
Back to working on the layout on a more consistent basis after a December surgery... ran a MTH NYC Empire State Express (PS-1) after 10+ years in the box with no problems.
Between going out to clean up snow, I have been 'staging' some scenes for photo shoot of the LCCA 'Switching Track' car program. Yes, Car #5 is in Butler, Pennsylvania this week!
I ran trains again, always testing the track. No train show today, snow squall right now or tomorrow. High of about 3 they say. No way. When I built my new layout I left a 4'x6' opening in the middle so I could reach everything not like the old one. I could use the space but like the convenience. Debated the lift up idea but settled for a "crawl under" instead. Layout too low to duck under. When I thought of a lift up with 5 ovals of track, which meant 10 track joints I decided to crawl. So far, so good.
Sunny and in the mid-60s here in the Ozarks, so I took full advantage of this to put another coat of Krylon on the Gi-raffe GG-1 in my back yard. Helpful hint: A retired pool stepladder is perfect for the purpose...

Mitch
Attachments
Images (1)
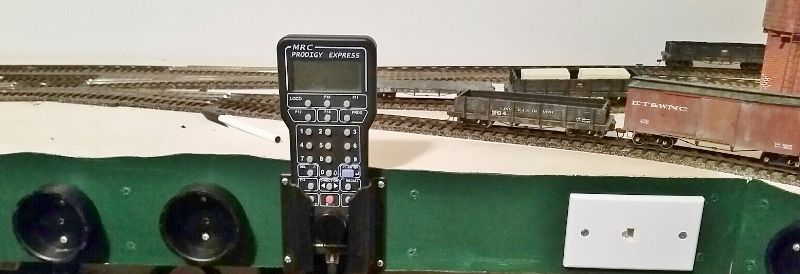
JUST finished cleaning up from painting all the fascia, and had beforehand drilled pilot holes to mount the DCC throttles. Next, the blue points go in for the turnouts, that'll likely be tomorrow as I'm taking my lovely wife out to dinner for Valentine's Day in a short while...
Originally Posted by tstark:
After watching the forum for years and reading all the negative posts on duckunders I figured they could not be that bad WRONG!!!!!!! I started laying track and every thing I needed was always on the other side. One day of crawling back and forth tha duck under is now history. A hinged lift bridge is now in place. Pays to heed good advice. Thanks. Tstark
I got to watch the duck under learning curve in development as a kid.
You might not be done.
One or two tracks isn't bad. But 5 or more wide, gets heavy. A screen door closer saves fingers. there are cabinet plunger stops for protection from the seam too. A tether/stop to lock it in the up position, or stop to keep it from falling closed when left up for a while, is next best!
If it swings to a safe angle already, it may still need a brace to keep from being accidently pressed on, over opening it, and stressing the hinges till something pops crushing the local Plasticville market, a news stand, and a small dog.![]()
Gramps could swear quite well. ![]() But no finger brace that time.
But no finger brace that time.![]()
Originally Posted by Chugman:
Originally Posted by fisch330:
What is the stone facing made of? Is it commercially available or did you do all the art work on it yourself?
Paul Fischer
Thanks, Paul. I am using 1/8" pink foam that is used to insulate under metal siding. I carve the stone patterns on it and then am gluing it to a Masonite form. There are more pictures of the construction process on the thread on the Scenery & Buildings topic..........
........... a "wow effect" and I think it will do that.
Thanks again, Art
Hand carved too! ![]() Wow!
Wow! ![]() .....Hey you were right, "Wow effect" already!
.....Hey you were right, "Wow effect" already!![]()

Primed and painted the homasote. Just need to paint the trim, and then I can start laying track.
Not much done today. I added some grass foam to spots and ballasted some areas I missed. I had been redoing the yard trying to figure a good way to incorporate the 4 way into the area. So I played around till I thought I had the right position. Ordered a 11 degree Y switch from Ross to tie it in better. So until that comes by way of Mr. Brown I will probably measure for a piece of wood to do a small engine yard off to the side of the four way. I should follow up with a few pics of the progress. Maybe after dinner............Paul
Well, the Gi-raffe Express GG-1 is complete!
Details here: https://ogrforum.ogaugerr.com/t...and-final-assembly-1

Mitch
Attachments
Images (1)
A few pics of what I have been working on now. The open space between the four way and the other switch will be closer once I get the Ross 11 degree Y switch. I got the track coming out of the tunnel tied into the yard lead. The track to the left of that is my grade going to the top mainlines. To the left of the yard where the boxes are sticking up through the framework will be the engine yard. The track to the right of the four way will be the makeup track..................Paul


Attachments
Images (4)
Got to meet an ORG Forum member 10 minutes from my house.
Had a great time visiting his layout and watching the trains run!
Holy headed banger! How many giraffes do you have? Are they with painted spots or without? I bought two Turtle Back Zoo cars and got one of each.
Originally Posted by M. Mitchell Marmel:
Well, the Gi-raffe Express GG-1 is complete!
Details here: https://ogrforum.ogaugerr.com/t...and-final-assembly-1
Mitch
Originally Posted by RichO:
Holy headed banger! How many giraffes do you have? Are they with painted spots or without? I bought two Turtle Back Zoo cars and got one of each.
Fourteen, all of which have spots except for one I rebuilt recently... ![]()
https://ogrforum.ogaugerr.com/t...-later-type-gi-raffe
Mitch
Patrick, Matt and Jon all came over last Wednesday, and I spent the afternoon running around like a chicken with its head cut off.
Patrick started off by filling the cracks that had developed in some of the backdrop seams, while Matt went to work repairing engines.
Then Patrick and I cut the tricky piece that went over the back door, leaving room for the trim which will go on last.

Then Patrick hung and Bondoed 4 more sections.

There wasn't enough time to prime and paint, so we started the Ford Plant approach realignment by notching the 1x4 and extending the plywood. We'll finish this little project next time while the primer is drying.

Jon and I untangled wires, and started stringing feeder buses in the next aisle. Toward the end of the afternoon, we ran the connecting wires back to the power supply, so when I'm ready another 40' of mainline can go live.

When the guys aren't around, I've been working on redrawing my track plan. This is the upper deck. I never had a finished plan for this. I just built it as I went along.

I know it looks like a spaghetti bowl and there isn't room for structures and scenery, but I don't have a problem with that. This is urban railroading. One yard after another in a nearly continuous chain.

That brings us back to today. I started laying track at the Ford Pant.

The near ladder is finished. Tomorrow the far ladder.

Attachments
Images (8)
Drilled all the holes in the fascia for the blue point pulls, along with the PVC cups to secure the pulls.
The pulls will all rest inside these cup, to keep them from being ripped off if someone brushed up against them. Probably more work than it's worth, but I'd rather go the extra mile ahead of time than have to risk going back and fixing stuff later.
I tried mounting the blue points but I'm going to need some help with that.
This is the last step before making my layout operational. After this, the scenery starts...
Hay P51
Took the grand kids for a ride over to Roan Mountain to play in snow yesterday. Took a picture of this for you on the way back through Elizabethton, just for grins.
Larry


Attachments
Images (2)
Thanks, Larry. Wish I could get back out that way as it's been a while since I've been in the area. My parents still own Dad's childhood hom on Stoney Creek, not far from where this photo was taken (my Uncle also lives very close by, down by the river near the Gilbert Peters bridge).
I see they still have that boxcar numbered as 434, which it can't be. 434 has been ID'd and it isn't that one: http://www.tarheelpress.com/etbox/Page4.html
That 0-6-0 was one of the very last steam locomotives in commercial operation in the US and the last to run in interchange with other steam. It ran the North American Rayon plant in Elizabethton, as late as 1991. It ran interchange with ET&WNC standard gauge locomotives 207 and 208 (today known as Southern RR 630 and 722) into 1967.
I was lucky enough to get into the cab of the Porter fireless loco in the mid 1980s once chilly afternoon.
Have the last front panel on my curved arch bridge painted and ready to be glued on. Things are finally moving along at a descent clip again.
Art
Add Reply
Sign In To Reply
