


I finally got some time to get down the basement again and got some wires run from the transformer to barrier blocks on the upper level, one for switch fixed voltage operation and the other for low voltage accessory power.
Good work!


Originally Posted by pennsyfan:
Originally Posted by trumptrain:
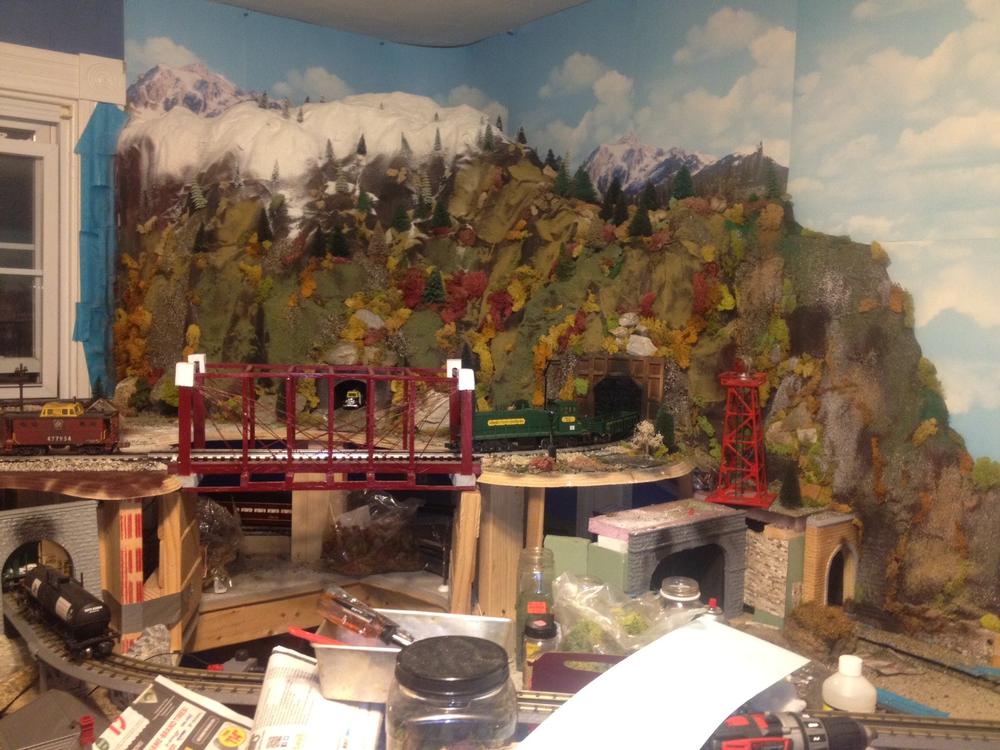
I've been quite busy working on the Mountain Division of the Free State Junction Railway since my last post.

Pat,
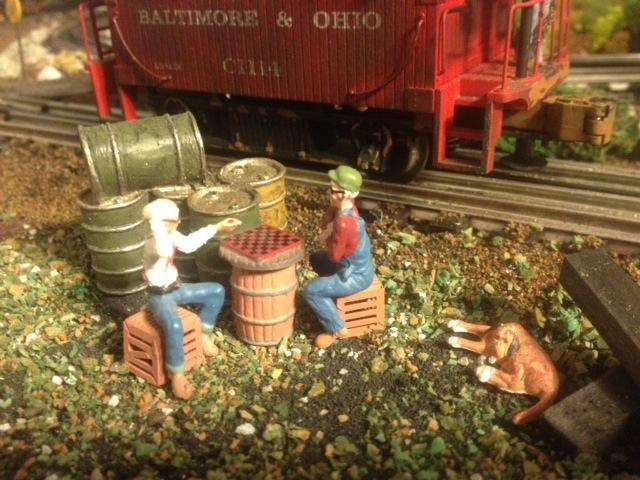
Excellent scenery work! That B&O SF-43 combination Boxcar/Caboose is awesome; I snagged one of them at York back when the Yellow Hall was still active.
Bob, Thanks so much for your kind compliment. I'm happy you liked the photo. Yes I love this combo caboose as well. As soon as I saw it I just had to have it ![]() I weathered it and now use it here on the Mountain Division. Glad to hear you have once of these combos as well!
I weathered it and now use it here on the Mountain Division. Glad to hear you have once of these combos as well! ![]()
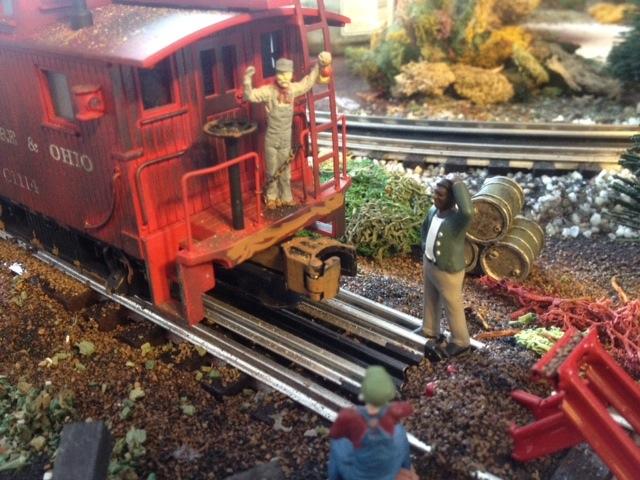
Tonight I ran my Railking Y6 on the Mountain Division. Placed a windmill behind the barn and tried out different locations for my Marx postwar water tank on the Mountain Division. Really cool to see that Y6 trundling over the Bollman Truss bridge. I'll try to get some photos up soon.
Just got in a few minutes on that mill I started some days ago...I had previously dabbled a number of colors over all the stones with a brush, and today I used a bigger brush to spread a thin wash of gray over all to weather and insure all walls are the same general tone. Not much progress...
ON THE GLACIER LINE TODAY 3-14-14.
03-14-2014 The road crews are fast! In one day, they built the road across the tracks and also paved main street in Cataract.


Attachments
Images (4)
Finished staging yard which has morphed into a 3 track stub end passenger terminal. Installed the last of the RK block signals so now there are simulated signals and I know if something is on the track in locations that are out of site. Weather is getting nicer so need to finish installing 3 caboose industries ground throws, stacking foam for a hill to hide where track penetrates a wall and installing track ballast before calling it a winter.
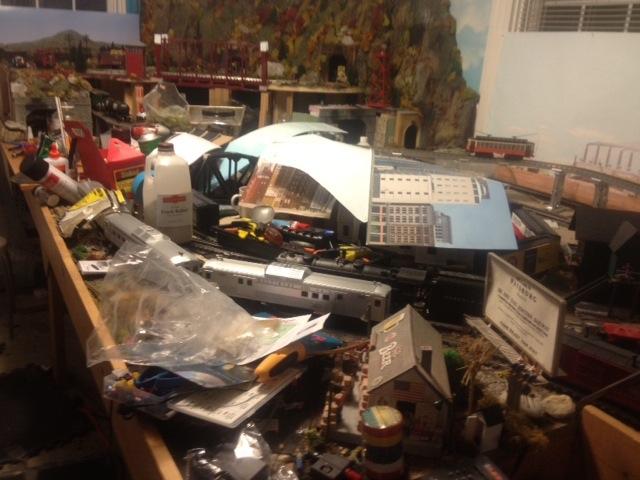
I also managed to put some small signs up around the layout as well as pick stuff up again!
GOOD GOD I thought I was going to turn into a skeleton for a minute.Originally Posted by John C.:
Worked on the interior of a church building that will be set high in the mountains. It is loosely based upon our own home church, but looks like some of the first churches built near Glacier Park on the exterior. My wife "stained" a few windows...more today with photos later...train show starts in one hour.
c.sam,
i'll second that.
jackson
THE GLACIER LINE UPDATE:
03-14-2014 The road crews are fast! In one day, they built the road across the tracks and also paved Main Street in Cataract. I cut a piece of hardboard to replace the balsa wood floor in our church. I also cut out paper and covered the park benches and painted them brown to make them look like church pews.
03-15-2014 I continued to paint the floor. Connie Coy detailed the top two church windows to look like stained glass. We both glued down the interior pieces onto the new hardwood base. The main aisle way in our church resembles our real life church, St. Stephen's Lutheran Church in Plainfield, Indiana.
You aren't there yet Pastor Robert C. Rohrman!


Attachments
Images (4)


John,
The church looks fantastic! Connie did a wonderful job on the stained glass! The last view looking in from outside is really great!
That gives me a great idea. as a thread was going on the forum earlier this winter, every layout needs a church. I of course, have always had one, but will need a new one in O gauge. My idea is like you. to build a church reminiscent of the church Kim and I were married in 30 years ago. While we moved a year later to Virginia, then West Virginia, we have been back in Butler, about 18 years, and are with our old congregation. Also, the old building was too small, and was torn down a couple of years after our wedding for a larger one. The church has old photos of the original building , and we have some, so I could do a descent job. It was a unique building, so it would look good on the layout, when I get that going.
Thank you.
I looked up Plainfield Indiana. I see it is right off I70. I traveled right past you twice driving to my company's headquarters in Mattoon, Illinois. I don't know if I will ever go there again, but if so, I will at least lean over the driver, and blow the horn. ;-)
Mark:
If you ever find yourself out this way again please contact me if you'd like to see the layout in person. We are actually "between" Plainfield and Avon, Indiana. From the I-to interchange at Plainfield, you are 15 minutes from our house.
Originally Posted by Mark Boyce:
I looked up Plainfield Indiana. I see it is right off I70. I traveled right past you twice driving to my company's headquarters in Mattoon, Illinois. I don't know if I will ever go there again, but if so, I will at least lean over the driver, and blow the horn. ;-)
John,
I don't travel much, but one never knows. I would love to meet you and see your layout, if the chance ever comes.
Thank you,
03-16-2014 on THE GLACIER LINE
Connie outlined and began to paint the area of Cataract. Today it was mostly just blue sky. I went through the hassle of vacuuming up a bunch of ballast, probably about three feet total, to install some wires that will enable the flashing cross bucks to function automatically as trains pass through the main roadway crossing in Cataract.
Thank God! I didn't glue down my ballast or this would have been a disaster. I simply vacuumed up the ballast, installed two “trip” wires, one on each track that will lead to a Dallee Electronics circuit board that will make the signals flash and also activate a bell sound. Of course, I didn't think about this before I put the ballast in the first place, because there was no way to know that Connie and I would be offered two very nice cross bucks for five dollars each!
That’s why when building model railroads I try to construct everything in such a manner so that when changes or upgrades come it is easier to make the changes. If the ballast and track would have been glued down I would have literally had to rip/tear out the track and roadbed and wiring and start from scratch! Of course if we wouldn't have stumbled onto this fabulous deal it wouldn't have been a problem either!


Attachments
Images (4)
Originally Posted by John C.: John, Your track work and roads look great!!!
What kind of ballast do you use? Looks fantastic!![]()
ON THE GLACIER LINE TODAY 3-14-14.
03-14-2014 The road crews are fast! In one day, they built the road across the tracks and also paved main street in Cataract.
Jo
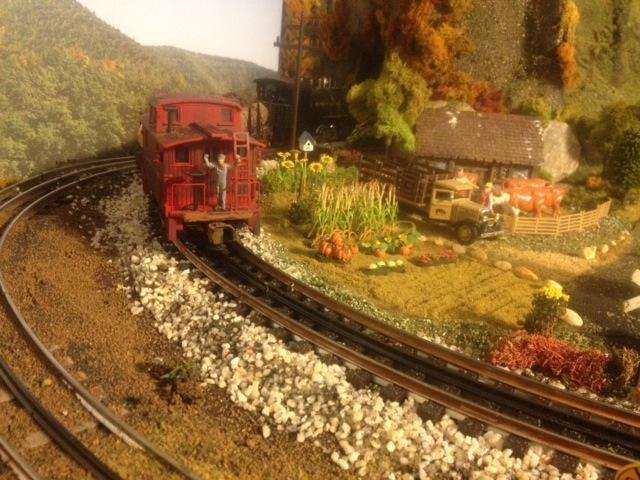
This morning I spent some time getting the train room ready for visitors. I had the kids next door and their dad over to see Mount Randolph and the Mountain Division. The were pretty darn amazed!! The last time they visited all that was there was a couple 2 by 4 braces for the mountain. They really enjoyed seeing the Y6 smoking up a storm too.
03-17-2014
I ordered the MTH crossing gates with sound from LINCOLN, NE today for $59.99; which is a good price but bad because these are nowhere on the priority list. I thought that we had gotten a great deal on the two signals we purchased not realizing I’d have to but another electronic piece to make the gates work. A piece by itself, with no sound, ranges from $20 to $30. After this discovery I thought to myself why am I going to buy just a circuit board to make the lights flash when for $30 more than that, $60.00 total, I can get: a sound system, a circuit board and two more crossing gates? This became a no brainer less laying out $70 for stuff I don’t need, but farther down the road are nice details.
Secondly, because we now will have four crossing bucks, I stretched the Cataract road out farther than originally planned to have it cross the tracks on the far end town. I think the nice long curve looks nice.


Attachments
Images (4)
I was getting really bored with grass laying so I laid out a new addition to my layout-a bump and go trolly line! I always wanted to have parallel tracks; however, due to my space constraints I never thought it would be possible until I saw trolleys being advertised and I found some old track from an RTR set!

Attachments
Images (1)

Working on a cliff along with a wooden trestle bridge.

Attachments
Images (1)
More wiring!
")
Peter
Attachments
Images (1)
")
We had a track laying party on Saturday. This is the unfinished side of my attic. There are double mainlines entering and exiting this area. At each end are #4 turnouts feeding a doubleslip switch. This breaks the track out to two mains plus a center passing siding. The 0138/0128/0120 curves at the far end are super elevated a scale 3" (1/16") and are spaced at 4.5" O.C.
This area is approximately 14x18'. Even with two halogen work lights, it's hard as the dickens to get decent lighting. From the pictures, I can see I've got a tweak or two to straighten out a couple of my runs. All told, we ran about 90' of track. It's exciting to finally get some track down.
Special thanks to Jerry and Dexter for their assistance.


Attachments
Images (6)
Looking Great Gilly!
I have neglected to post photos of the work going on at our club layout. It's fairly large with three loops and an elevated run that is separate from the lower mains.
We have created a gorge and one member is working on a trestle to span a river over and through it.
The orange arch bridge came from my old home layout.
Here is the temporary plywood support while we await the installation of the trestle itself.


Attachments
Images (2)


THE GLACIER LINE UPDATE: Second update today!
Connie Coy was a busy bee tonight! She extended the back drop painting about 12 to 13 feet. This is just the basic outline and fill. There are many more levels of detail to be added to this area. This is Cataract where the recent pictures have been of me installing a road and preparing for the flashing cross bucks with sound! It looks very different with all of the buildings removed.


Attachments
Images (5)
Originally Posted by chefnme:
I was getting really bored with grass laying so I laid out a new addition to my layout-a bump and go trolly line! I always wanted to have parallel tracks; however, due to my space constraints I never thought it would be possible until I saw trolleys being advertised and I found some old track from an RTR set!
Your trolley line will really add something to your layout and your growing town. Looks great!
I recently purchased a bump and go trolley (Pittsburgh Railways of course). I put it up on the Ceiling Central using Gar Graves track and bumpers. The problem with the Gar Graves bumpers was that every few times, the bumper on the trolley would get stuck under the rail cross brace of the bumper. It was that close of a fit. Must have been designed by Murphy.
I modified the bumpers by gluing a tie under the rail. It works fine now. When I finally get to build my layout, I will come up with a better looking scheme.

Attachments
Images (1)


I was very lazy today. There's a whole bunch of stuff going on unrelated to trains that has my attention today. I did go down and brainstorm my next plan-of-attack which is to get two of the four upper level hidden staging loops in operation. All I need is one more turnout and a few more strips of track, plus building the support structure. Hopefully this will be accomplished in the next few months--wires and all!
I went downstairs for the first time in a few days. Didn't spend long, but got a couple things done. Finished the wiring on the last of the control panels. Now all 4 are ready to install.
I also hooked up a strip of LED's to one of the circuits I built following forum member RailRide's design.
RailRide's original design.
My perf board mounted version.
Williams Superliner from the early 90's. I have 2, six car sets of these that need conversion.
Not bad.
I bought enough parts to do 50 cars.
Attachments
Images (4)

Originally Posted by Big_Boy_4005:
I went downstairs for the first time in a few days. Didn't spend long, but got a couple things done. Finished the wiring on the last of the control panels. Now all 4 are ready to install.
I also hooked up a strip of LED's to one of the circuits I built following forum member RailRide's design.
RailRide's original design.
My perf board mounted version.
Williams Superliner from the early 90's. I have 2, six car sets of these that need conversion.
Not bad.
I bought enough parts to do 50 cars.
Nice! I tried to send u few emails and never heard from you. Please check ur emails. Thanks!
Patrick, I've been checking and checking looking for your email. Got nothing. Was starting to worry about you. Tammy got no texts either.
Wednesday and Thursday are still open.
Sent u emails twice. I'll be at ur place this Thursday. My internet n mobile are down.
Sounds good Patrick, see you then.
Former Member
Test run my new AC9 in the bar. It's a Sunset 3rd Rail, and yes, it cost as much as the new VL BigBoy and don't even have a smoking whistle... ![]()
and I don't even have any guard rails up there!
FULL HD...go big screen!
The AC9 is off the chart! Awesome!
What a great engine. Definitely a winner.
well I'm the odd ball here..I have a carpet layout for now,until we move into a bigger appartment or house...but its better then nothing at all....its 11x18...I had to re wire my PRR S1 unskirted duplex made by 3rd rail..going to upgrade it to TMCC shortly...here a video of it running..running high balling...but had the sound off to show a guy how smooth it runs but can hear the belt wine in it...its like hearing a blower on a car..because of the wide cog belt.....sound neat to me..S1 with a blower..lol..I do take a section of track down by the kichen and hall way so nobody cant step on the track...video was taken with my samsung s4 cell phone..laidoffsick I love your setup..!!..thats what I'm hoping to do someday..
Finally, I am hooking up some of my Miller Engineering signs.


Attachments
Images (2)


Add Reply
Sign In To Reply
