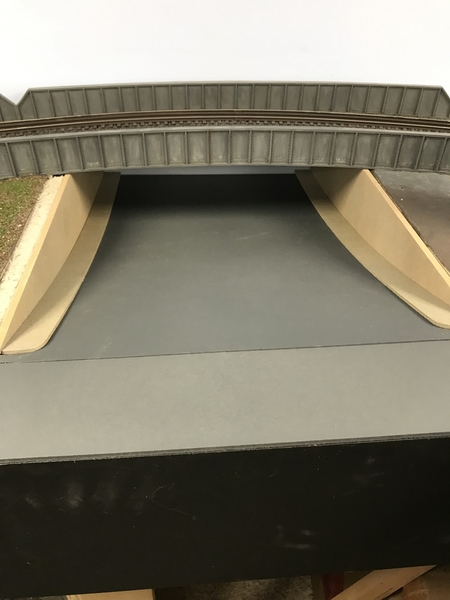
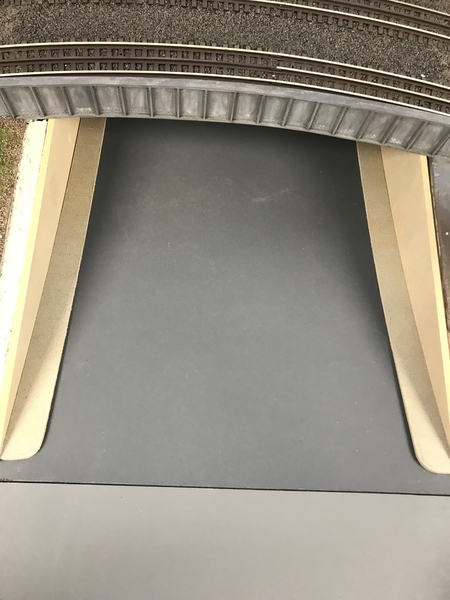
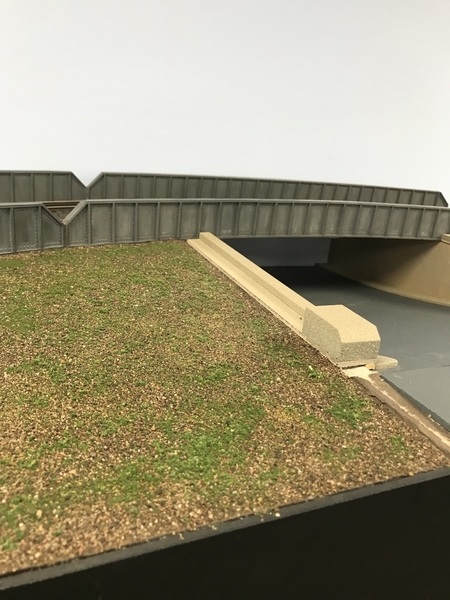
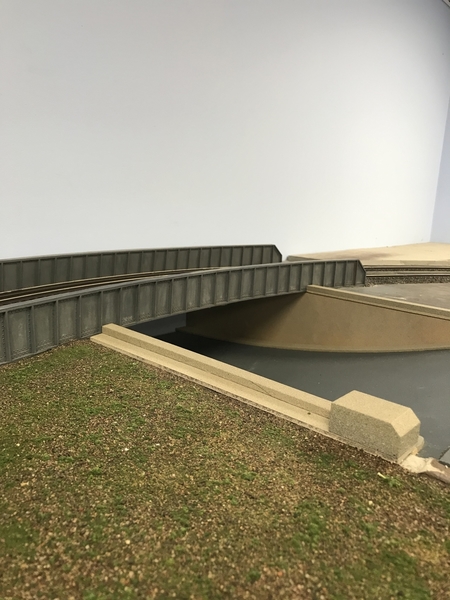
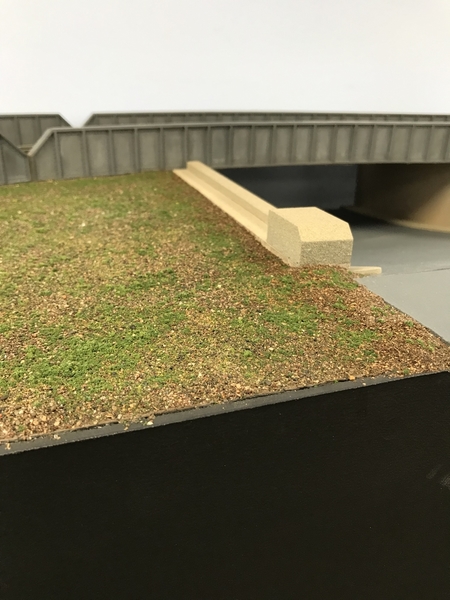
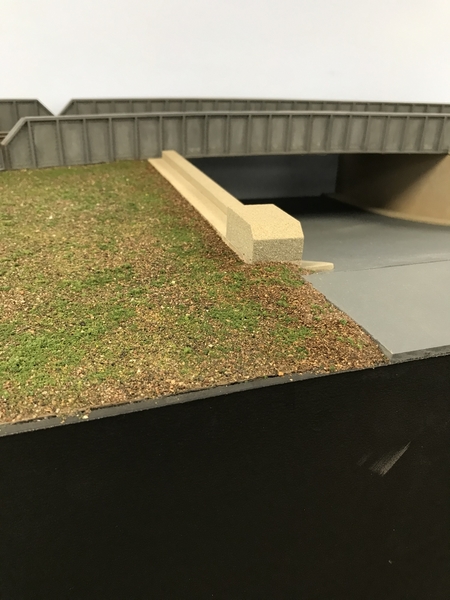
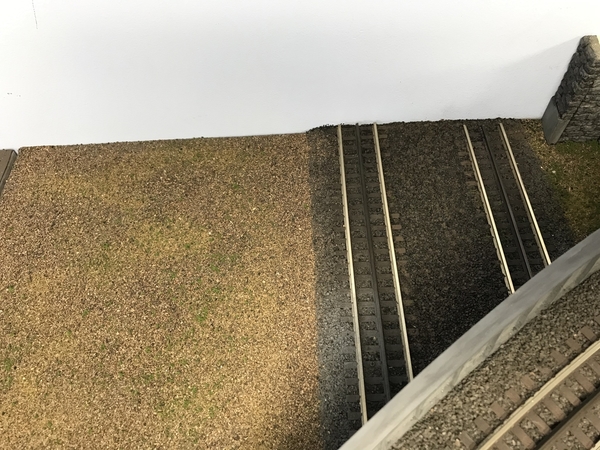
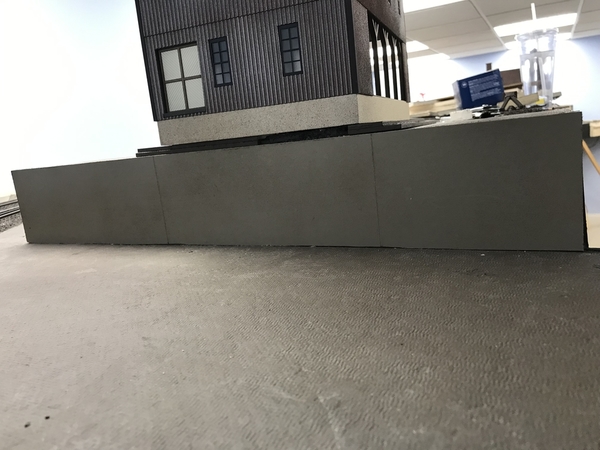
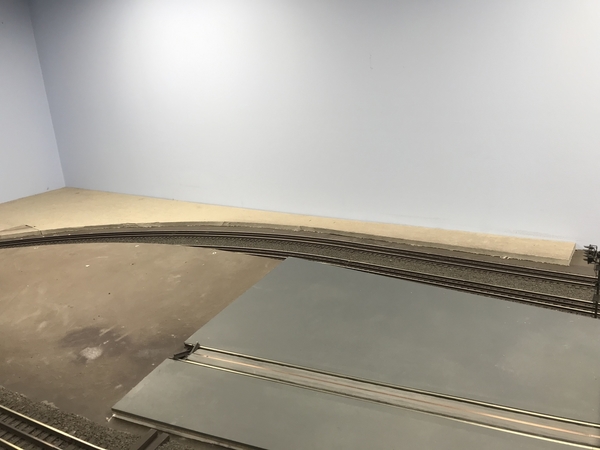
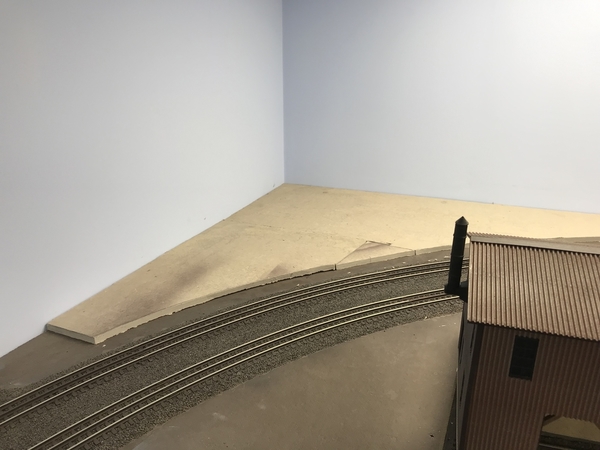
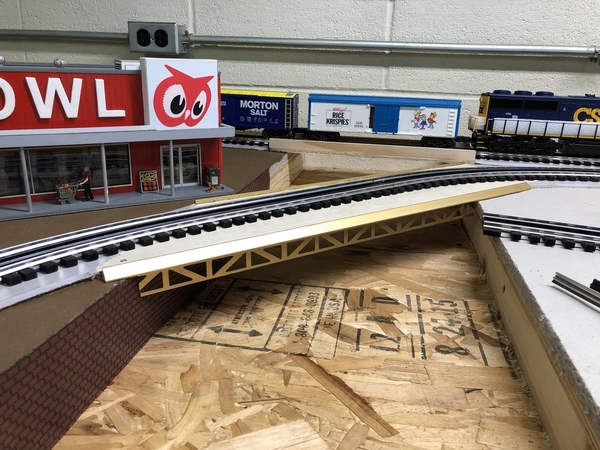
I added the sidewalks and cement cap/end pieces for the underpass, along with some ground cover. I installed more retaining wall pieces and some ground cover behind the girder bridge, and installed a cement retaining wall in front of the higher level industrial area on the layout known as “the hole”. I’ll add the street portion to connect that area with Jericho Turnpike (underpass) soon. I also put in a layer of some 1/2” Homasote in the corner and up the side of the grade. I’ll paint it earth brown and put down some ground cover and trees. I think it’ll be nice to give this area a little elevation. Thanks for looking.

Andy

2856D430-5668-40A6-988C-4A14DE49CA51C35F1399-8777-4795-B89E-1787CB1B16BC0F332A9D-A461-4126-867E-66F857AED0168EB842CE-5D0F-4F9E-9F71-2CB383940D5AEB4238DB-E248-4AF2-BED1-BF0E25BB69642744E145-FD9D-44FF-BA32-D474854BECBA2C580CA2-2D5B-4FCE-B787-CC0344F507F147A9DDE1-A723-4C17-ABCB-F212BA62B2FBD09C7CE6-724A-4E21-9CEE-42E354D010C5F41B7249-9EAB-4B04-8C7B-73EF603EC17B

Attachments

Images (10)
  • 2856D430-5668-40A6-988C-4A14DE49CA51
  • C35F1399-8777-4795-B89E-1787CB1B16BC
  • 0F332A9D-A461-4126-867E-66F857AED016
  • 8EB842CE-5D0F-4F9E-9F71-2CB383940D5A
  • EB4238DB-E248-4AF2-BED1-BF0E25BB6964
  • 2744E145-FD9D-44FF-BA32-D474854BECBA
  • 2C580CA2-2D5B-4FCE-B787-CC0344F507F1
  • 47A9DDE1-A723-4C17-ABCB-F212BA62B2FB
  • D09C7CE6-724A-4E21-9CEE-42E354D010C5
  • F41B7249-9EAB-4B04-8C7B-73EF603EC17B

YAY my track and Southern Smithsonian boxcar came in just now!   Everything in great condition!  Will see how things work out!  

Mike I hope round 2 goes better!  I don't reckon age makes a difference on that stuff.  I haven't used it.   Ive been using real rocks lol  

Lee that looks great!   I have that 57 Ford Fairlane!   My Dad gave it to me.  I had given it to him as a Christmas gift in 1988!!!  I like that 56 Ford Skyliner too!   I don't have one In those colors!  I actually spent time on Evilbay today looking for some 1/43 campers.  

John D. I don't know what Lee used but I watched a "whats neat this week" the other night and they used concrete repair stuff from "DAP" corporation.   Of course all their work is done in HO.   

Jim


Last edited by carsntrains

Andy, looks great! nice addition to the sides of the underpass!

Jim, #2 is drying as I type, the directions say it will be ready in 15 minutes to take out of the mold. We will see!

I am glad you got your track, now you have something to do! LoL I am really glad everything came in in great shape, there has been a lot of people getting stuff damaged lately!

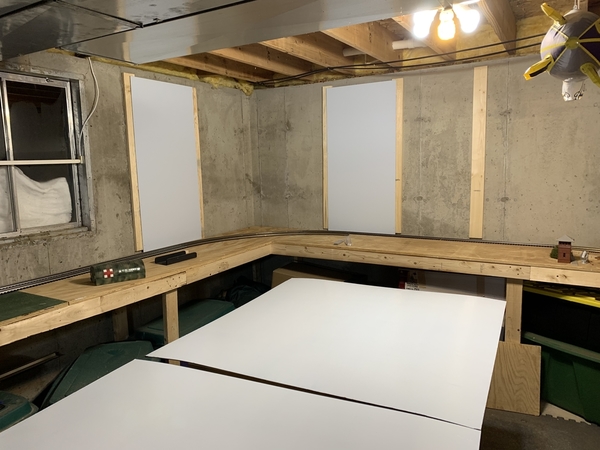
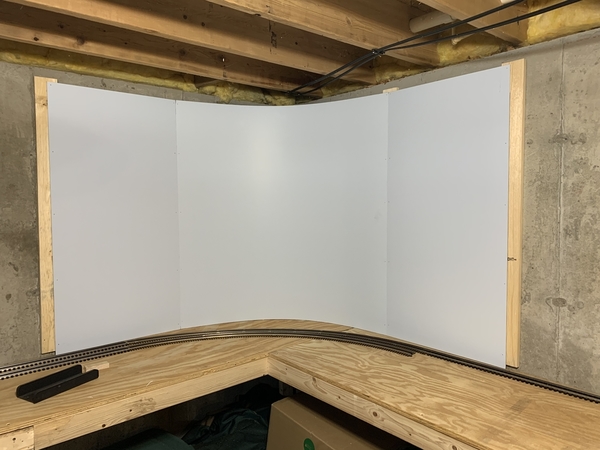
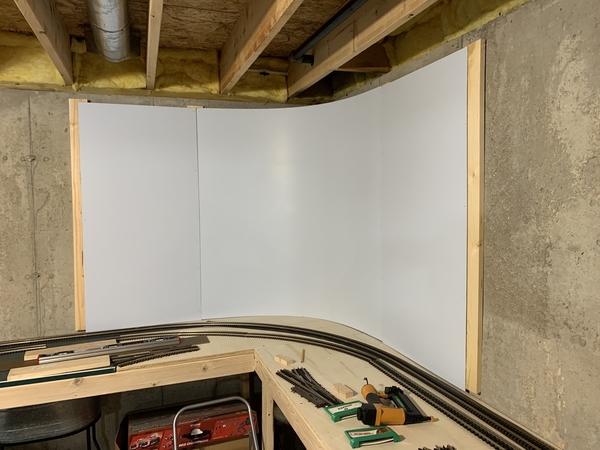
Well guys, work progresses on putting up the panels.  I was able to bend the big panels into the corners and I just love having the curved corners.  The radius is sharper than the curve of the track on purpose to limit space lost.  I am currently waiting for the glue up on more furring strips to dry as well as the paint on a few more panels.  It’s time consuming but I’m very pleased with the results so far  

369E0970-51FF-4CB0-97D7-AC036437657D4CD2EAC2-B301-4539-9308-F9D8138DADA238CC8A31-2A7D-4025-898F-FEEEECF8C1E3


Attachments

Images (3)
  • 369E0970-51FF-4CB0-97D7-AC036437657D
  • 4CD2EAC2-B301-4539-9308-F9D8138DADA2
  • 38CC8A31-2A7D-4025-898F-FEEEECF8C1E3

KMARSOO,Looks great, the round corners really change the dynamic of the room! Nice job!

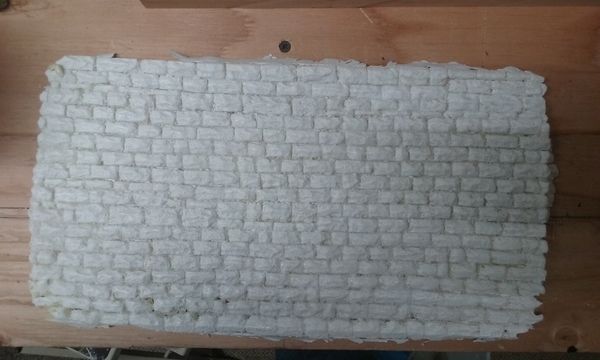
Today I tried the 2 part resin for making brick and rock walls as other know from a different post. But I thought I would let you all know, I love this stuff ! Start to finish 1/2 hour! I think the first one turned out good the second one is drying now! Here is what it looks like.20190202_105025

Attachments

Images (1)
  • 20190202_105025
Steamfan77 posted:

I added the sidewalks and cement cap/end pieces for the underpass, along with some ground cover. I installed more retaining wall pieces and some ground cover behind the girder bridge, and installed a cement retaining wall in front of the higher level industrial area on the layout known as “the hole”. I’ll add the street portion to connect that area with Jericho Turnpike (underpass) soon. I also put in a layer of some 1/2” Homasote in the corner and up the side of the grade. I’ll paint it earth brown and put down some ground cover and trees. I think it’ll be nice to give this area a little elevation. Thanks for looking.

Andy

2856D430-5668-40A6-988C-4A14DE49CA51C35F1399-8777-4795-B89E-1787CB1B16BC0F332A9D-A461-4126-867E-66F857AED0168EB842CE-5D0F-4F9E-9F71-2CB383940D5AEB4238DB-E248-4AF2-BED1-BF0E25BB69642744E145-FD9D-44FF-BA32-D474854BECBA2C580CA2-2D5B-4FCE-B787-CC0344F507F147A9DDE1-A723-4C17-ABCB-F212BA62B2FBD09C7CE6-724A-4E21-9CEE-42E354D010C5F41B7249-9EAB-4B04-8C7B-73EF603EC17B

Very nice progress!! Did you build the girder bridge or did you buy it?? Where did you buy the bridge or did you get the pieces to fabricate it???

KMARSOO, good job on the backdrop. Whenever possible if you can curve your backdrop in the corners it gives you a continuous flow and better lloking scenes. 

Today I cut some plywood for the table top. Got the other bridge out of the box and placed them on the abutements to get an idea of how i what to do them. I have seen in photos where railroads run bridges together at an angle. I am also staggering them. When I am happy with their location I'll mark the plywood and cut. Still have to set the Masonite in place. Might measure for that later. Tomorrow morning heading for a train show in Medina Ohio then I'll start back on the layout when I get home. Pics...............Paul

DSCN0069DSCN0070DSCN0071DSCN0072

Attachments

Images (4)
  • DSCN0069
  • DSCN0070
  • DSCN0071
  • DSCN0072

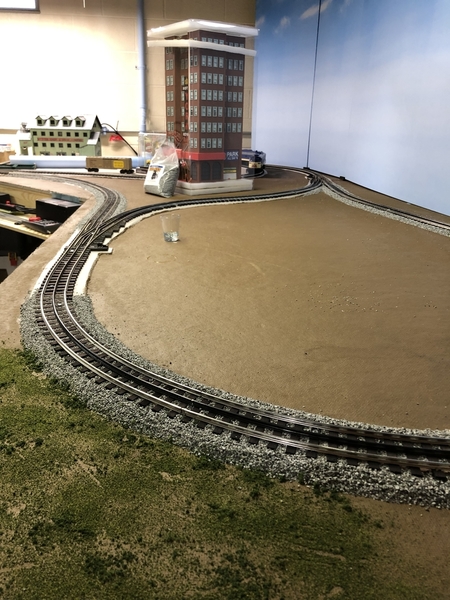
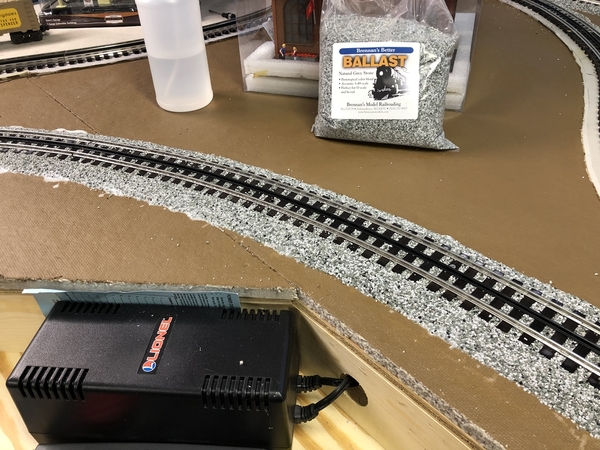
Started the ballasting of the track and played with some ground cover (my first time for both).


Also built out some of the bridge crossings. Made one out of left over Gargraves ties which I will probably paint to resemble stone or concrete blocks.

Swcond bridge I used some ceramic tile trims to make look like a steel bridge. I’ll maybe eventually paint to a more typical steel color.

Still not sure if the bridges will be crossing water, or if it will be more of an industrial/viaduct/road crossing.


C0515A31-0E75-4F62-8816-895274480D82007C24A9-2B5C-4729-84A6-B5B41F197A8C37A0EAF2-4A9C-468B-9B4D-0A5B806938D2BE37DB3D-DA94-4DED-B162-EBFA741FD099

Attachments

Images (4)
  • C0515A31-0E75-4F62-8816-895274480D82
  • 007C24A9-2B5C-4729-84A6-B5B41F197A8C
  • 37A0EAF2-4A9C-468B-9B4D-0A5B806938D2
  • BE37DB3D-DA94-4DED-B162-EBFA741FD099

Good evening everyone!!

First off, very beautiful work on the layouts everyone!

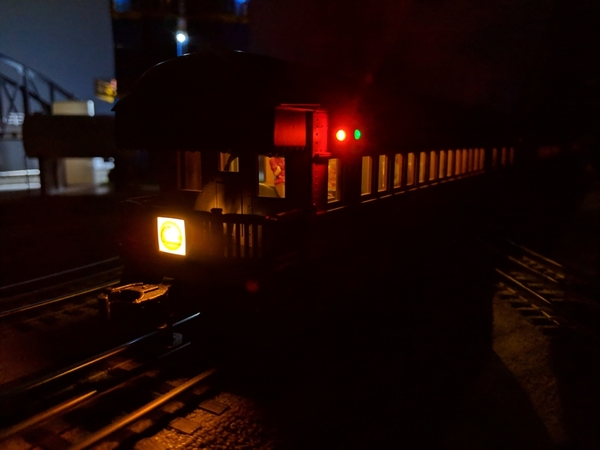
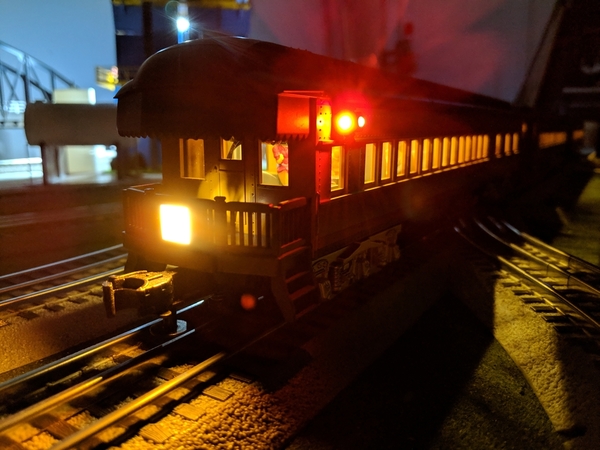
I have been converting my MTH Premier UP Challenger Pass. Cars to LED. Here is a shot of the Observation car with the Drumhead and marker lights upgraded to LEDs as well.

All of the circuits have been hand made by yours truly. (GRJ's design credit!)

IMG_20190202_163826

IMG_20190202_163810

Have one more car to go and I will post a video and some better shots for you guys.

Thanks everyone!

Attachments

Images (2)
  • IMG_20190202_163826
  • IMG_20190202_163810
Steamfan77 posted:

Hi Woodson, thank you for the kind words. I bought the girder pieces from forum sponsor Scenery Express. I glued two pieces back to back on a flat surface, then spray painted them with a flat gray primer. I gently bent them around the curve of the ballast and glued them in place, then touched them up with some weathering powders. 

Andy 

Thanks for the information!! Keep up the great work!!

Neel

John d Sewell posted:

Lee, please let me know what you used for your road surfaces.

thanks 

John d.

John 

I used some rubber material that a friend of mine gave me years ago where I use to load. It’s  used for anti slip of freight on trailer floors they used to throw this stuff away what they didn’t use by the pounds so I asked if I could have some of it. I cut my desired lengthens and I glue it down then I take ashes from my fire place and lightly sprinkle them on the top and with one of my daughters make brushes I blend it in different spots. Hope this helps 

mike g. posted:

KMARSOO,Looks great, the round corners really change the dynamic of the room! Nice job!

Today I tried the 2 part resin for making brick and rock walls as other know from a different post. But I thought I would let you all know, I love this stuff ! Start to finish 1/2 hour! I think the first one turned out good the second one is drying now! Here is what it looks like.20190202_105025

Mike that turned out good.   I take it when you join them you figure a place to cut them and butt them together?  That's something I haven't worked with!  

Keith Johnny Cash engine?  

Lots of good stuff going on here!   It was 61 outside today so we just came in to do some track work.  See if I can figure out how to get this Fastrack to line up!  

JIm  

Paul, nice bench work! I really like the staggered bridge look! Its going to fit right in!

Brian, Sweet pictures! Thanks for the smile today!

Kerrigan, with all those cars your not going to get board! LOL

BrewCrew, The bridges and ballast look great! Nice job also on the ground cover in the corner!

Daniel, wonderful job on the LED Lighting!

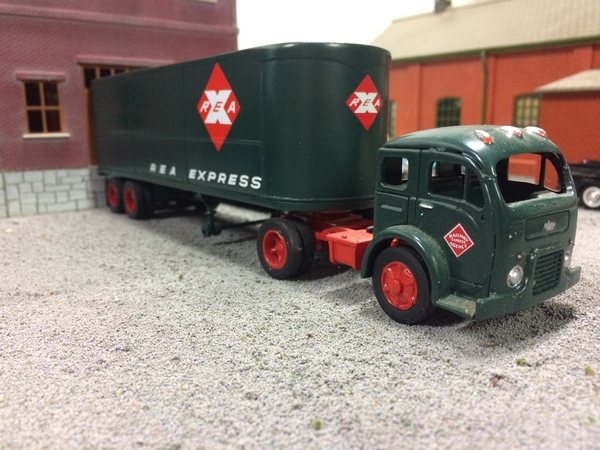
Andy, that new trailer you did looks perfect behind that cabover tractor!

I had to run to work for a few hours, but before then I got 2 wall sections done and plan on going back out to do a couple more here in a little bit! I hope everyone is having a great Saturday!

carsntrains posted:
mike g. posted:

KMARSOO,Looks great, the round corners really change the dynamic of the room! Nice job!

Today I tried the 2 part resin for making brick and rock walls as other know from a different post. But I thought I would let you all know, I love this stuff ! Start to finish 1/2 hour! I think the first one turned out good the second one is drying now! Here is what it looks like.20190202_105025

Mike that turned out good.   I take it when you join them you figure a place to cut them and butt them together?  That's something I haven't worked with!  

Keith Johnny Cash engine?  

Lots of good stuff going on here!   It was 61 outside today so we just came in to do some track work.  See if I can figure out how to get this Fastrack to line up!  

JIm  

Jim, to be honest I have no idea! This is the first time I have ever done anything like this before! I figured I would get some made then ask around! LOL

mike g. posted:

Paul, nice bench work! I really like the staggered bridge look! Its going to fit right in!

Brian, Sweet pictures! Thanks for the smile today!

Kerrigan, with all those cars your not going to get board! LOL

BrewCrew, The bridges and ballast look great! Nice job also on the ground cover in the corner!

Daniel, wonderful job on the LED Lighting!

Andy, that new trailer you did looks perfect behind that cabover tractor!

I had to run to work for a few hours, but before then I got 2 wall sections done and plan on going back out to do a couple more here in a little bit! I hope everyone is having a great Saturday!

Mike 

you got me mistaken for Andy. I have the REA Express truck and trailer. Thanks for the complement 

Last edited by lee drennen

I made a quick trip to Menards this morning, to pick up a couple heavy duty light switches and a couple 20 Amp circuit breakers. Got it all with an old rebate check. I had torn apart the box with the layout power switches on Thursday. The box is back together now, and the problem with the breaker tripping is better, but not solved entirely. I'll change the breaker tomorrow. I think the problem was the old 49 cent switches were only rated for 15 Amps, and it was arcing causing the breaker to trip every third or fourth time I turned the layout on. The constant tripping has probably weakened the breaker. Once the new switch was installed I could cycle the power 7 or 8 times before it tripped.

The new switches are in, and the old ones are on the floor, next to the screw gun. 

IMG_8707 

I made this new Empire Builder Thursday by combining two sets of Williams Superliners. Originally, a Williams Genesis powered and dummy pulled the six car sets. I took out the dummies and three cars, and kept an Atlas baggage and a couple express box cars. The train was running great, but all of a sudden, the second unit cut out, leaving it stranded for the time being in the big hidden yard. I did manage to shoot this video before it quit.

Attachments

Images (1)
  • IMG_8707
Big_Boy_4005 posted:

I made this new Empire Builder Thursday by combining two sets of Williams Superliners. Originally, a Williams Genesis powered and dummy pulled the six car sets. I took out the dummies and three cars, and kept an Atlas baggage and a couple express box cars. The train was running great, but all of a sudden, the second unit cut out, leaving it stranded for the time being in the big hidden yard. I did manage to shoot this video before it quit.

Very nice! That's how I see them down here.

Lots of great projects in the last 24 hours!  I have been delinquent and this is the first I looked at OGR since last evening.   

Elliot, The 1976 Empire Builder looks great running on your layout!!! 

I have had to start replacing 15 Amp breakers in out 51-year old house.  The seem to weaken with age, and trip when there isn't anywhere near 15 amps.  I have never heard of this happening before; strictly my own observation.

Yesterday I tried to slide out a sheet of 1/2" plywood I leaned against the wall early last fall, with the intent of cutting it into a couple pieces and put on top of my Mianne benchwork.  Alas, I discovered I am not nearly ready to move it as I am recovering from a bulging L5-S1 disc and sciatic nerve damage.  I need to do more PT and strengthening exercises.  So, I pondered the problem, and decided I would go to Lowe's and Home Depot Monday and see about buying some cut pieces. 4x4 or maybe better yet 2x4.  

Last edited by Mark Boyce

Went to Hobby Lobby for the first time today. They have just recently opened stores on Long Island. Cool store- lots of stuff for our layouts. Didn't buy anything but made notes of what I may need in the future.

Received a BCR unit from Just Trains Friday. My new MTH H-10-44 has an older PS-1 system. I figured I'd skip the ni-cad and go right to the latest and greatest. I hope to get it installed tomorrow and check out the features of PS-1.

Everyone is doing so much great stuff on their layouts. Time for me to get off the bench and back into the game here.....

Bob

Not fan of either team but I hate Tom Brady so GO RAMS!

Last edited by RSJB18

Thanks Mark. I'm not sure if breakers die of old age. I know they get weak if they're tripped a lot. The good part is mine are cheap, under $4 each. This one only does the track power, but that's a big load with six 20 Amp power supplies on the 20 Amp circuit. That's a pretty big bounce on start up. If it still pops the breaker after I replace it, I have another trick up my sleeve. I'll put a delay circuit on three of the supplies to stagger the start up, reducing that spike. 

Big_Boy_4005 posted:

Thanks Mark. I'm not sure if breakers die of old age. I know they get weak if they're tripped a lot. The good part is mine are cheap, under $4 each. This one only does the track power, but that's a big load with six 20 Amp power supplies on the 20 Amp circuit. That's a pretty big bounce on start up. If it still pops the breaker after I replace it, I have another trick up my sleeve. I'll put a delay circuit on three of the supplies to stagger the start up, reducing that spike. 

They do wear out over time. It's called "planned obsolescence". Plus they are made for lights, not for massive, gargantuan, Guinness Book Of World Record qualifying layouts.  

Maybe later go with double pole switches & wire them to their individual breakers.


Last edited by balidas
lee drennen posted:
John d Sewell posted:

Lee, please let me know what you used for your road surfaces.

thanks 

John d.

John 

I used some rubber material that a friend of mine gave me years ago where I use to load. It’s  used for anti slip of freight on trailer floors they used to throw this stuff away what they didn’t use by the pounds so I asked if I could have some of it. I cut my desired lengthens and I glue it down then I take ashes from my fire place and lightly sprinkle them on the top and with one of my daughters make brushes I blend it in different spots. Hope this helps 

Lee the idea to spread the ash on the road bed is a fantastic idea.  Plenty ashes on hand after the last week in January.

I enjoy watching your post photos. New truck s are great. I believe your daughter plays HS basketball. I hope their season is going well this year.

Take care, John d.

balidas posted:
Big_Boy_4005 posted:

Thanks Mark. I'm not sure if breakers die of old age. I know they get weak if they're tripped a lot. The good part is mine are cheap, under $4 each. This one only does the track power, but that's a big load with six 20 Amp power supplies on the 20 Amp circuit. That's a pretty big bounce on start up. If it still pops the breaker after I replace it, I have another trick up my sleeve. I'll put a delay circuit on three of the supplies to stagger the start up, reducing that spike. 

They do wear out over time. It's called "planned obsolescence". Plus they are made for lights, not for massive, gargantuan, Guinness Book Of World Record qualifying layouts.  

Maybe later go with double pole switches & wire them to their individual breakers.


The Clark Grizwald Layout!!! 

lee drennen posted:
mike g. posted:

Paul, nice bench work! I really like the staggered bridge look! Its going to fit right in!

Brian, Sweet pictures! Thanks for the smile today!

Kerrigan, with all those cars your not going to get board! LOL

BrewCrew, The bridges and ballast look great! Nice job also on the ground cover in the corner!

Daniel, wonderful job on the LED Lighting!

Andy, that new trailer you did looks perfect behind that cabover tractor!

I had to run to work for a few hours, but before then I got 2 wall sections done and plan on going back out to do a couple more here in a little bit! I hope everyone is having a great Saturday!

Mike 

you got me mistaken for Andy. I have the REA Express truck and trailer. Thanks for the complement 

Lee, you are so right, that's what happens when you leave and so much gets done while your gone! LO I am so sorry, I will try to do better next time!

balidas posted:
Big_Boy_4005 posted:

Thanks Mark. I'm not sure if breakers die of old age. I know they get weak if they're tripped a lot. The good part is mine are cheap, under $4 each. This one o¢nly does the track power, but that's a big load with six 20 Amp power supplies on the 20 Amp circuit. That's a pretty big bounce on start up. If it still pops the breaker after I replace it, I have another trick up my sleeve. I'll put a delay circuit on three of the supplies to stagger the start up, reducing that spike. 

They do wear out over time. It's called "planned obsolescence". Plus they are made for lights, not for massive, gargantuan, Guinness Book Of World Record qualifying layouts.  


Those 49¢ light switches really do wear out. I had to replace the one in the family room and the one in the bathroom, the ones that get the heaviest cycles. I know the layout hasn't had as many cycles as those, but the old one was only rated for 15 Amps. It might have been arcing. The new ones are 20 Amp commercial. They should last a while, at almost 10x the price. 

So I was able to go out and get 2 more brick walls casted! Not bad 2 in about an hour and 15 minutes. I am still waiting on the hydrocal one to finish setting up so I can pull it from the mold so I can see how this is going to work on rock molds! I would show a picture, but once you seen on brick wall you have seen them all! LOL

mike g. posted:

Elliot, I agree very nice! but the big question is, HOW do you get it out of the hidden yard?

Thanks Mike. Somebody has to go in after it. Three guesses and the first two don't count on who that might be. I think it's just dirty rollers on the second unit. It had been running just fine, then went all intermittent and quit. This is why I don't like running long trains with multiple powered units. These Empire Builders are the exception, because they are the stars of the railroad.

Mark Boyce posted:

Lots of great projects in the last 24 hours!  I have been delinquent and this is the first I looked at OGR since last evening.   

Elliot, The 1976 Empire Builder looks great running on your layout!!! 

I have had to start replacing 15 Amp breakers in out 51-year old house.  The seem to weaken with age, and trip when there isn't anywhere near 15 amps.  I have never heard of this happening before; strictly my own observation.

Yesterday I tried to slide out a sheet of 1/2" plywood I leaned against the wall early last fall, with the intent of cutting it into a couple pieces and put on top of my Mianne benchwork.  Alas, I discovered I am not nearly ready to move it as I am recovering from a bulging L5-S1 disc and sciatic nerve damage.  I need to do more PT and strengthening exercises.  So, I pondered the problem, and decided I would go to Lowe's and Home Depot Monday and see about buying some cut pieces. 4x4 or maybe better yet 2x4.  

Wow, so glad you mentioned about the weakened breakers. I'm not an electrician, have had to replace breakers in my 48 years old box. You have explained the reason Mark. I won't hesitate to put in New breakers from now forward.

If I were closer we would find a way to cut your board.  I'm nursing hand and arm from October surgery. Exterior has healed but not the muscles that were severed.  Dr. Informed will take until May. I cannot lift boards in place after I have them cut for my !ayout.  I call my neighbor and friends....

John

Big_Boy_4005 posted:
mike g. posted:

Elliot, I agree very nice! but the big question is, HOW do you get it out of the hidden yard?

Thanks Mike. Somebody has to go in after it. Three guesses and the first two don't count on who that might be. I think it's just dirty rollers on the second unit. It had been running just fine, then went all intermittent and quit. This is why I don't like running long trains with multiple powered units. These Empire Builders are the exception, because they are the stars of the railroad.

Well do me a favor and take it easy getting back there and don't get lost! LOL

Add Reply

Post

OGR Publishing, Inc., 1310 Eastside Centre Ct, Suite 6, Mountain Home, AR 72653
800-980-OGRR (6477)
www.ogaugerr.com

×
×
×
×
Link copied to your clipboard.
×
×